

Home is where the Hooch is

Hi, friends! Danny here! I am the hobby and terrain specialist here at Privateer Press, and I am here to show you some cool progress shots of a terrain piece I made. I have received a great number of questions about the trollkin brewery I made for our Northkin Company of Iron table, and I thought I would take a minute to do a quick writeup on how it was made. Enjoy!
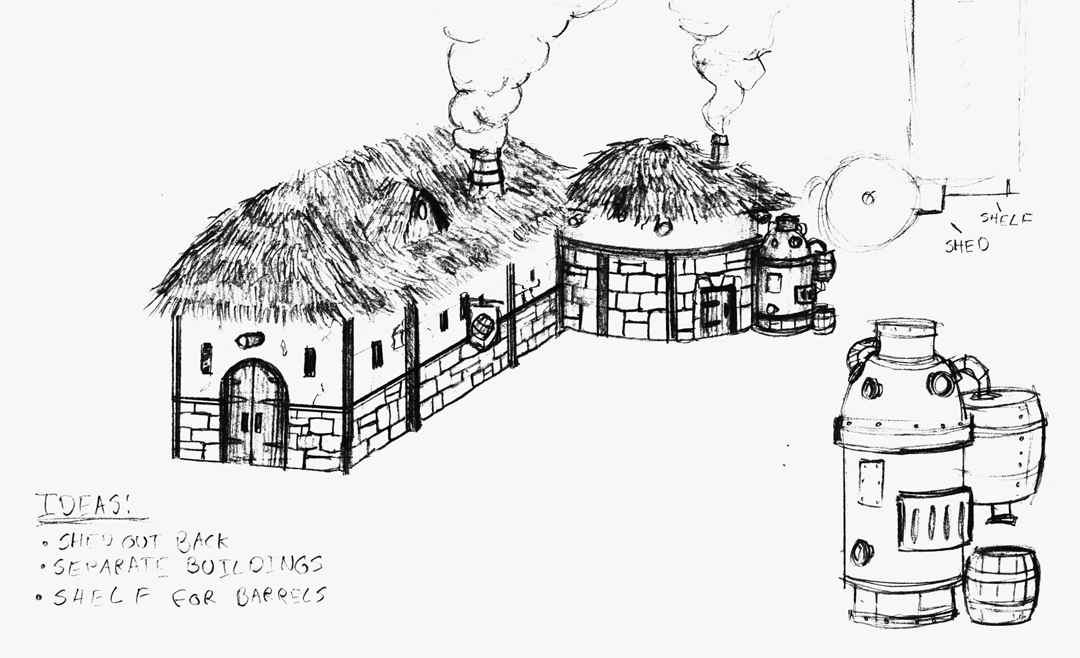
Like most of my pieces, I started with a quick rough sketch. When I made this terrain piece, new Northkin models were about to release, and I wanted something we could use for product photography as well as for our table. I decided to make the brewery function as one or two pieces depending on whether or not we put the smaller round building next to it.
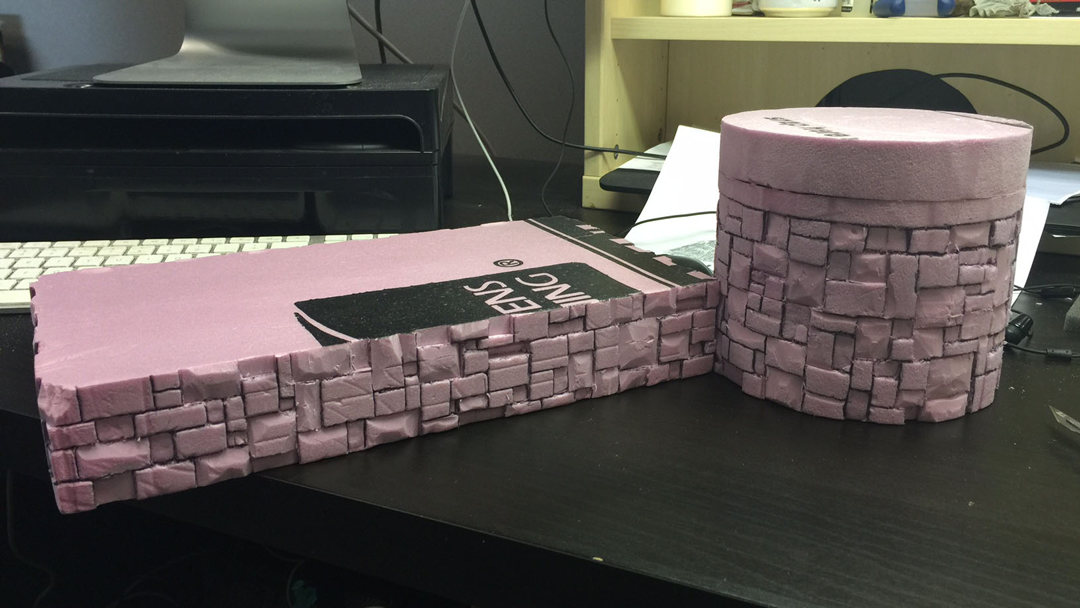
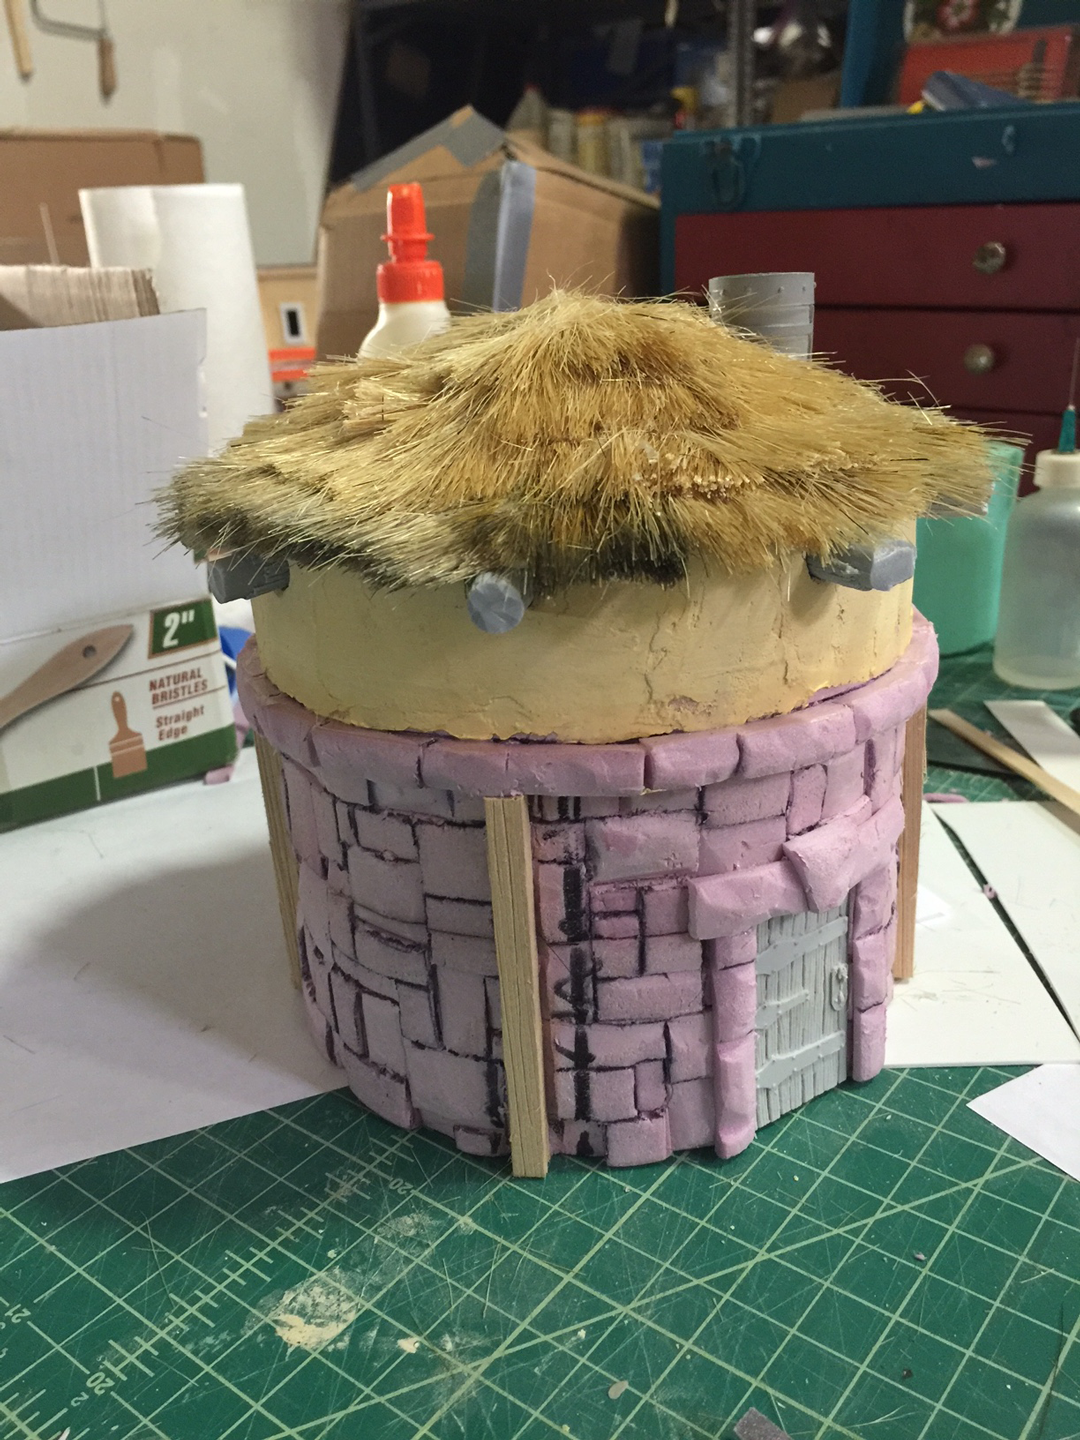
After the sketch and establishing the size of the piece (I usually do a cardboard mockup for this), I started to figure out my main shapes in insulation foam. I also began to carve my stone bricks using a ballpoint pen and a hobby knife.
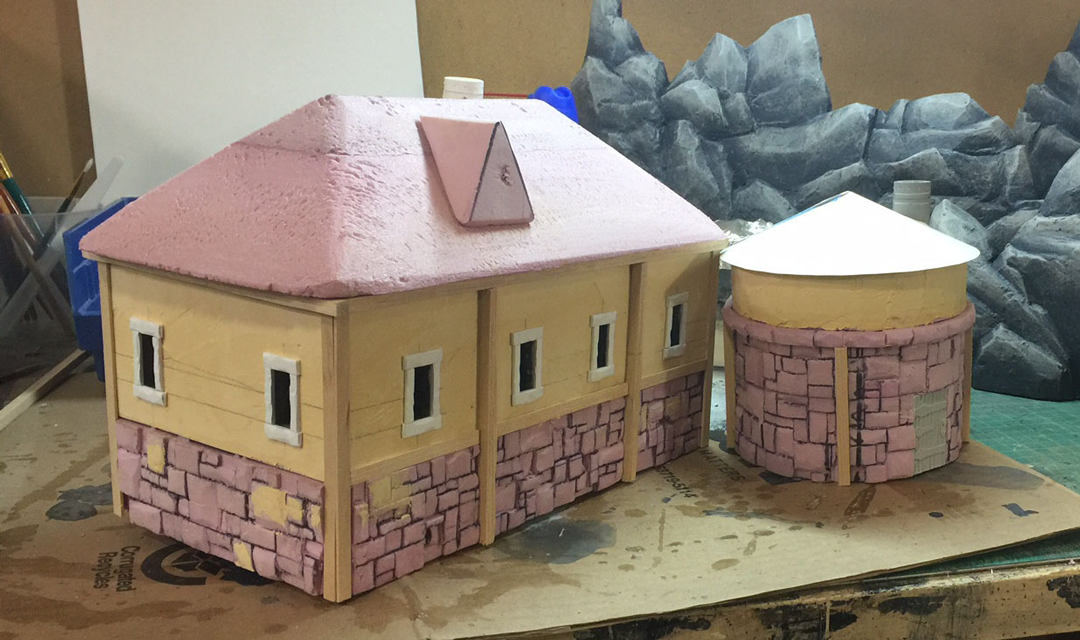
I am going to fast forward a bit here. I added a foam core box on top of the rectangular base for the longhouse and added stucco texture with wood filler. I also added window frames made out of styrene. I used a hobby knife to nick up the styrene so that it would look like stone once I painted it. I also added some wood framing details made with basswood. After carving the overall shape of the thatch roof for the longhouse from foam, I made a cone from cardstock for roof of the circular building. I made sure not to glue the roof onto the longhouse at this point. This will allow me to add the thatch much more easily.
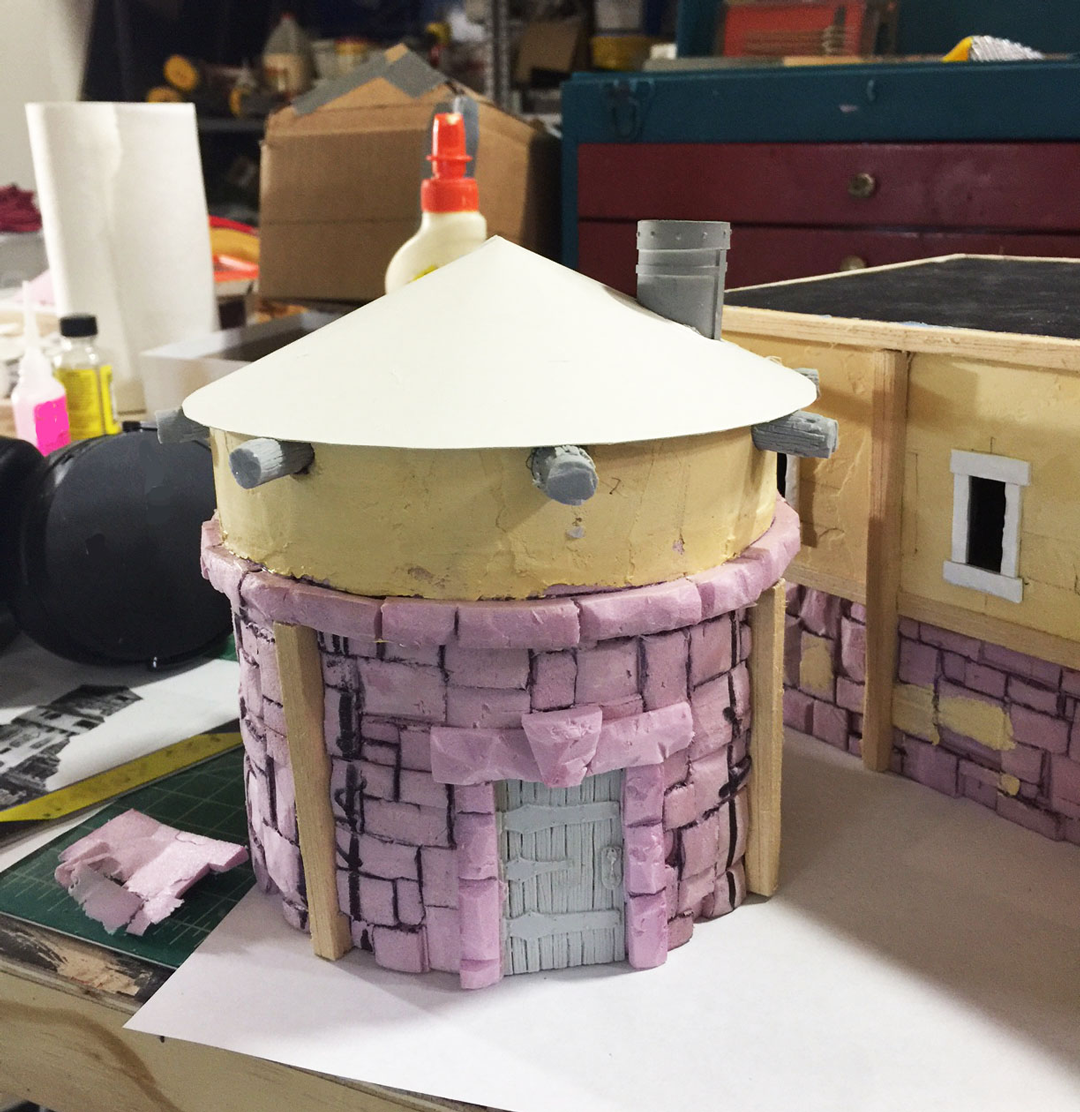
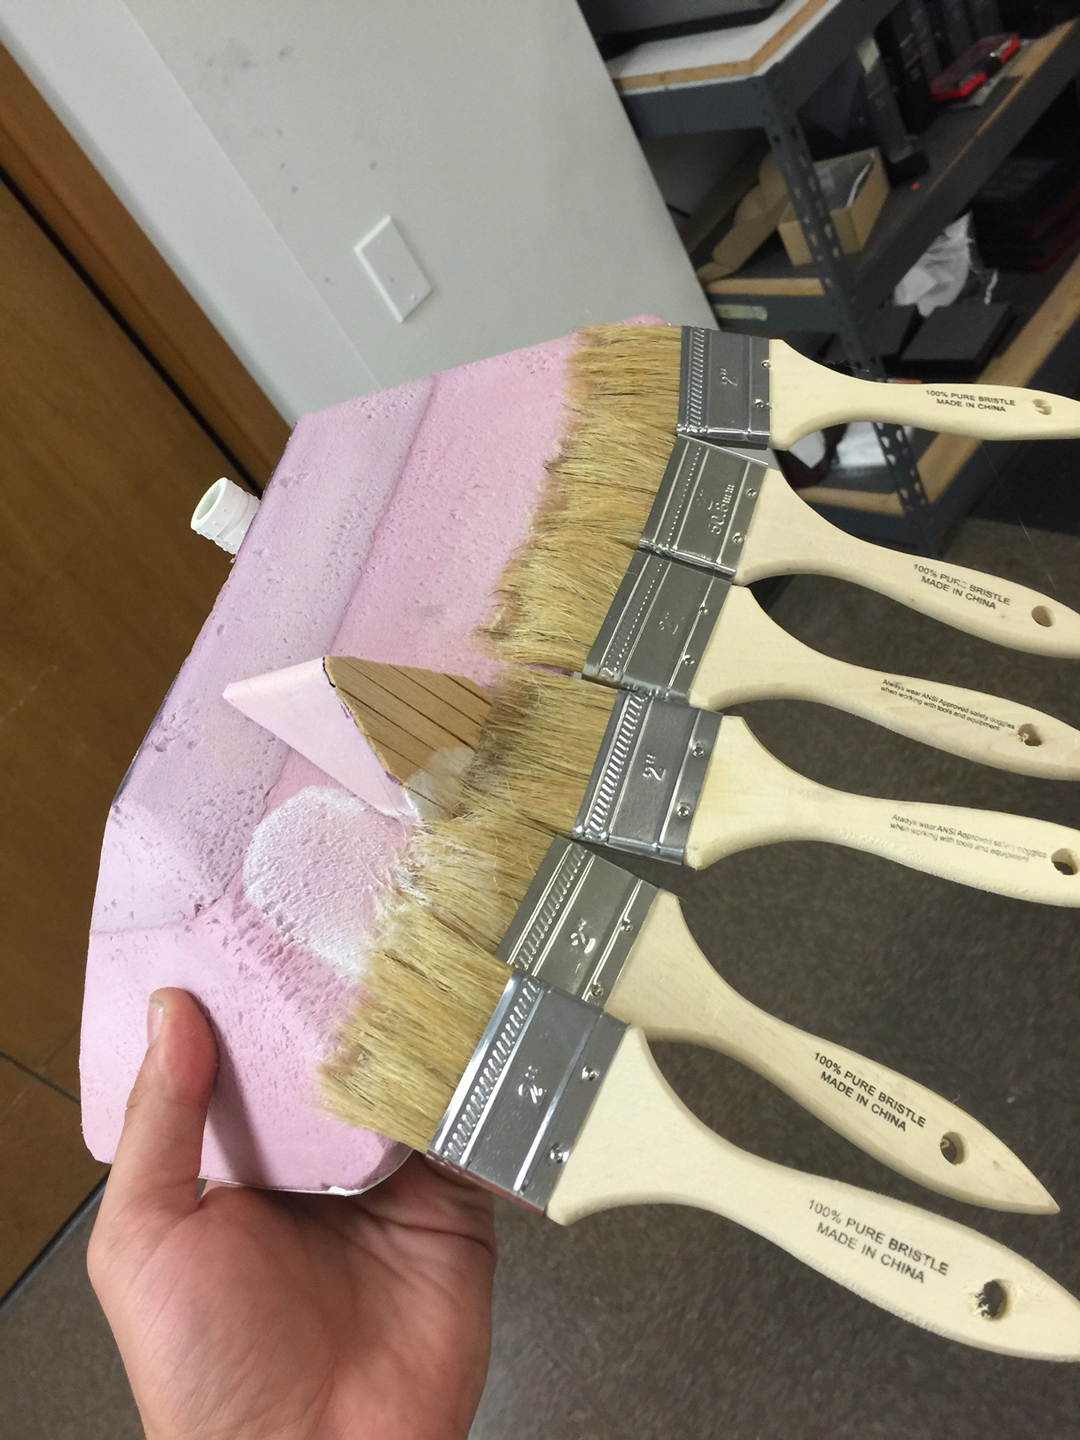
For the thatch, I laid down a bead of hot glue and pressed in a line of chip brushes. I then took a pair of scissors and cut the handles off. I continued doing this around the roof shape until it was covered in bristles. I used the same technique for the round section of the building. Eventually I brushed the bristles down with watered-down wood glue. This helped solidify the bristles and made it easier to paint.
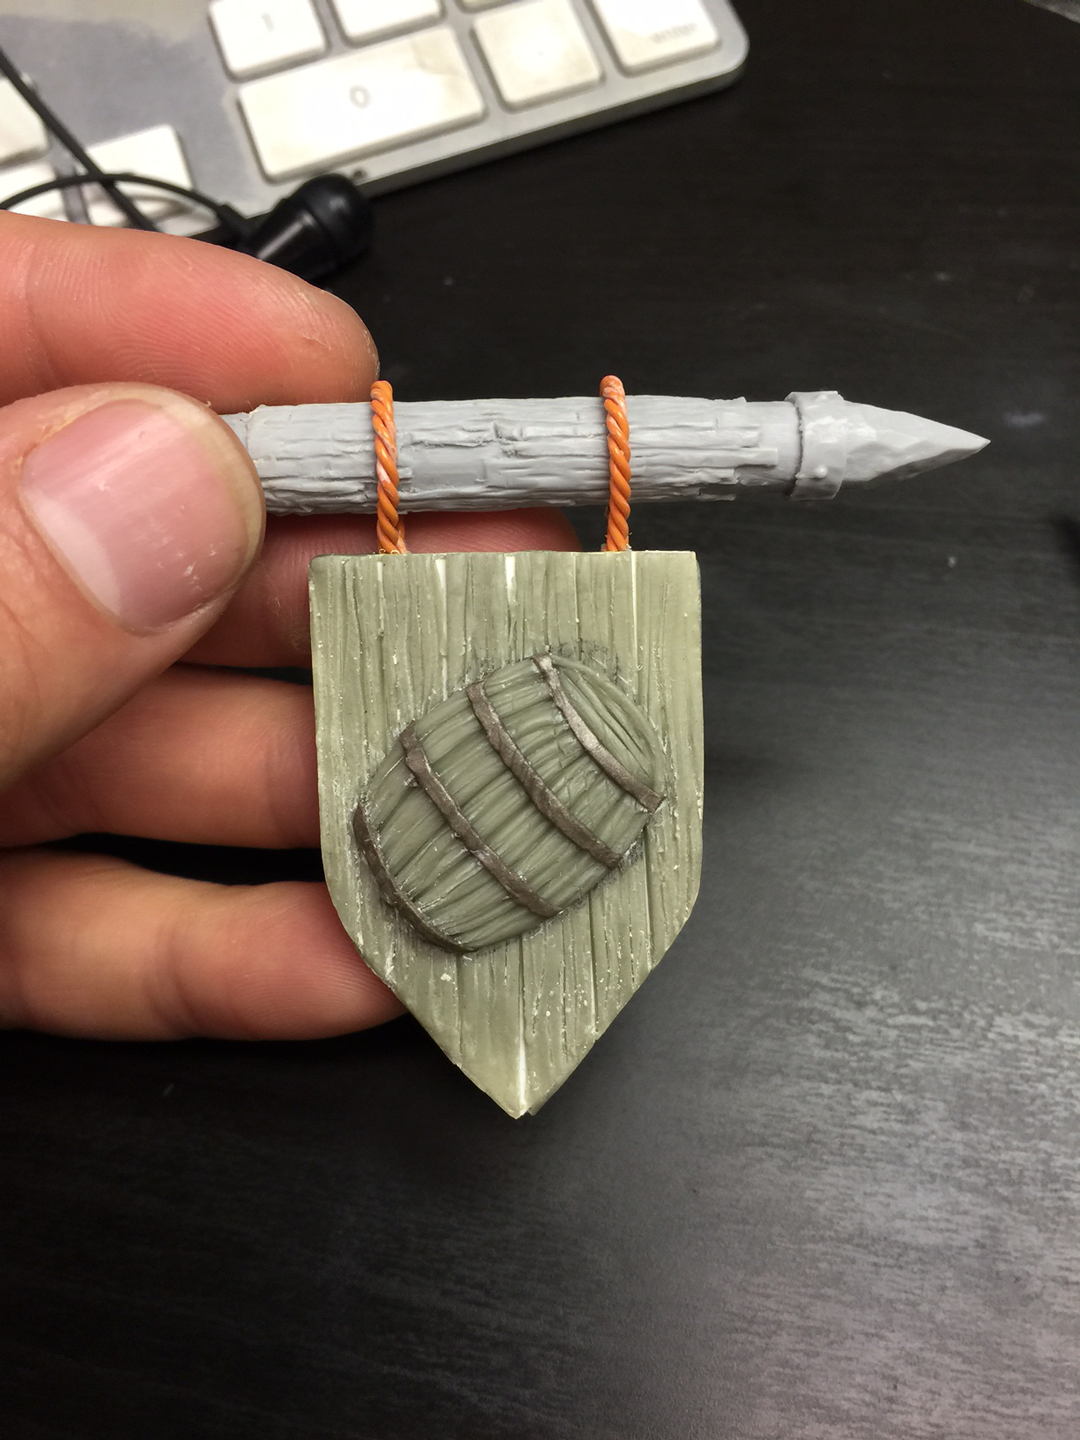
Now it was time for the details. I added boilers and chimneys made from pvc, styrene, and other miscellaneous parts I had lying around. There is even a plastic Easter egg in there! I sculpted the door and signage in epoxy putty with some styrene details and added those to the brewery, as well.
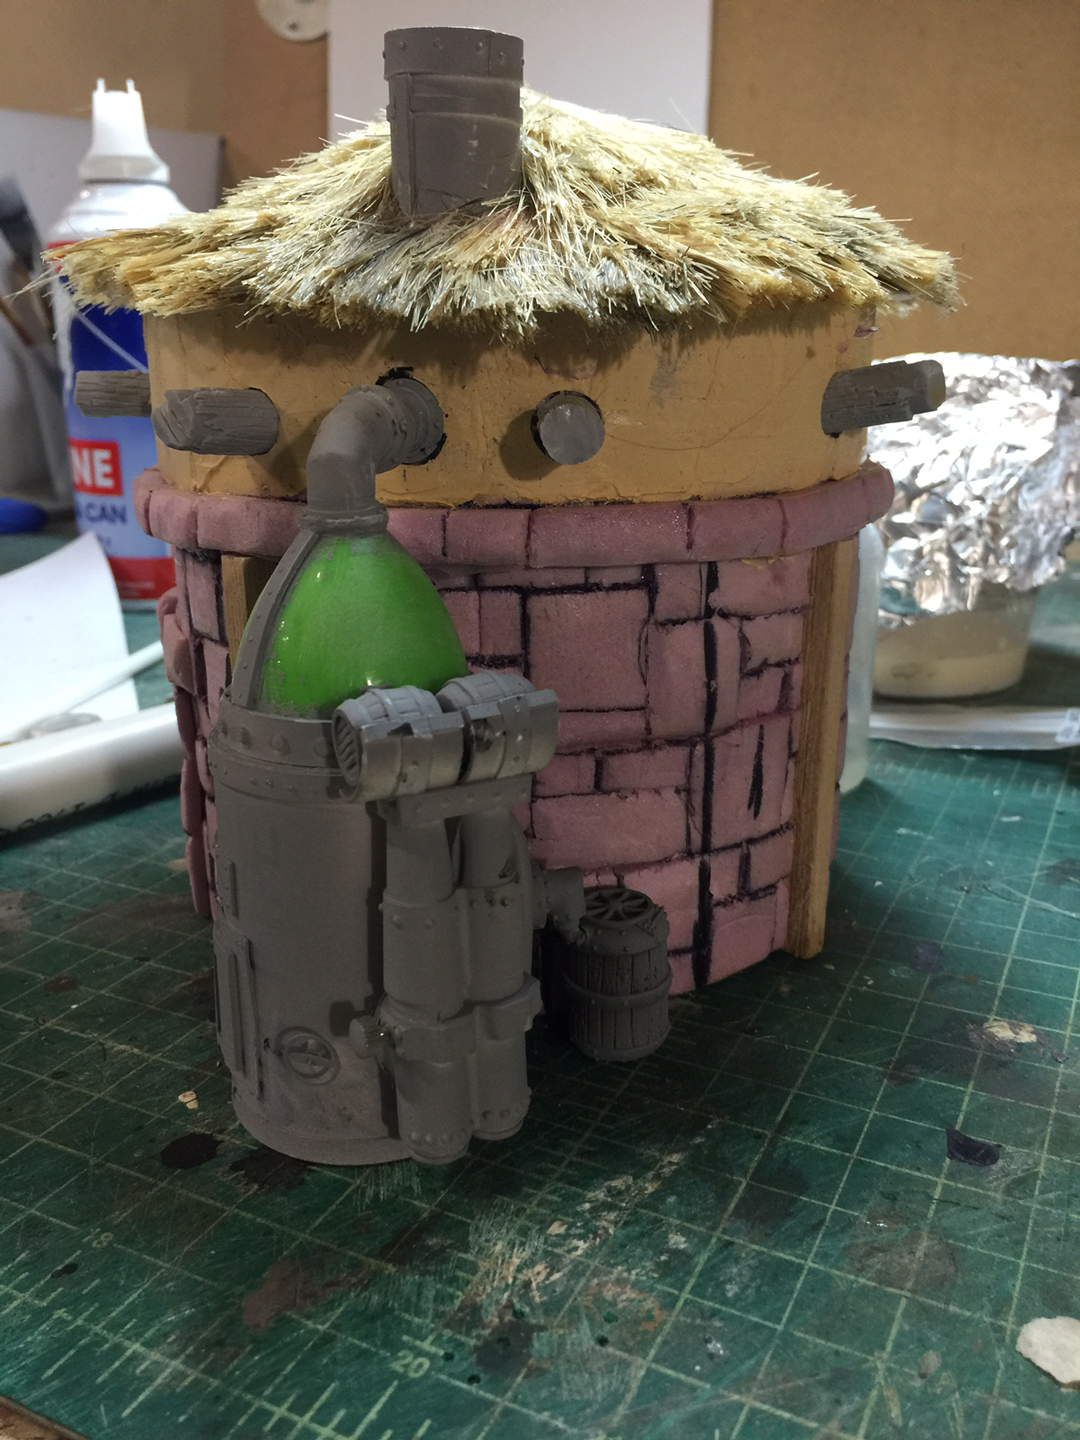
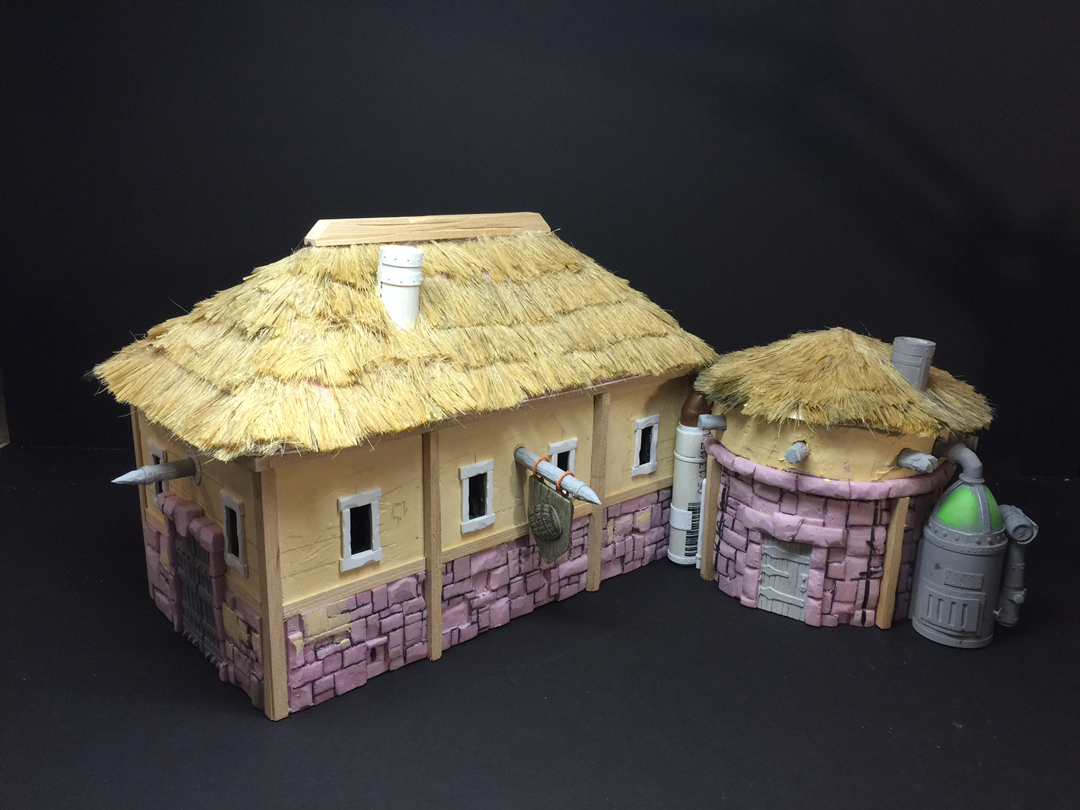
Here is a photo of the finished brewery before I began to paint it.
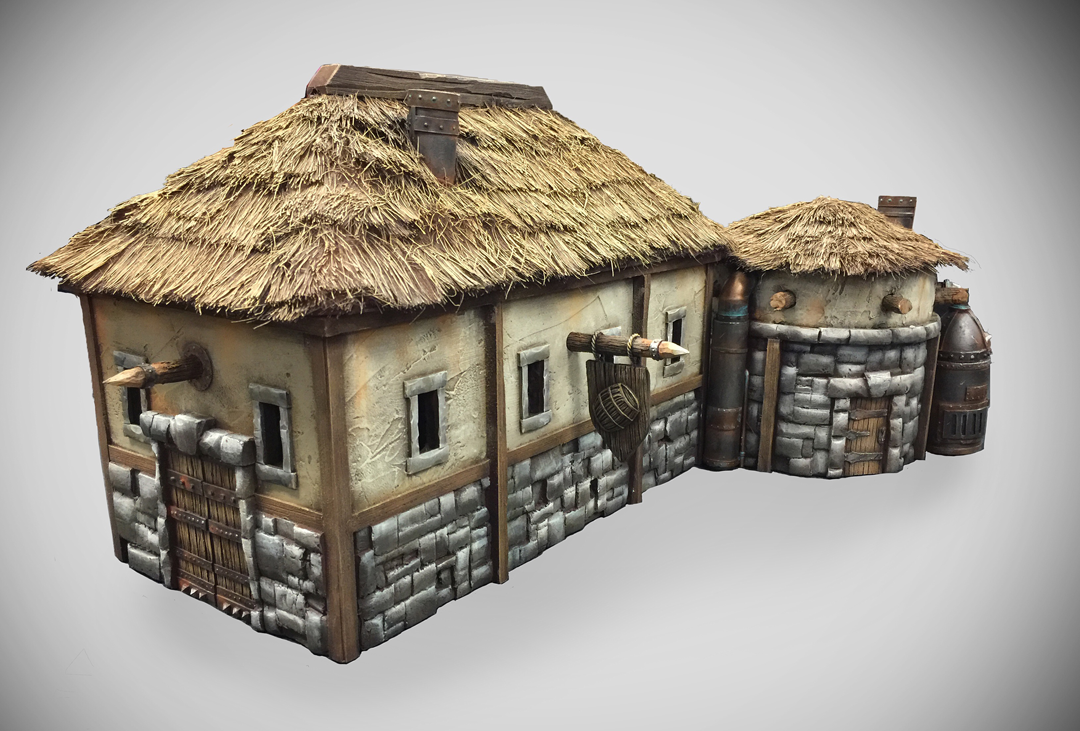
After painting it, I decided to add a few more details and some snow to match the table it would be on.
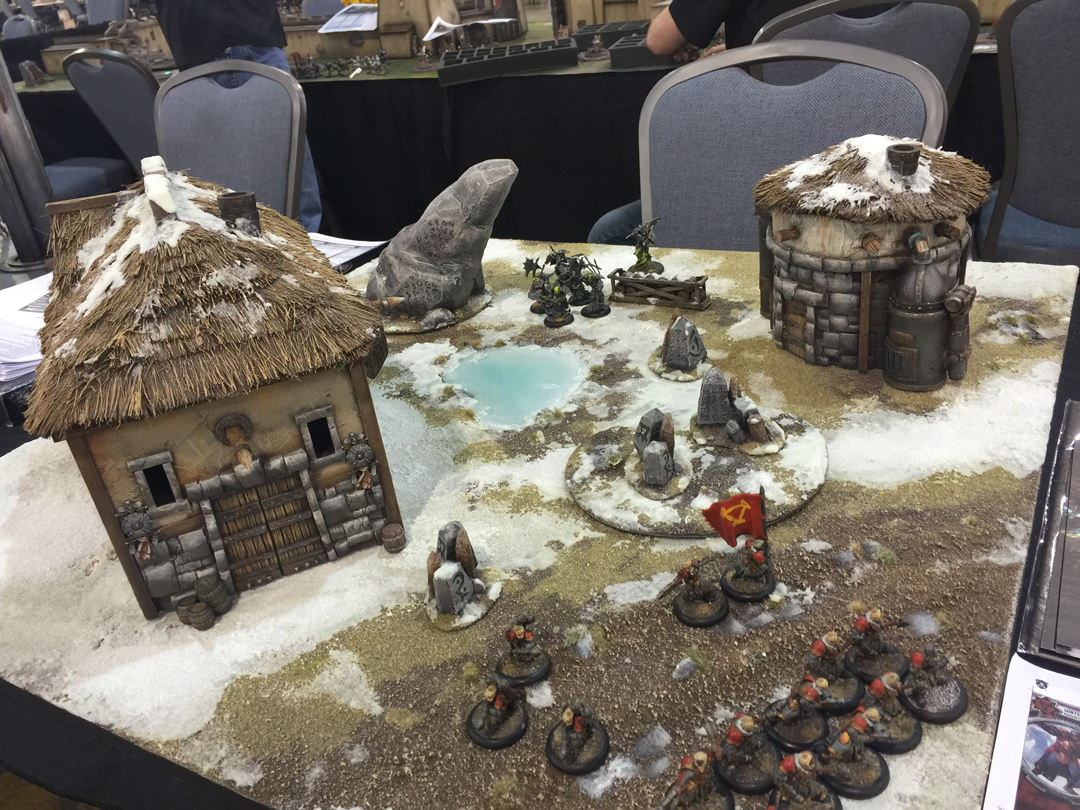
And there you have it: a Northkin brewery ready and equipped to hold the hooch (if you need something to haul it, check out the Hearthgut Hooch Hauler)! I hope you enjoyed this quick rundown of how this was made—I certainly enjoyed making it. Till next time, fellow hobbyists!
