

Hobby: Building My Konflikt’47 Strike force – The Devil’s Brigade
We’re constantly on the lookout for great armies in the community and spotted this one being worked on by a chap on the Konflikt ’47 facebook group – so, of course, we asked him to share…
By the AWI Review
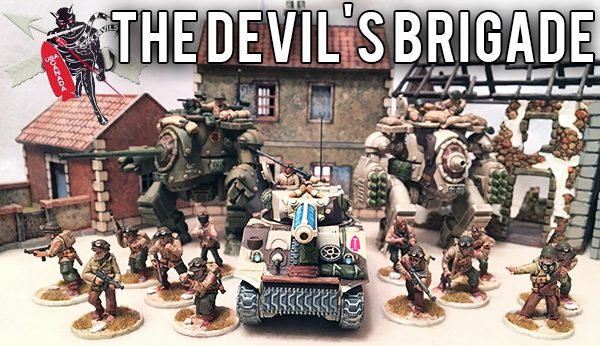
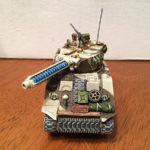
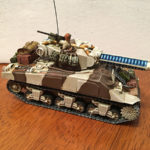
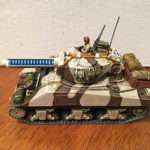
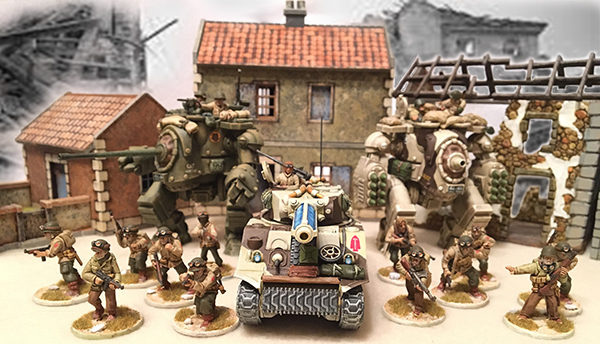
First Special Services Force / FSSF – AKA the Devil’s Brigade!
If you’re anything like me (your wallet hopes you aren’t), you spend a lot of time—more time than is healthy—burning through models, paint, and colour schemes trying to find a way to make your army stand out from all the others. One way I’ve found to add character to a Bolt Action or Konflikt 47 platoon, for example, is to give the vehicles in that platoon a camouflage theme.
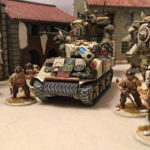
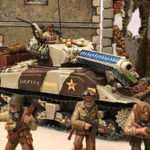
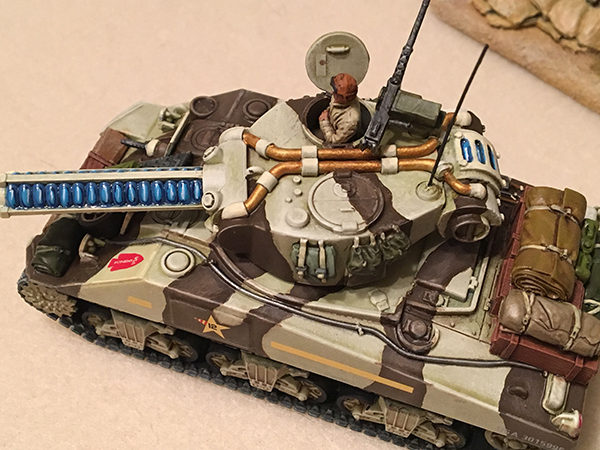
With a lot of Tank War Army Bundles now available at a very reasonable rate from Warlord Games webstore, now is as good a time as any to talk about one camouflage pattern I chose for a Sherman M4A9-T from the Konflikt 47 range of miniatures. I’m no skilled painter by any means, so hopefully, the techniques I’ve employed will be useful to all skill levels—from beginner to expert. And the best part of all? No airbrush is required.
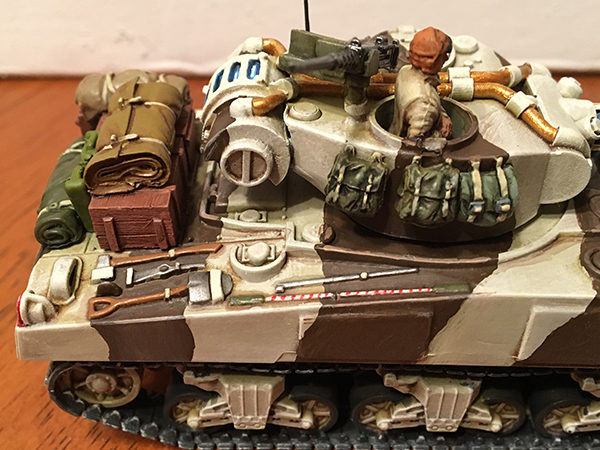
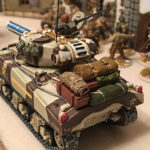
Just a side note: You might notice I did add a selection of various stowage items on this kit. This is an optional way to give your vehicles some life, but it isn’t necessary for this tutorial. However if you would like to add some stowage, I recommend Warlord’s range of stowage items and any remaining equipment bits left over from your plastic infantry sprues. You’d be amazed at how ‘lived in’ a vehicle can look just by adding some extra backpacks and helmets here and there.
Preparation Step:
After you have assembled the model (remember to thoroughly wash the resin parts in warm water and hand detergent before assembly and painting), I gave the whole thing a few sprays of Army Painter (AP) Necrotic Flesh Spray-Primer on each side, making sure to coat the entire model and then set it aside to dry. AP Spray-Primers dry remarkably fast and they hold to plastic very well; nevertheless, check it after an hour to be safe. It should be ready for the next step.
1st Step – Wash:
Wash Mixture consisting of equal parts AP Quickshade Washes Mid-Brown and Light, and Vallejo Sepia Wash. Add either water or (in my case) Pledge with Future Shine in an equal part to that mix.
2nd Step – Drybrushing:
First is a heavy drybrush of Vallejo Desert Tan Primer. I used my trusty Citadel large drybrush for this (but the Army Painter vehicle and Terrain Drybrush would work splendidly here), aiming to hit the majority of the raised areas, but leaving that washed-over Necrotic Flesh primer showing in recesses and in some of the wider crevices on the surface of the tank. It may seem odd to use a designated primer paint for dry brushing, but it really is the perfect method to get a lighter tone quickly. Plus it comes in a large bottle, so you aren’t wasting your small paint pots. However, you are going to want to really make sure you get nearly all the paint off your brush for this to work, as the primer paints tend to be watery and will leave streaks if the bristles on your brush are still wet.
Next, use a 50:50 mix of the Vallejo Desert Tan with some Vallejo Model Color Pale Sand. I used the same drybrush without cleaning the bristles (but really work those bristles out on cardboard or a paper towel to make sure that only a small amount of the original Desert Tan is left). This will help blend this new mixture in with the original drybrush layer. It may seem counter-intuitive to not clean your brush, but I think it helps the transitioning of the layers. This time, try to focus more on the higher layers of the tank and the edging in particular. Every corner should get an edge highlight at this stage by running your drybrush along the hard corners.
For the third (and final) stage of dry brushing, you are going to want to use Vallejo MC Pale Sand with just a dab of Vallejo MC White (about a 70:30 mixture). This is a very targeted drybrush, catching only the very tops of raised areas. I also went over the edges lightly once more as I did in the previous step to really help them pop. If you want to bring it up another level, an optional additional stage might be to use straight Vallejo MC White with an AP Regimental Brush (or comparable brush) and do a very light, very fine edge highlight at all the corners.
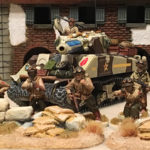
3rd Step – Camouflage:
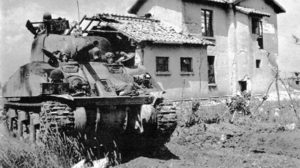
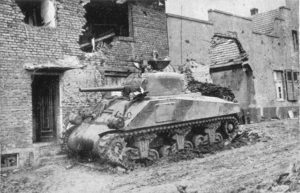
If you are curious about period pattern designs, I highly recommend Osprey’s range of WW2 books which contain some fantastic artwork and CG renditions, but if your wallet is a little empty you can find a wide range of period images in various online museum collections and government archive databanks (which are searchable). Then again, this is Konflikt 47; the historical accuracy of your paint scheme does not have to be as rigid (zombies and werewolves and werebears exist in this enjoyable game-verse, after all), so there is plenty of flexibility here. It might be a wise idea to sketch a design out first before applying if you haven’t found a particular reference image you like elsewhere. Keep it nearby and visible as you paint so you can constantly check your pattern against it.
If you want to follow what I did, I recommend the AP Regimental Brush (which is what I use) or some equivalent (like any decent #2 brush with a good tip). I used Vallejo MC Chocolate brown with a dollop of AP Leather Brown to lighten it up slightly and mixed in a decent amount of Medium Thinner from Vallejo to give it a smoother consistency for application. Then very carefully, I outlined the camouflage pattern. I essentially use the brush like a pencil (I apologize to all the master painters—amateurs like me are murder on brushes) and ‘sketch’ the design. I try to keep my lines smooth, but it isn’t necessary at this stage to be perfect. I found that with enough of a fluid consistency to the paint (thanks to the thinner and a wet brush) if I didn’t immediately like where the pattern was going, I could quickly wet my brush and remove the line without damaging the dry brushing work I just finished. Of course, I would still recommend care be taken when painting on the lines.
When you get the outline of the patterns, start filling them in. Take care along the edges now, as any mistake you make will almost impossible to correct. If you have a jagged outline or a rough line here or there, simply extend the camouflage out smoothly here in a curved fashion so that those ‘mistakes’ disappear. As the paint is likely very thin, you will have to apply a few coats to get a decent coverage of the colour and erase a few paint streaks. Let this dry thoroughly before moving on to the next part of this step.
Once that layer is dry, some AP Moalmostnster Brown to the mixture you already have so that it is around 50:50. This lighter colour will fill in most of the camouflage pattern and offer a highlight layer. Be sure to leave the original Chocolate Brown paint along the edge of the pattern. When this is done, use straight AP Monster Brown and very, very lightly drybrush over the camouflage pattern. Also, use that same drybrush to edge-highlight the areas where the camouflage pattern overlaps the corners of the model. If you want to take this an additional step, you can use this colour to highlight all the panelling that the camouflage also covers to add extra character and definition.
4th Step – Detailing:
This part is done to taste and how I did it might not be how you would do it. But for the sake of being thorough, I’ll run down the paints I recommend using for various items on the Sherman. I can’t promise this will be a comprehensive list, but I think I remembered to include everything.
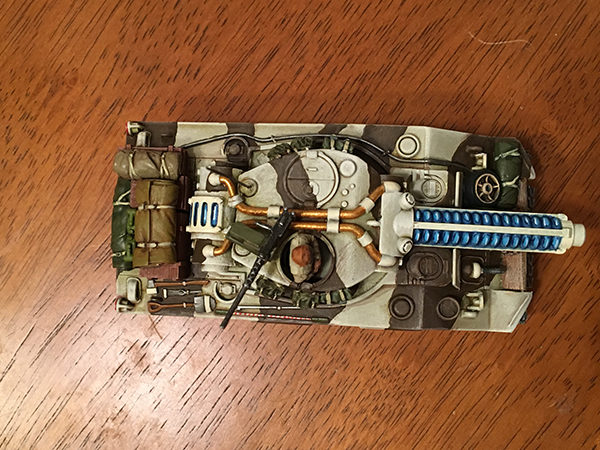
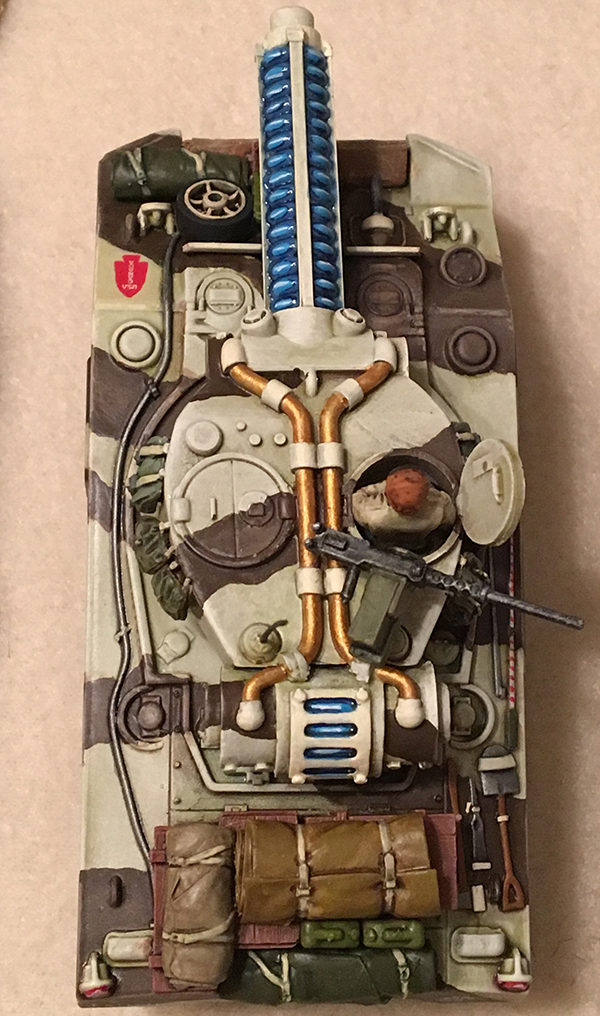
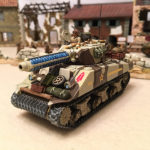
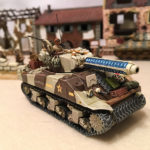
Tesla Cannon (and vents at the back of the turret): This part involves some redundant painting and a steady hand (lesson learned: don’t try to paint this after having a cup of tea or coffee). Start with a 50:50 mixture of Vallejo MC Sky Blue and AP Deep Blue. Add an equal part of water to this mix to thin it down well. Apply this mixture over the four exposed tesla parts of the cannon. You may need to apply two layers for coverage. No need to be careful here as you can always clean up the sand-coloured parts of the turret using straight Vallejo MC Pale Sand.
After this is done, add a highlight over the raised areas of the Tesla cannon using AP Deep Blue right from the pot. Remember to only catch the tops and avoid getting it in the recessed areas. After this has dried, apply a glaze using AP Blue Tone Ink and Pledge with Future Shine. If you don’t have Future Shine, you can use water at the same consistency. This part is very important: Let the glaze dry thoroughly.
The final touch is to add to the raised areas where you just painted that AP Deep Blue. This can be tricky so you will need a steady hand. In progressively smaller ‘ovals’ (in the sense that the raised areas are curved), first apply Vallejo Game Color Electric Blue, followed by Vallejo MC Sky Blue. You should still see at least an outline of the original Deep Blue and Electric Blue.
The final step is to add just a small line of Vallejo MC White to the very centre of each of the raised area. You can use these same steps to fill in the tesla ‘vents’ on the back of the turret.
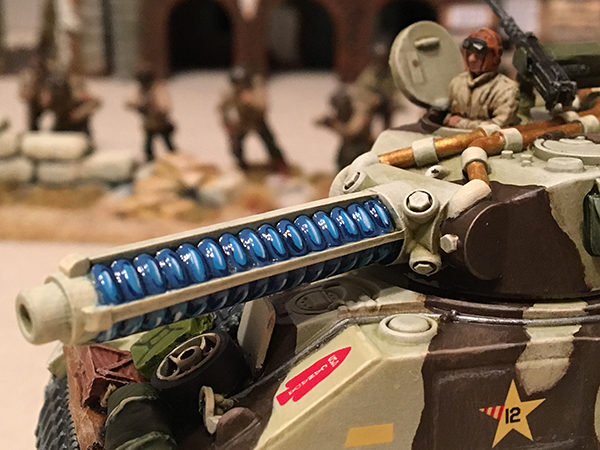
Brass metallic bits on the turret: For all of the ‘wiring’ components and the bulk of the Tesla mechanics, I painted these using a 50:50 mix of AP Glorious Gold and Vallejo MC Brass. Pretty straightforward!
Headlights: It depends on how much time and patience you have left at this point; I settled for painting them Vallejo MC Sky Blue with Vallejo MC White in the centre. But you could really paint these up using the gem effects technique or even plain silver if you wanted.
Taillights: For the red taillights, I first gave them a base coat of Vallejo MC Red (because there are a few ‘red’ colours, I used 70.926). This was followed by an edge highlight using Vallejo MC Scarlet. Finally, I added some accent lines in white, mainly around where I thought sunlight would reflect off the glass of a real taillight. To finish off the look, I gave it a quick wash of AP Red Tone Ink directs from the pot, trying not to overspill onto the other painted areas.
Heavy Machine Gun: For the barrel of the gun, I used Vallejo MC Gunmetal Grey. This is metallic, but it is a dark metallic, so it covers well and has just a bit of a satin shine. To complete the effect, I added some Vallejo MA Steel to the Gunmetal Grey (about 20:80, Steel to Gunmetal Grey) and then dry brushed this over the gun barrel; when that dried I went over it with AP Dark Tone Ink. This same process can be used to paint the hull-mounted machine gun in the front of the tank. To paint the green areas (like the machine gun mount and the ammo box), try Vallejo MC Brown Violet and then wash over that with AP Military Shader. A quick edge highlight of Brown Violet will bring the colour back up a little.
Wooden Crates: I used my standard AP Fur Brown for the base layer and then washed over that with AP Strong Tone Ink. I then highlighted by lightly drybrushing a 50:50 mix of AP Fur Brown and Vallejo PA New Wood. The rope handles on one of the crates I painted using a basic light tan paint.
Tarps, bags, and blanket rolls: How you paint your blanket rolls and tarps is really up to you; and it depends on a lot of variables. If you are painting up a winter army, you might want to go with more whites and greys. My tank is geared towards more arid and semi-arid climates, so I went with browns and greens. To give the bags hanging over the side of the turret some variety, I used two different base colours and alternated between bags. The first is Vallejo MC Us Olive Drab and the second is AP Combat Fatigues; on both, I painted the straps with AP Necrotic Flesh. I then washed over them with AP Military Shader and highlighted them using their base colours. I used this same process for all the bags and tarps as well, except for bags that were brown or yellow in colour, I used AP Strong Tone Ink rather than the Military Shader.
Tank crew: For the crewmember observing from the turret, I didn’t want to be too fancy, but a bad paint job there could really take away from the tank. I started with a basecoat of Vallejo Desert Sand Primer, which I applied to the jacket. The leather tankers helmet I painted with fur brown, and the goggles I painted using Vallejo MC Gunmetal Grey (as I still had it on my pallet) and then picked out the lenses using Vallejo MA Steel. For the skin, I used Vallejo PA Flesh Base and Flesh Highlights in a 50:50 ratio, and then washed over the whole crewman using AP Strong Tone Ink. I then highlighted using the original base colours.
5th Step (Optional) – Decals and Weathering:
At this point, my model was looking pretty okay to me! All that is left to do at this point is pick out a few decals that I wanted to apply and then varnish it up! When it comes to decals, it is always wise to look at reference photos of vehicles in theatre for proper placement. Ask specific questions as you are looking them over: Where were the markings on the tank? What did they signify? And so on… Again, this is Konflikt 47, so there is some leeway with this step, as there is with painting the vehicle. But nothing is uglier than a well-painted tank with an odd-looking decal placement. It can really make or break all your hard work!
Prior to placing any decals, it is recommended that you give the tank at least one coat of varnish. In the areas where you want to place your decals, be sure to first set up the area by applying some gloss varnish or Pledge with Future Shine to the areas. The glossy surface area will help your decals stick to the tank and also cut down on any ‘ghosting’ that sometimes happens when a decal doesn’t properly set. After the gloss varnish or Future is set (really make sure it is set and don’t rush the drying process here), some modellers (myself included) use Micro Sol and Micro Set to help with the model adhesion, but it isn’t necessary. After the decal is placed flat and dries, make sure you go over the decals again with gloss varnish or Future! This process seals the decal in place and protects it.
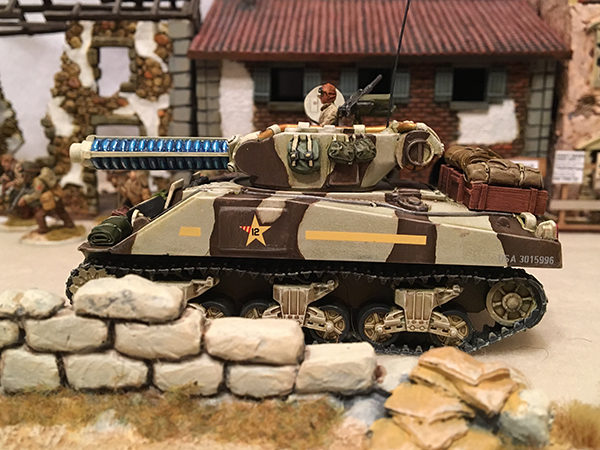 I went with an aesthetically-pleasing look with the decals over historical accuracy
After your decals are applied, it is time to consider weathering steps. For my tank, I chose not to whether it, opting for the cleaner look. But you may decide that you want a really beaten and worn vehicle. In that case, you should definitely search through Warlord’s database of articles on weathering techniques that will really make your tank look like it has been through some rough scraps.
I hope you all enjoyed this little tutorial on painting up a camouflaged Sherman tank for Konflikt 47! Next time I’ll attempt to explain my selection and what is in my army 
The AWI Review
Do you have an article within you? Share your collection to the world of Bolt Action by dropping us a line with a couple of pictures to [email protected]

Tear into the enemy with your Armoured force with the US starter set and a great selection of Walkers!
US starter set
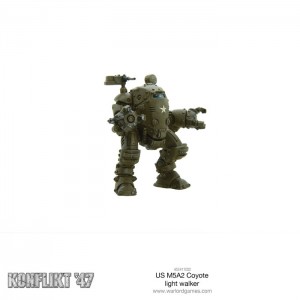
Coyote
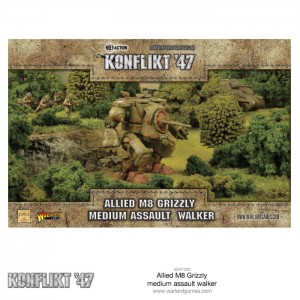
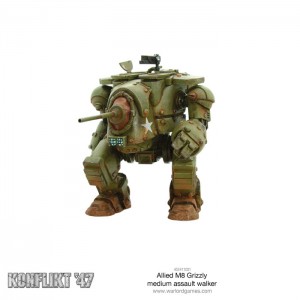
Grizzly
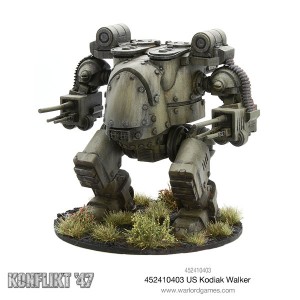
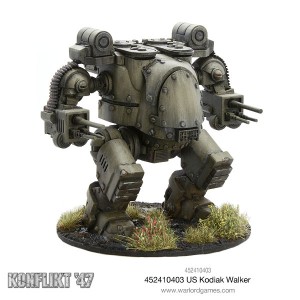
Kodiac
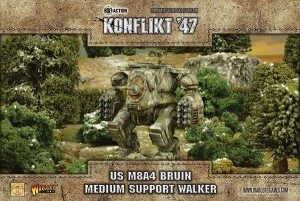
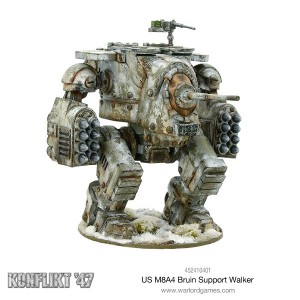
Bruin
The post Hobby: Building My Konflikt’47 Strike force – The Devil’s Brigade appeared first on Warlord Games.