

Guest Hobby Blog: Weathering with Griffon’s Roost Painting
Privateer Press is excited to welcome guest blogger Lauren Fahey (twitter: @griffonsroost). She currently works as a freelance artist specialized in painting miniatures for hobby gaming and display. Drawing from a background in art history and medieval/renaissance studies, she takes inspiration for her art from history, nature, and her favorite parts of nerd culture.
Lauren has previously appeared in the pages of No Quarter, and runs a painting blog [http://griffonsroostpainting.com] where you can find more of her stellar work.
Today she focuses on rust and oxidation effects with the recently released Inflictor:
Step 1: Prep and Prime
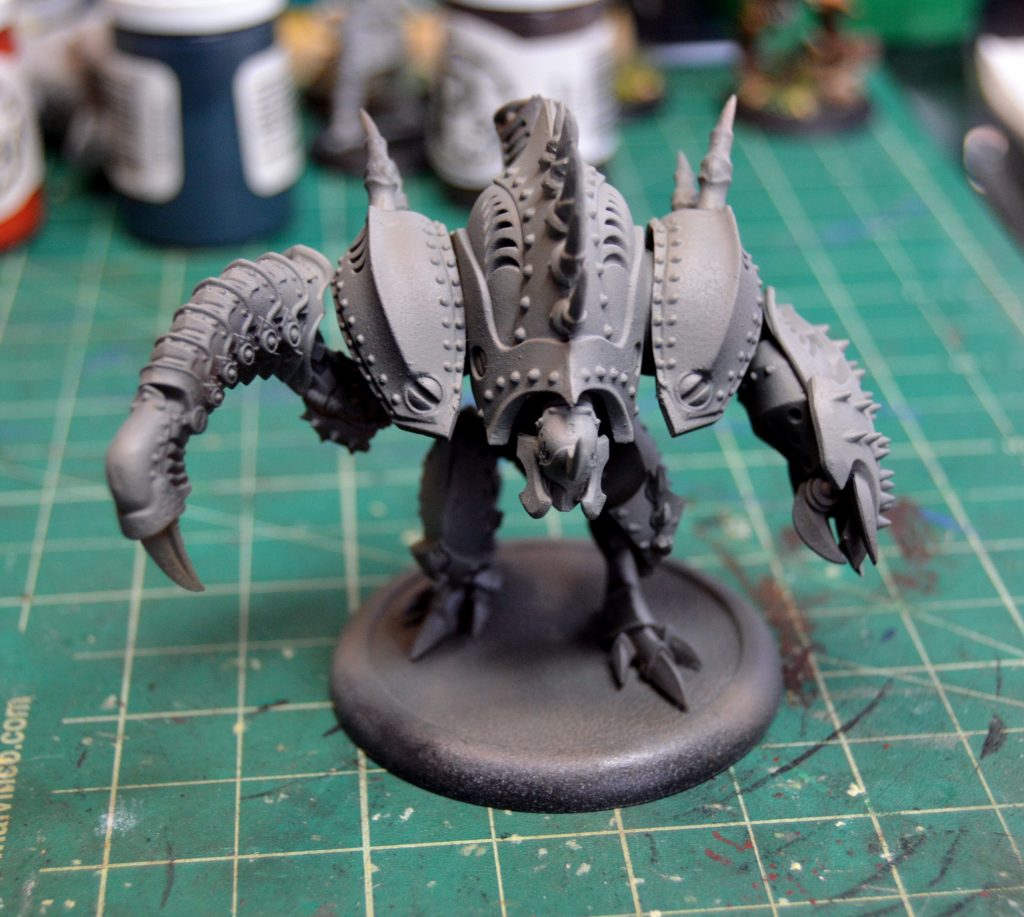
Assemble the warjack according to the instructions, remove mold lines with a sharp hobby knife, and fill the gaps with an epoxy material of preference. It is important to note that I failed on the following instructions part, and didn’t notice that the Inflictor should have two small acid tanks on its right shoulder instead of another set of spikes. So mine has two sets of shoulder spikes… oops!
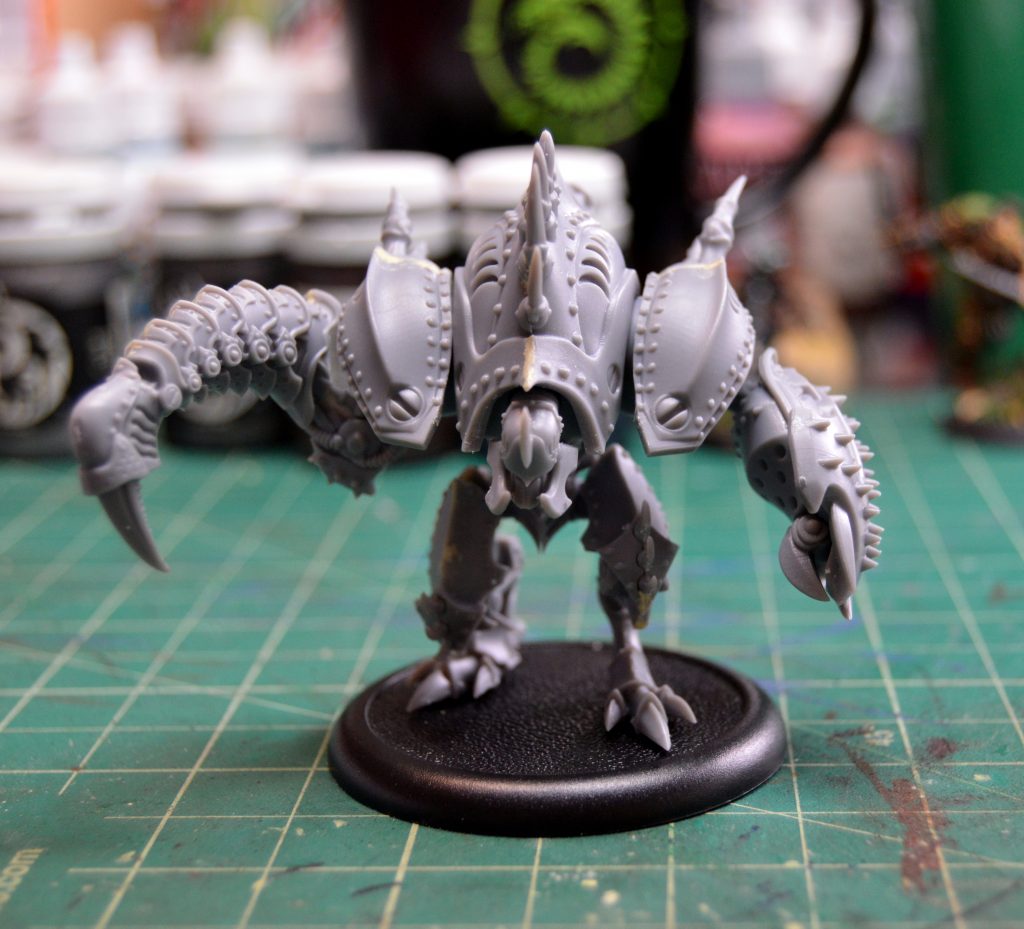 Assembled, Cleaned, and Gap Filled
Prime the model in a light gray or white primer using an airbrush or a rattle can variety. A lighter primer is important here because it helps the next step, a rusty orange, show up vibrantly.
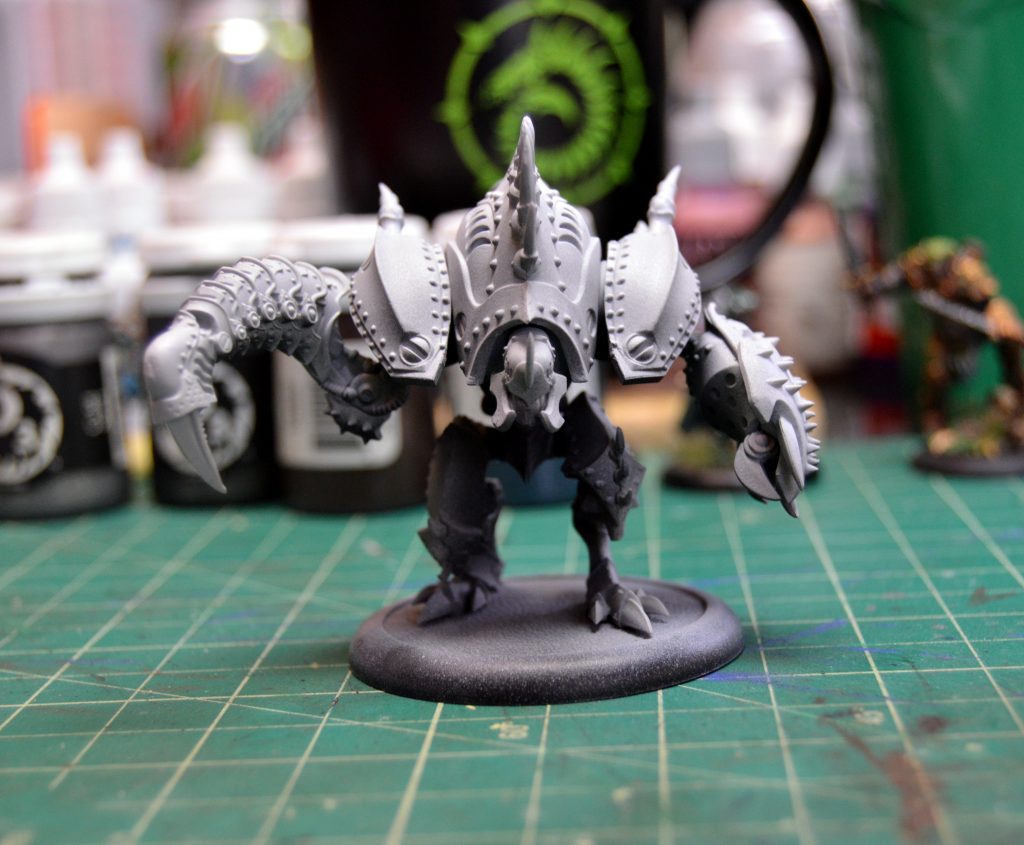 Primed in Light Grey
Step 2: Rust Layer
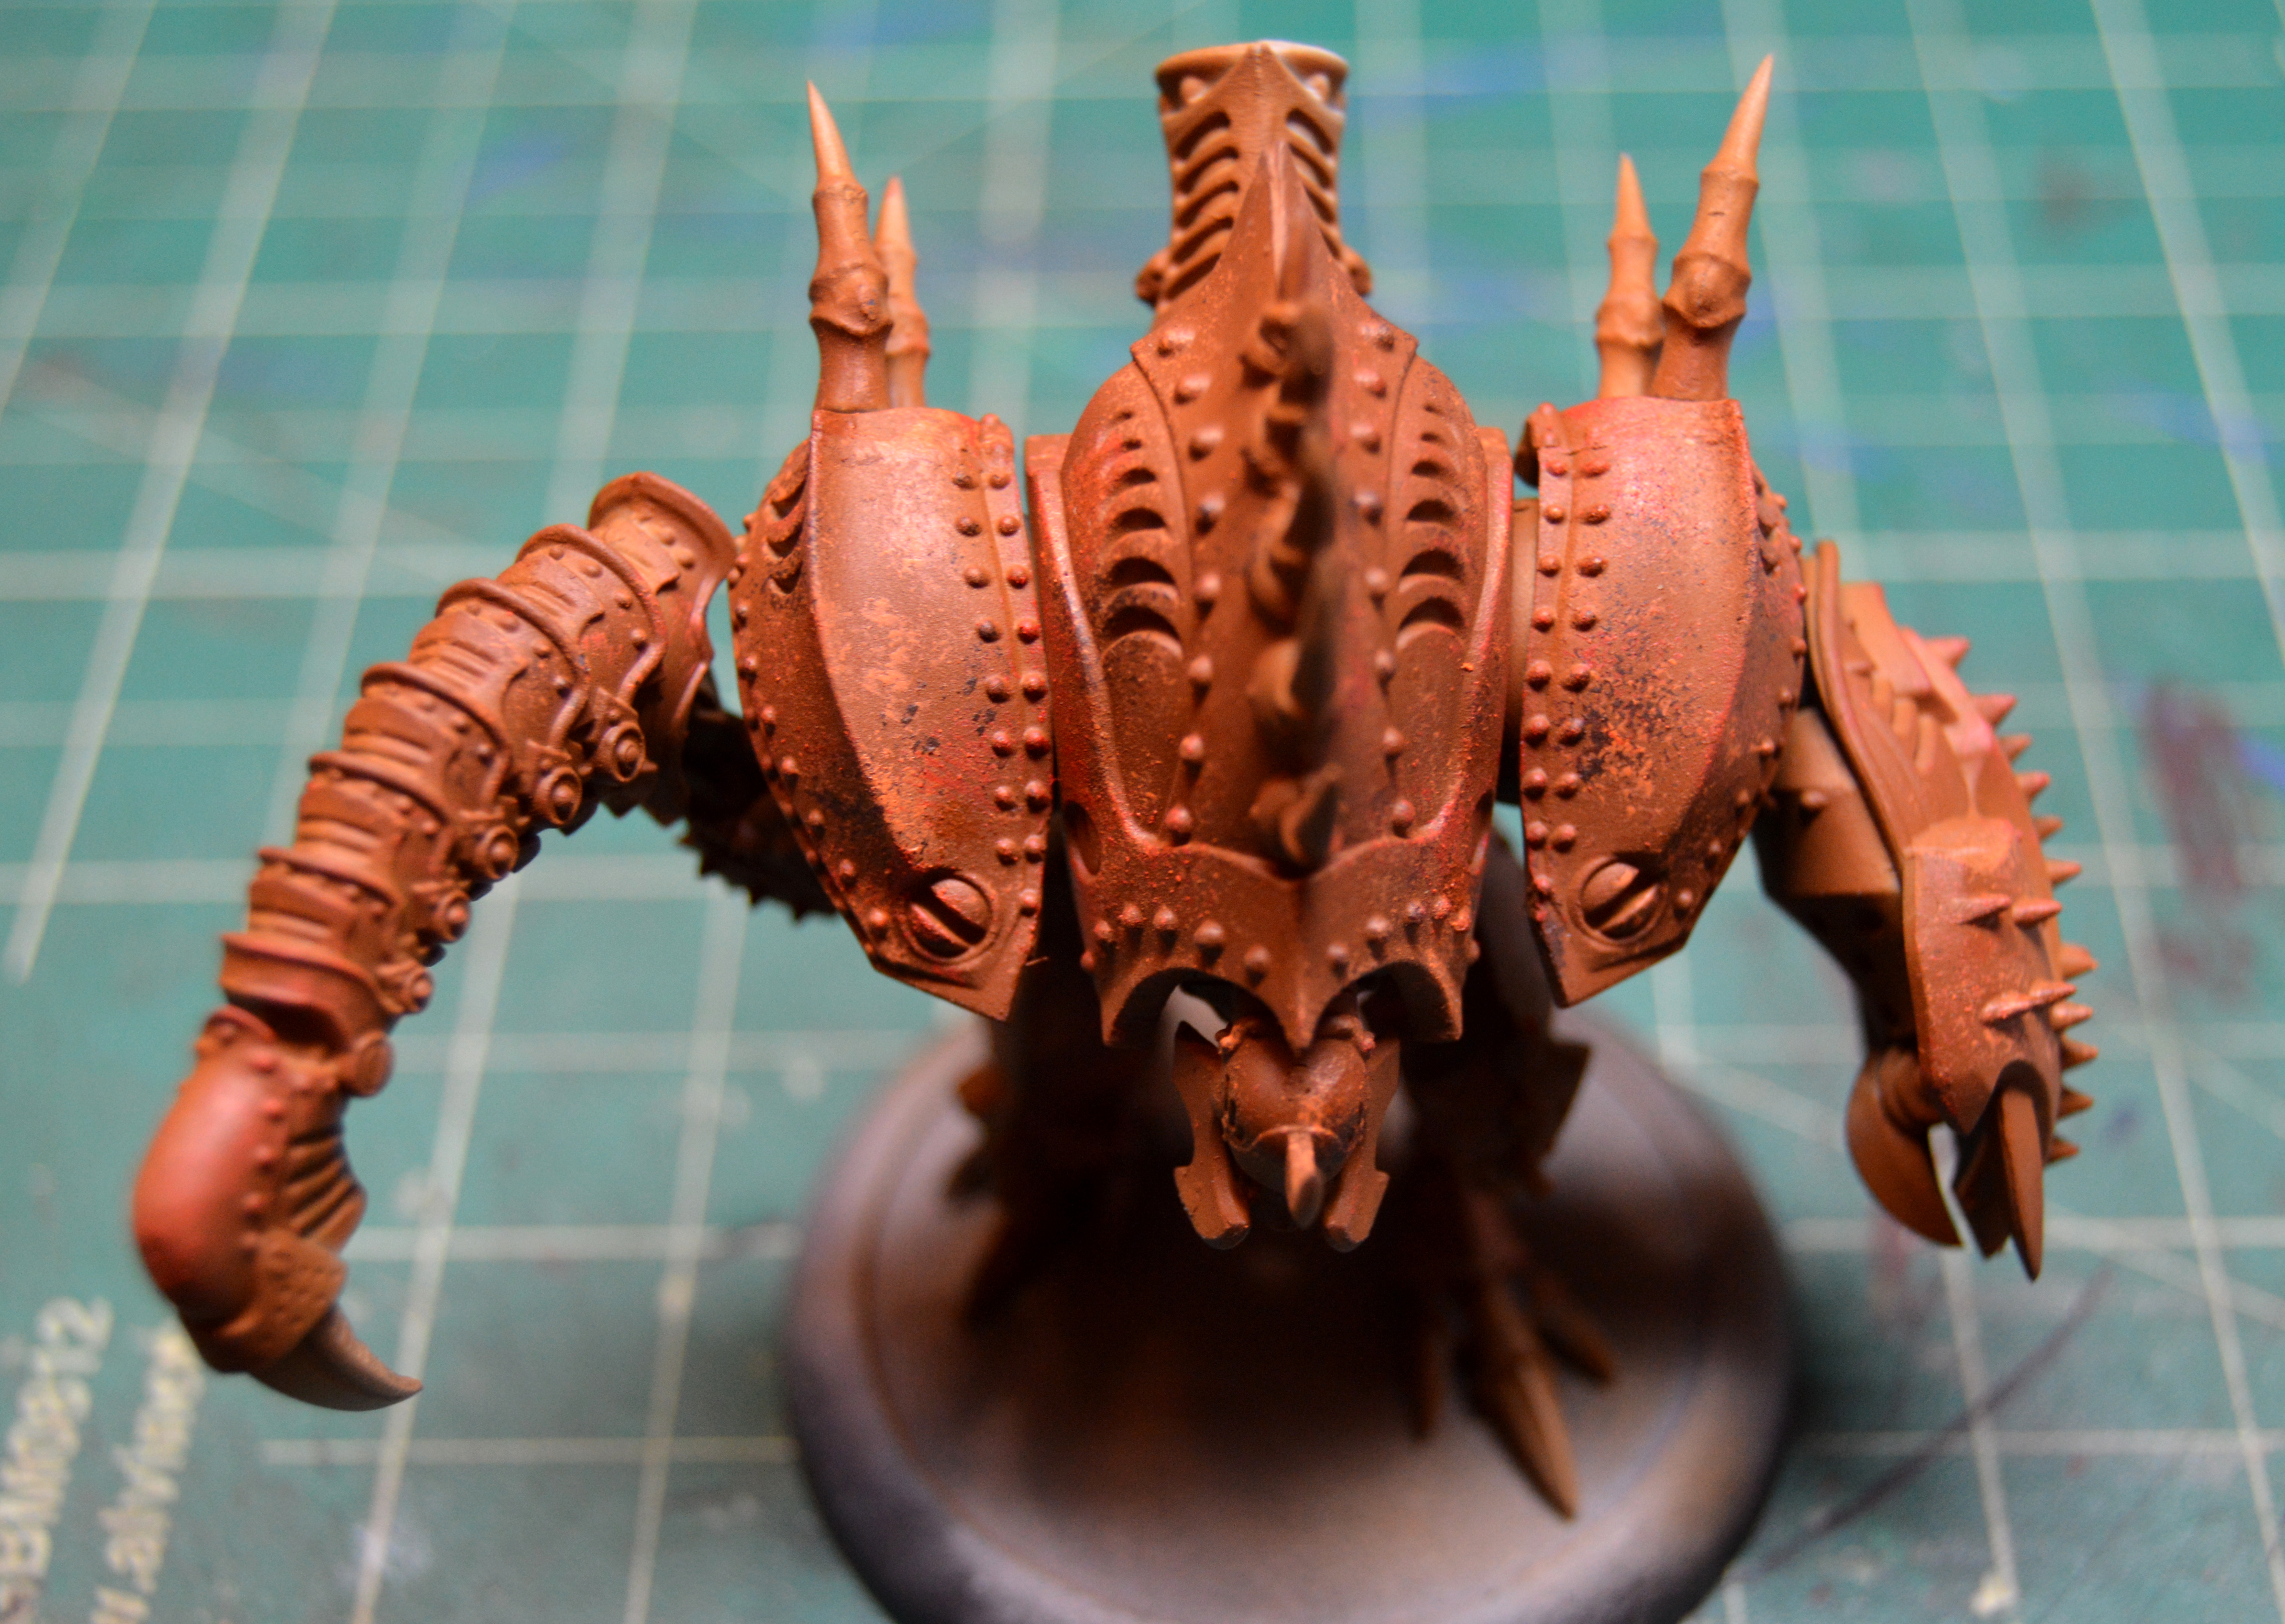
Using the airbrush again, give the Inflictor a solid base of Bloodstone mixed with a little Bloodtracker Brown.
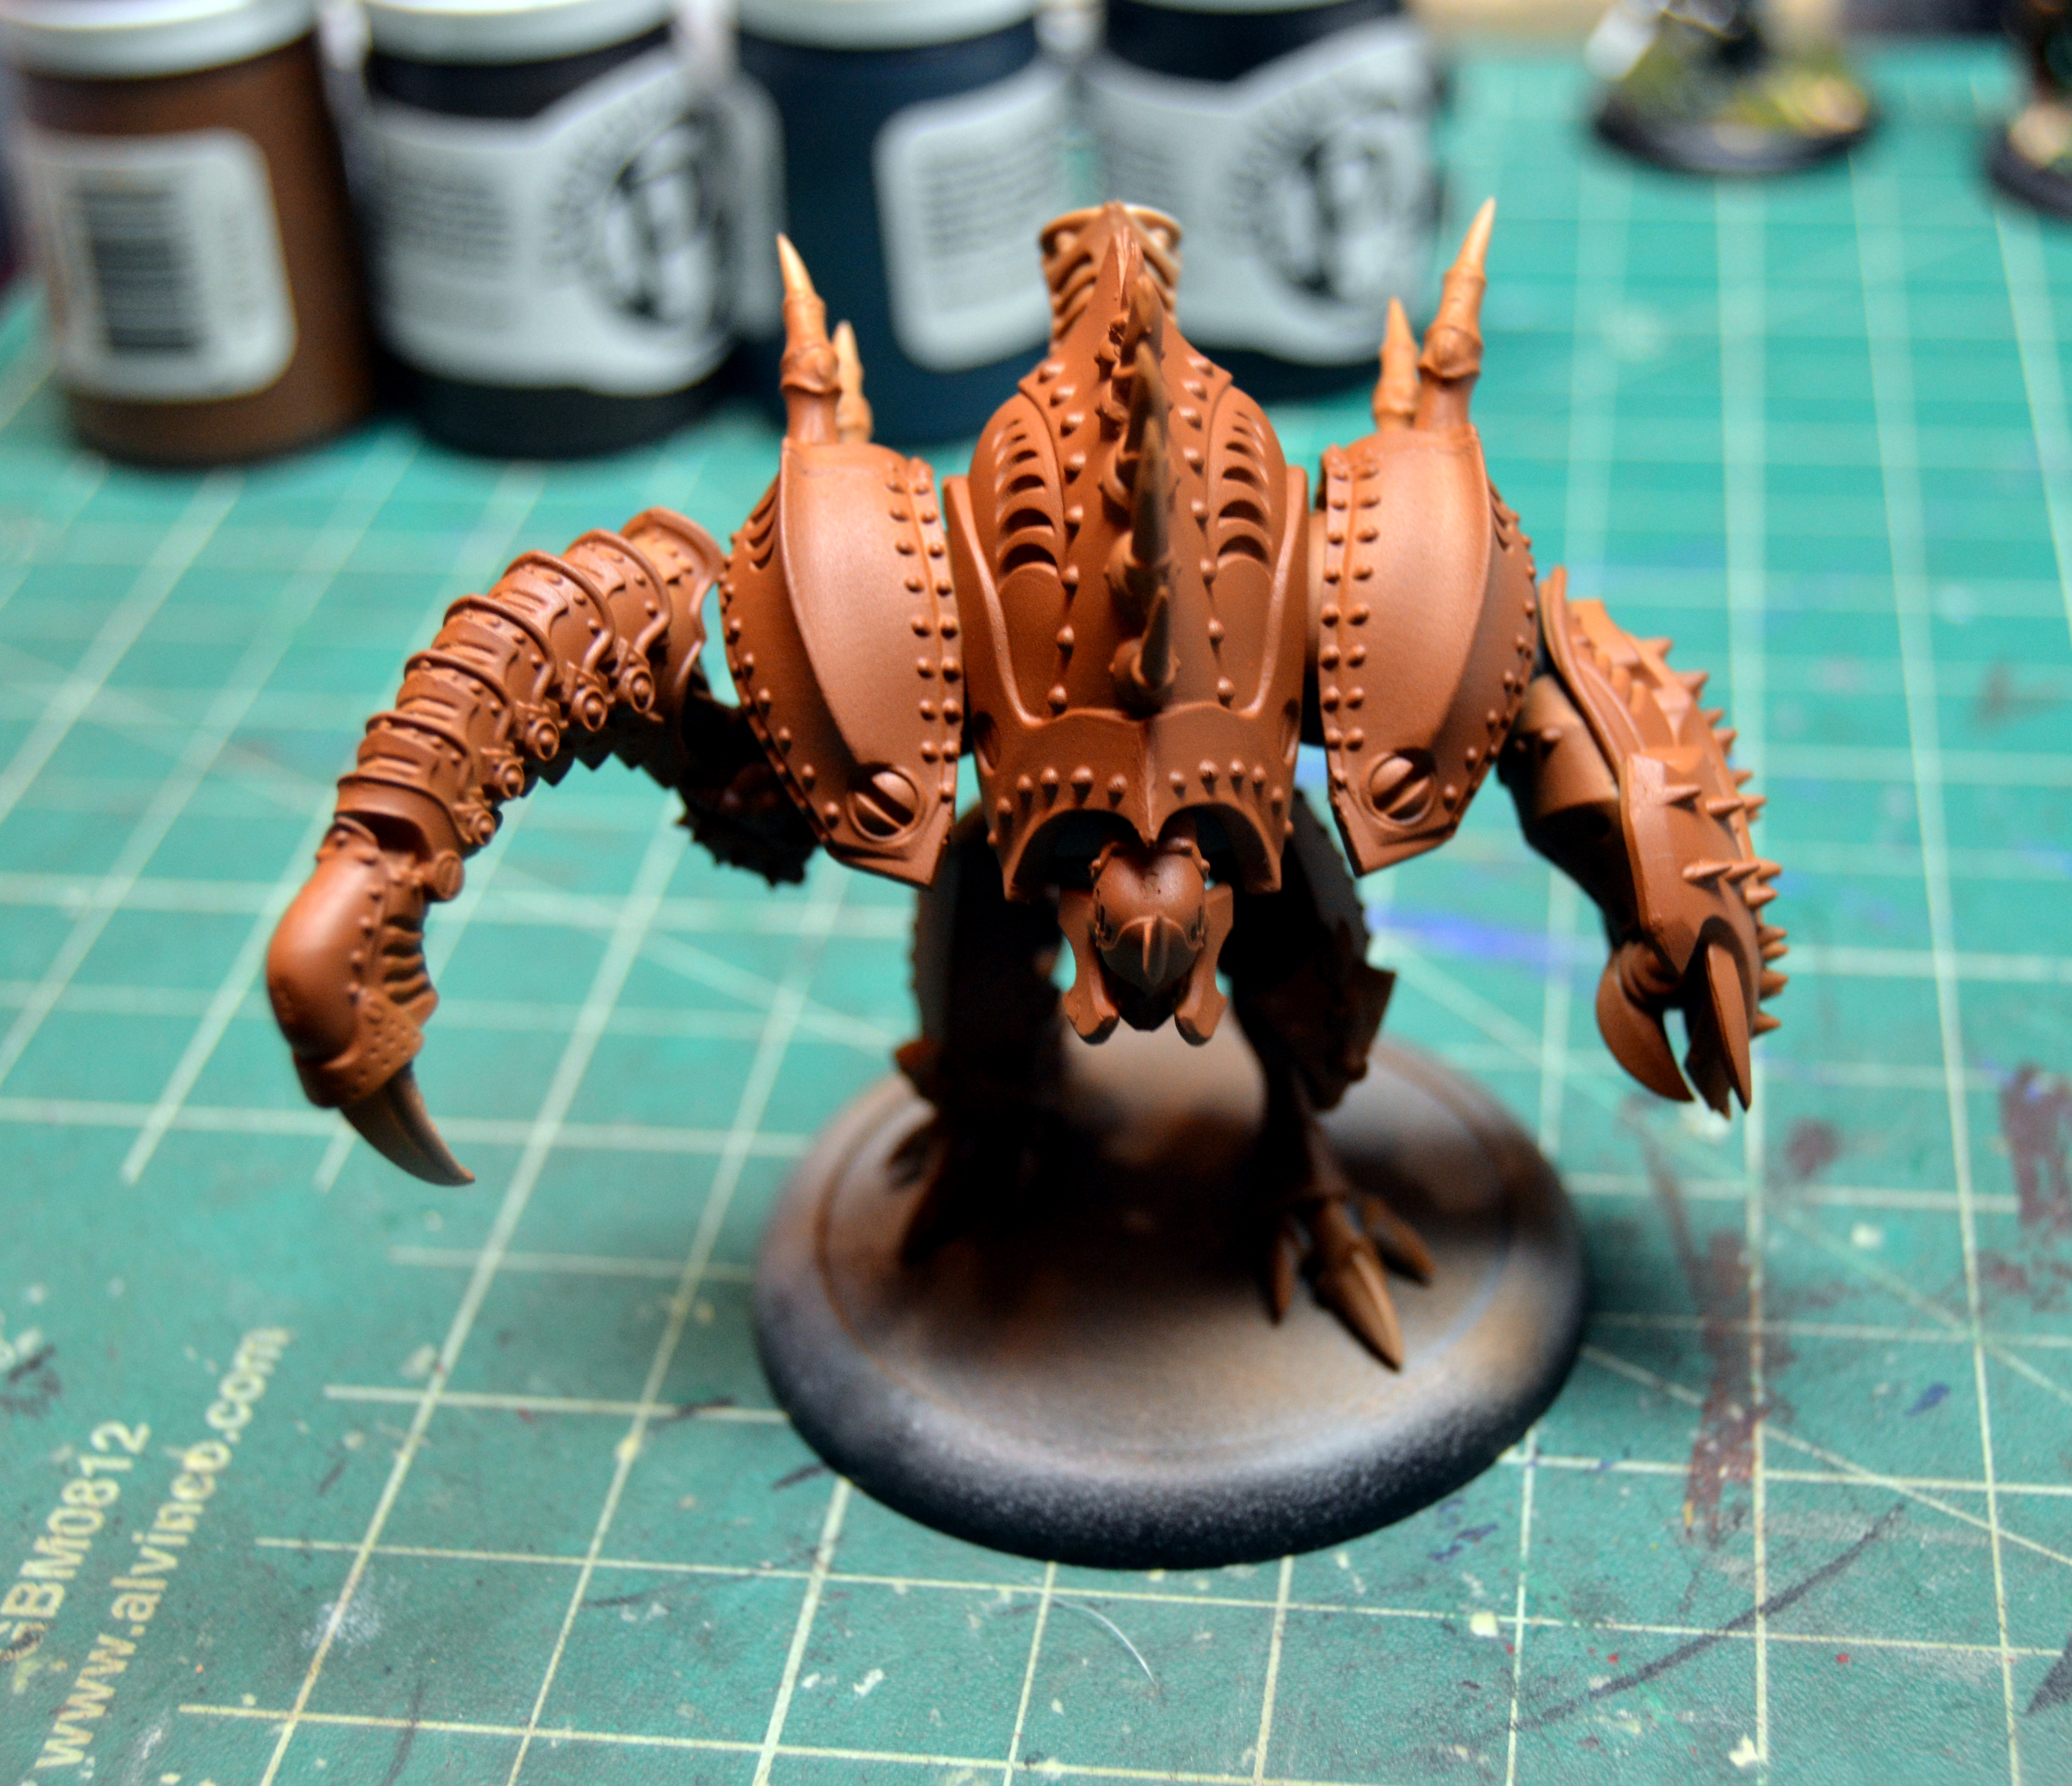
Next take a bit of blister foam, and using it as a sponge, dab on spots of Khador Red Base, Khador Red Highlight, Bloodstone, and Umbral Umber.
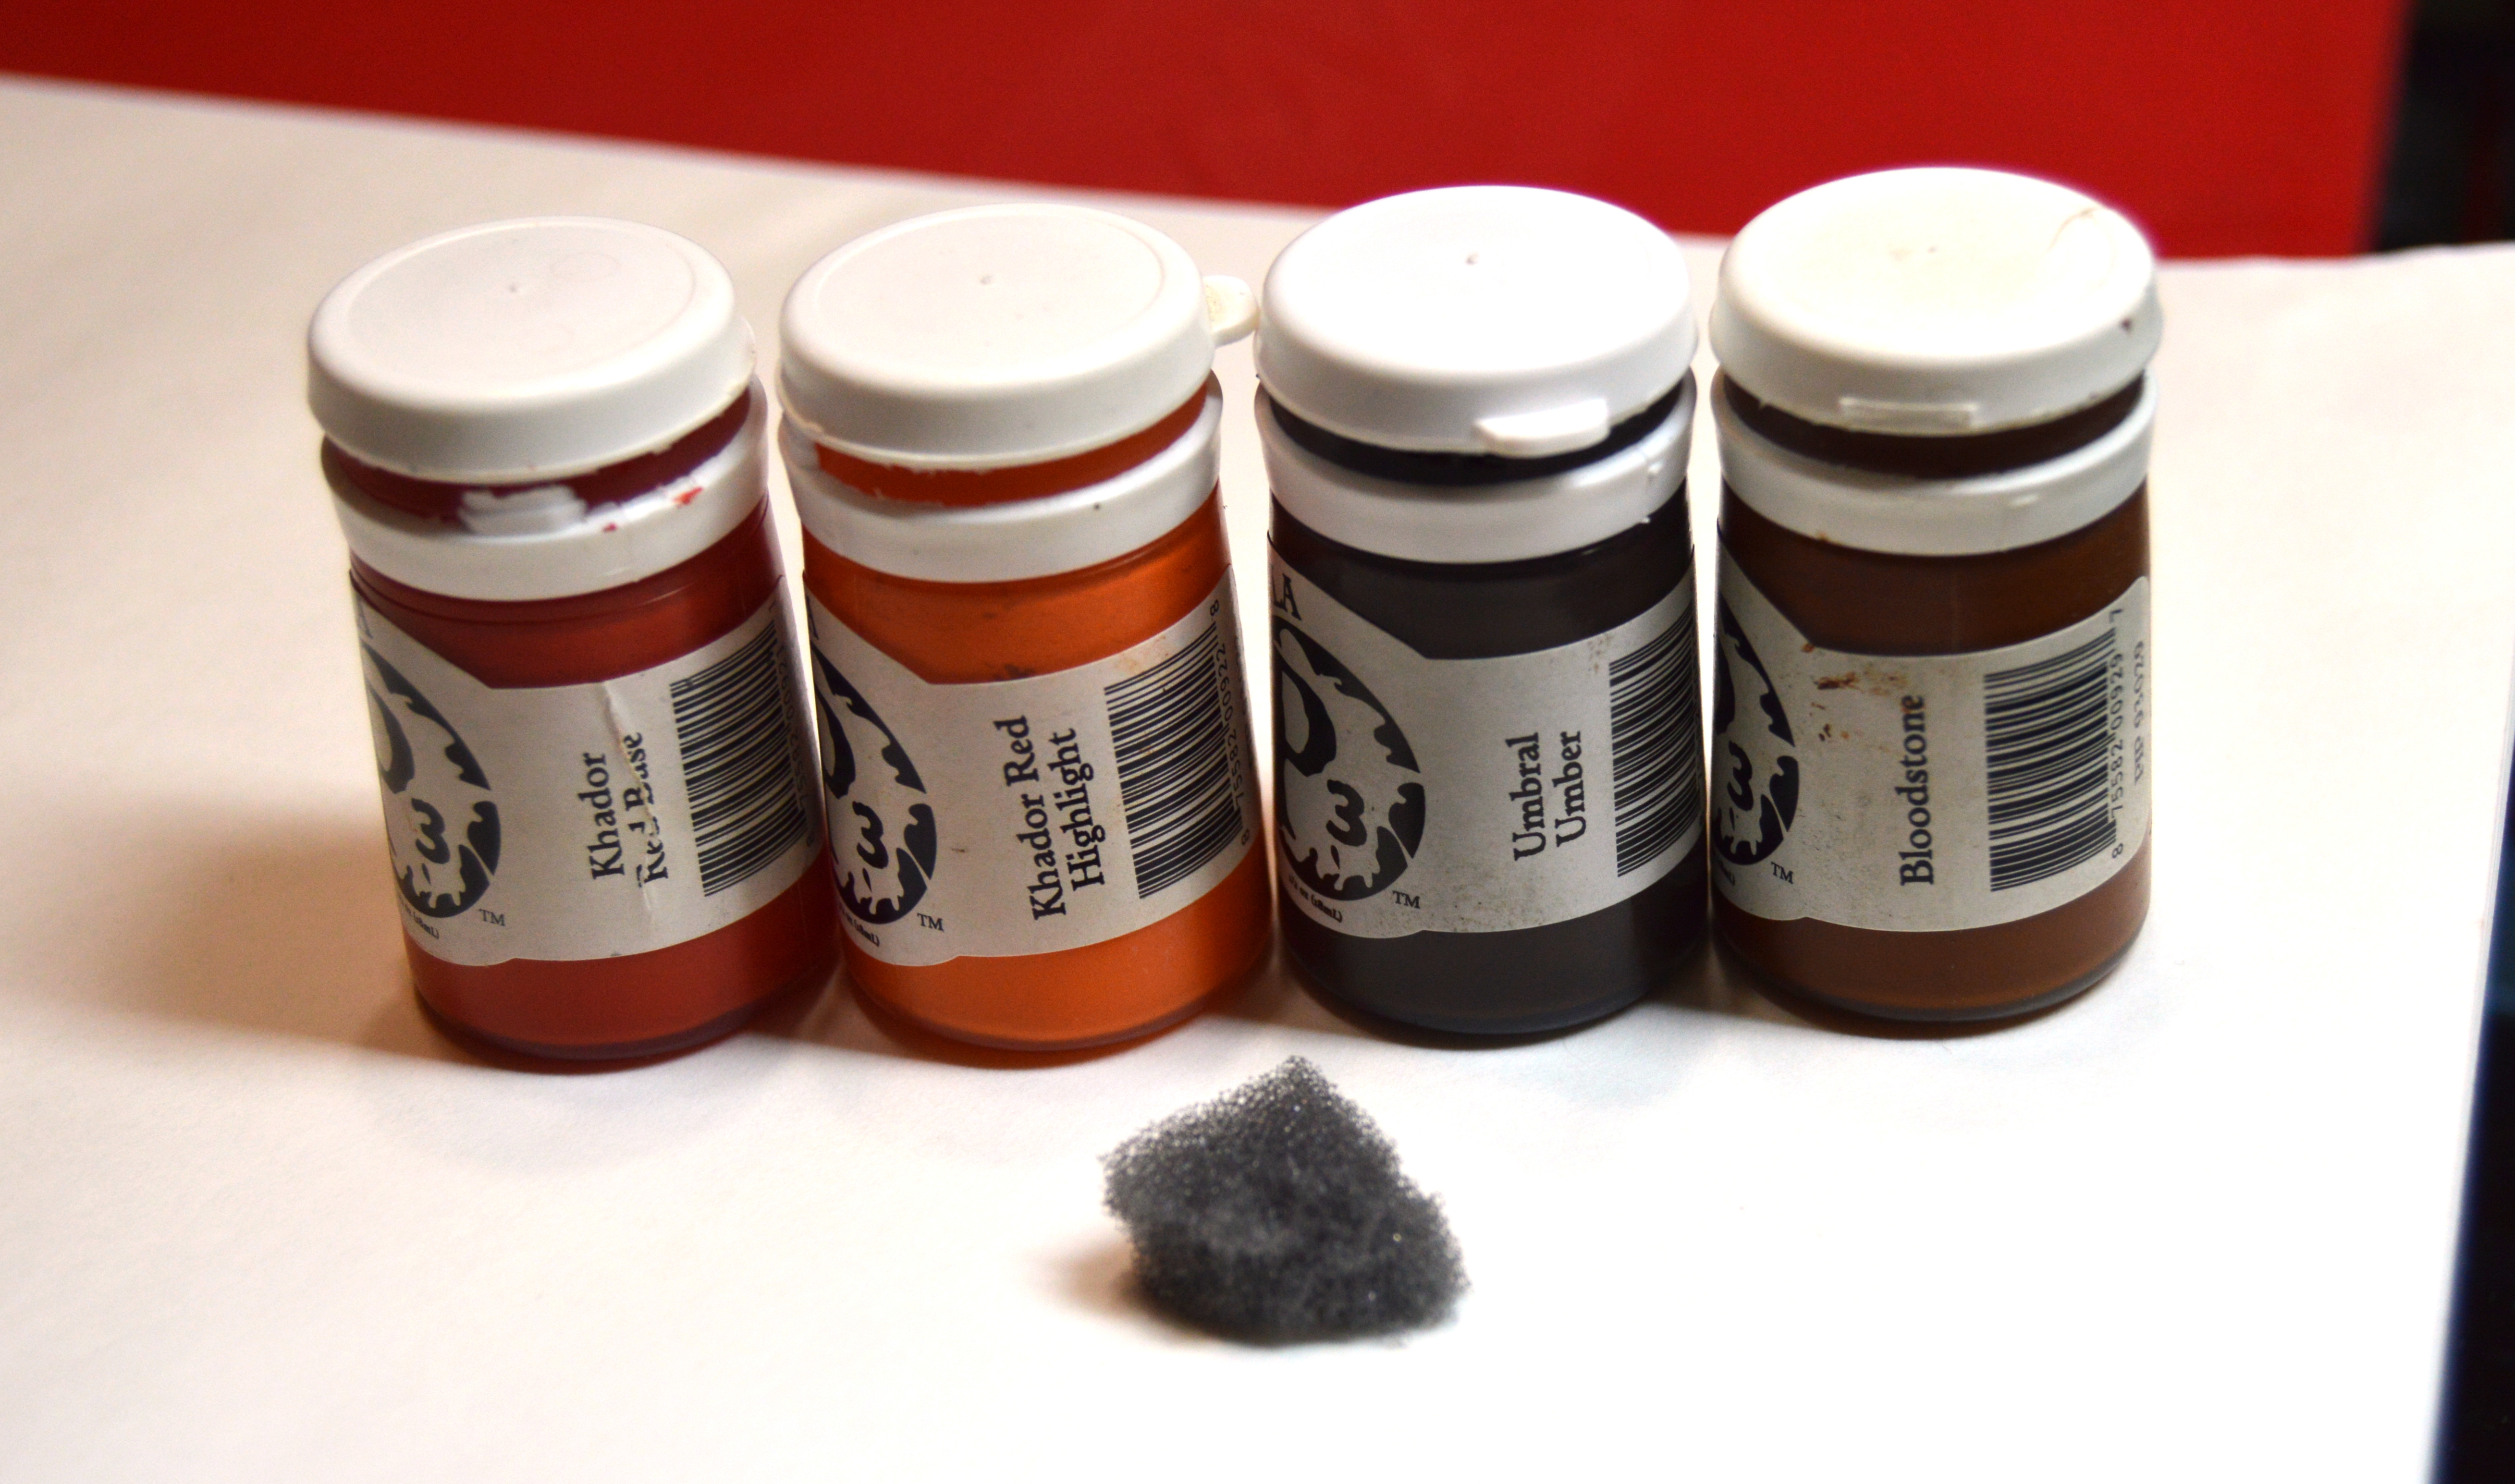
After sponging on these colors, the rust layer should have a decent amount of variation.
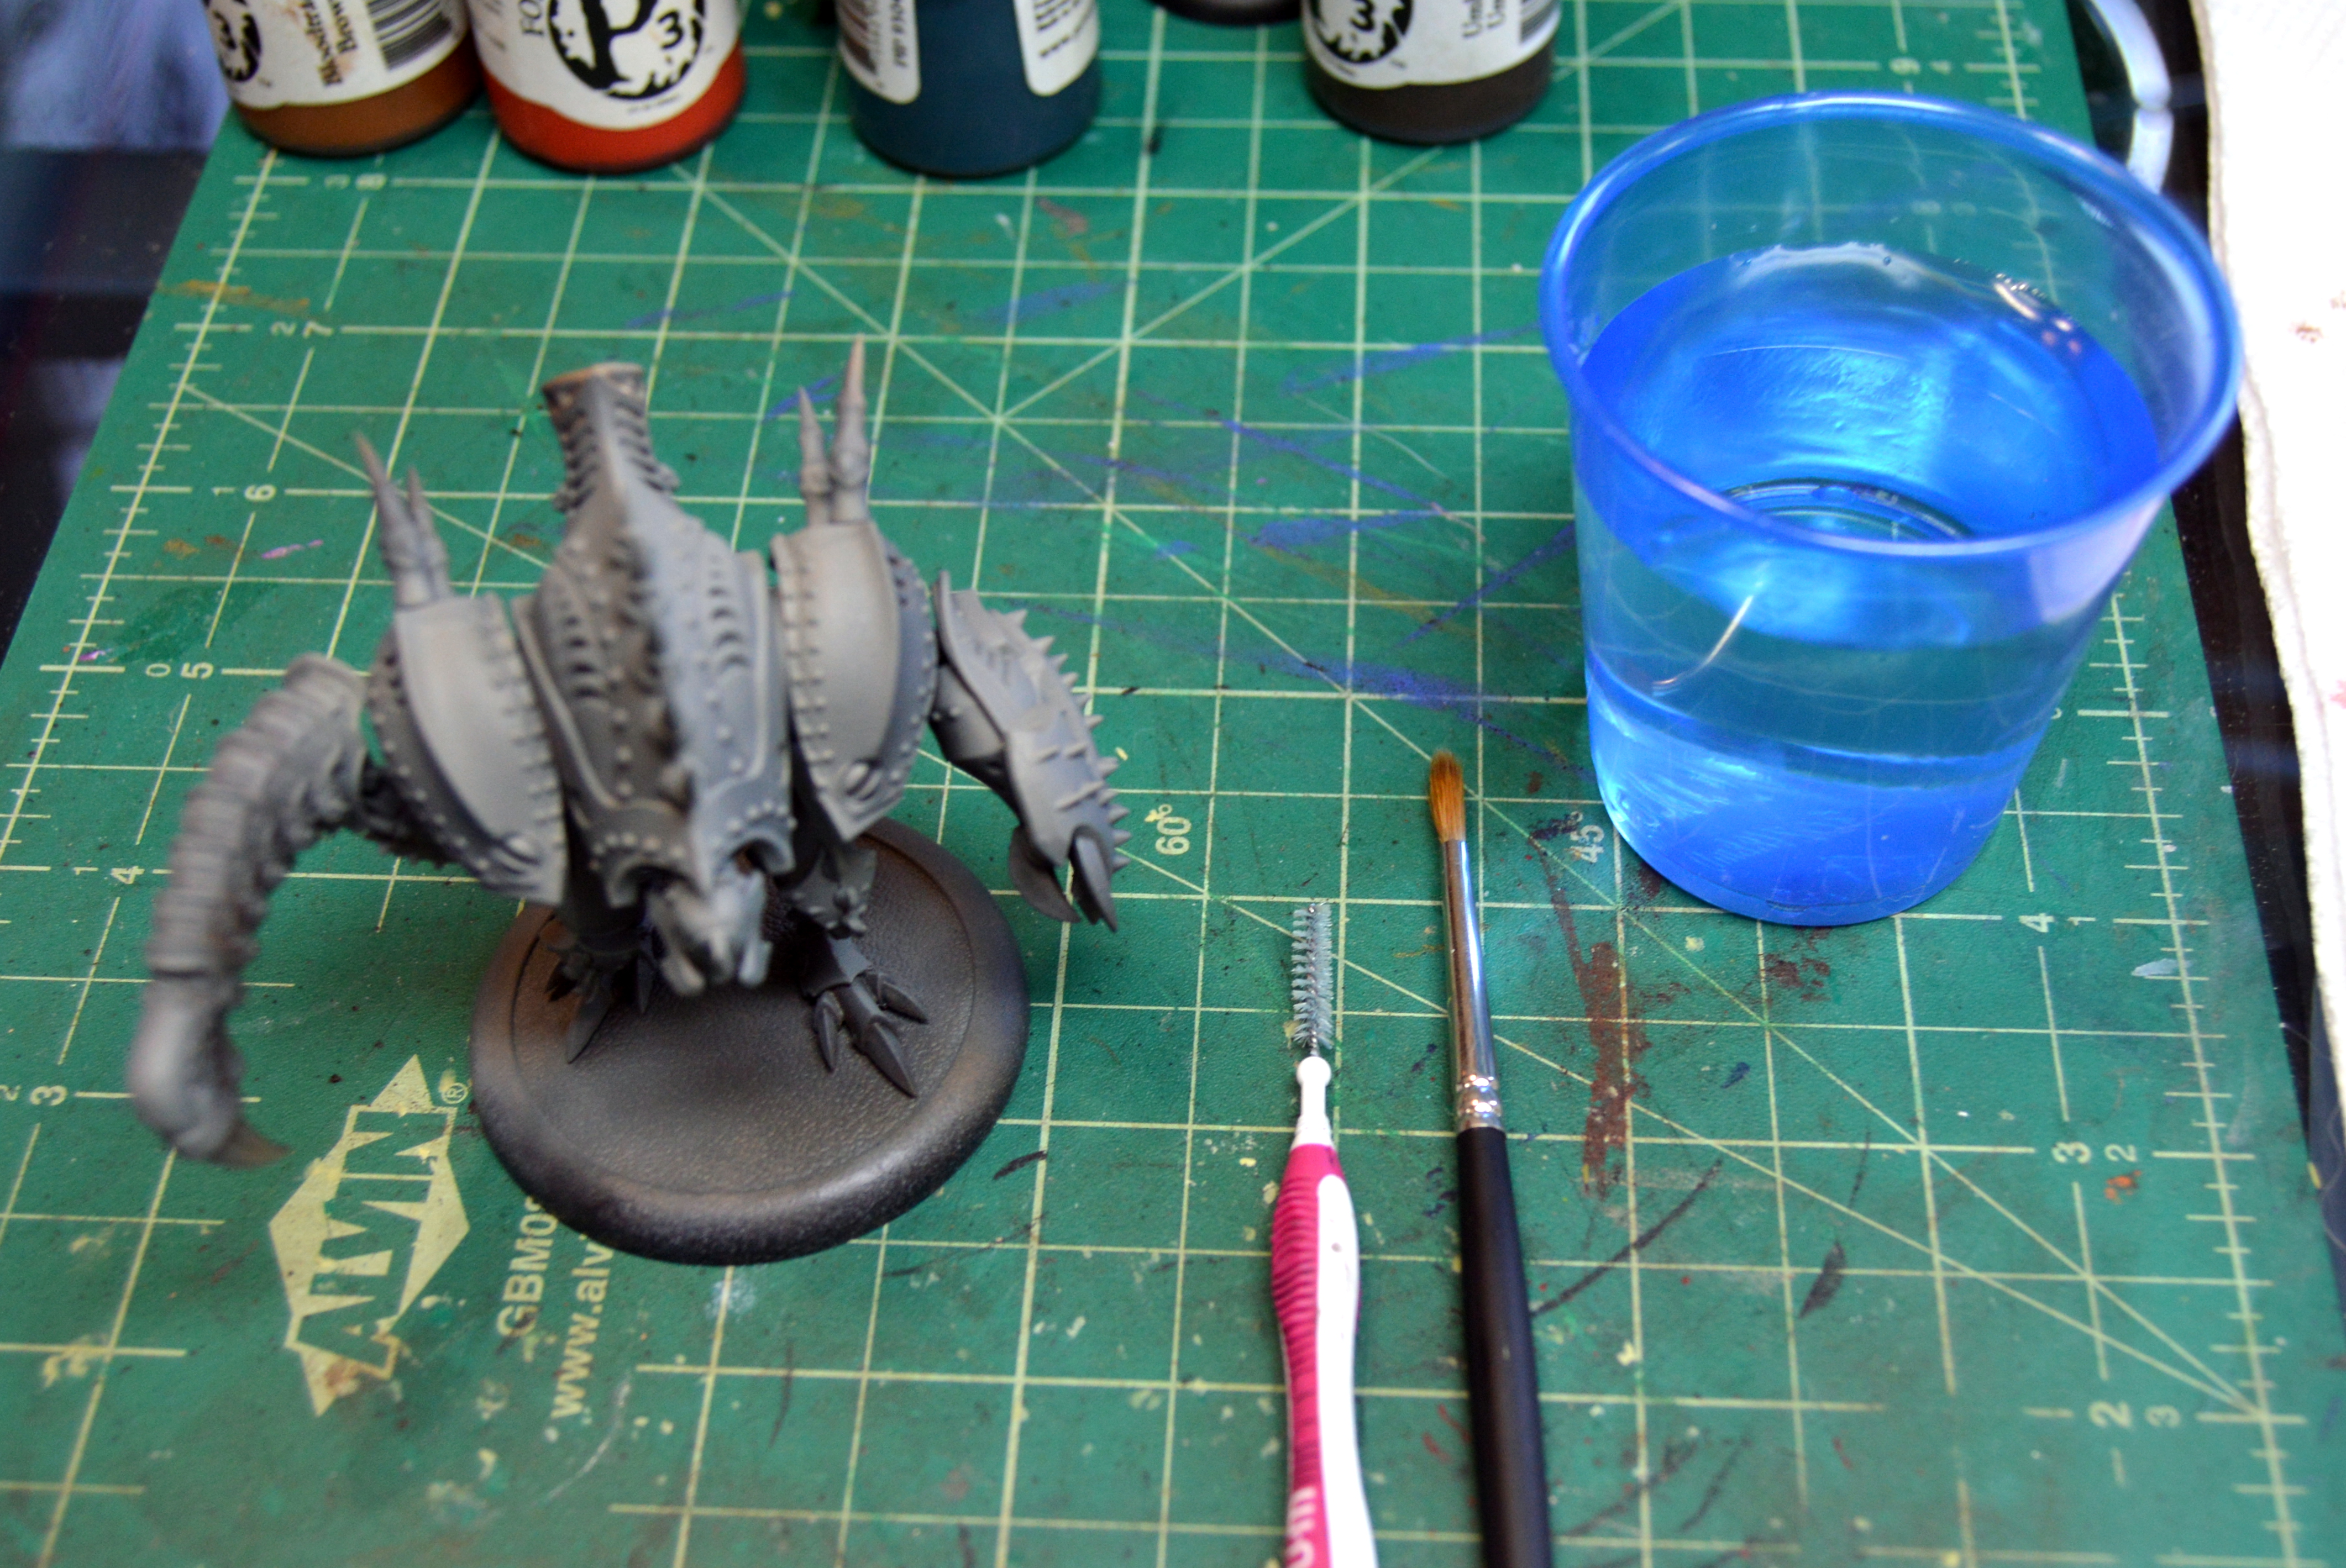
At this point, I sealed the Inflictor lightly with some Testor’s Dullcote, a spray matte varnish, to protect the rust layer in the next steps. After that had fully dried, take whatever cheap aerosol hairspray and apply two light coats to the model, letting it dry fully between coats. A hairdryer on a cool setting can speed up the drying time significantly. It is possible that the hairspray will make the model look shiny, but this is fine as it won’t stay that way.
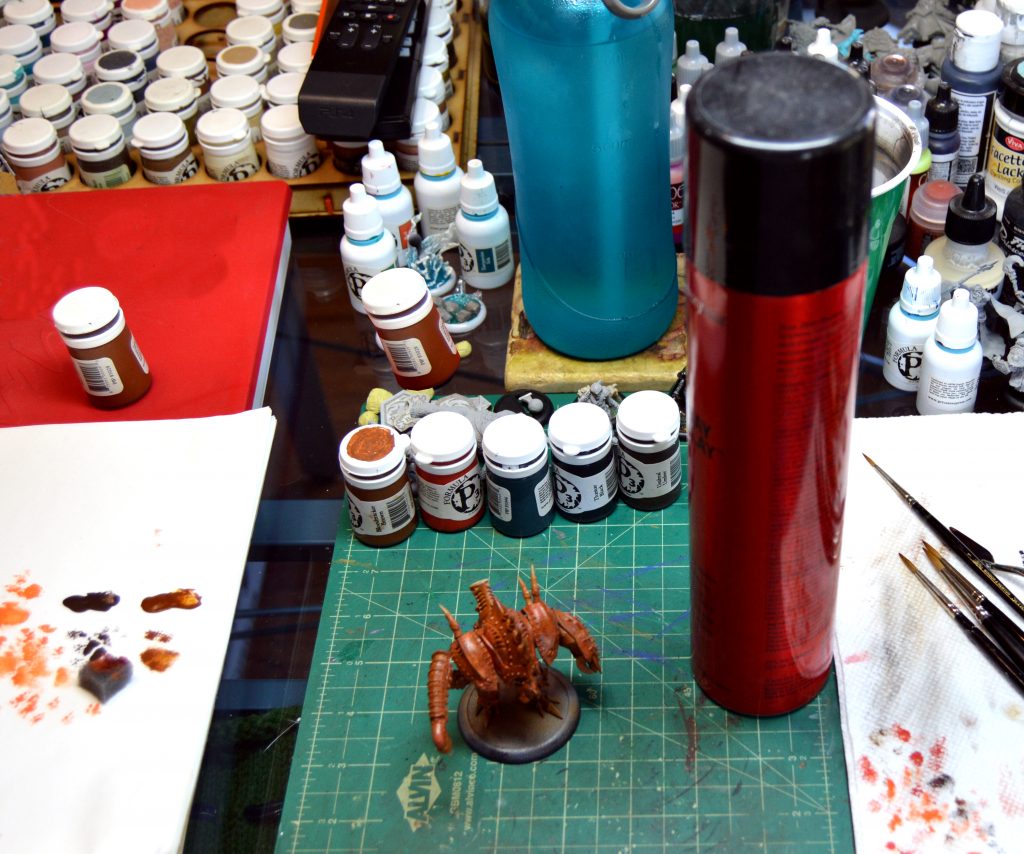 Hairspray application
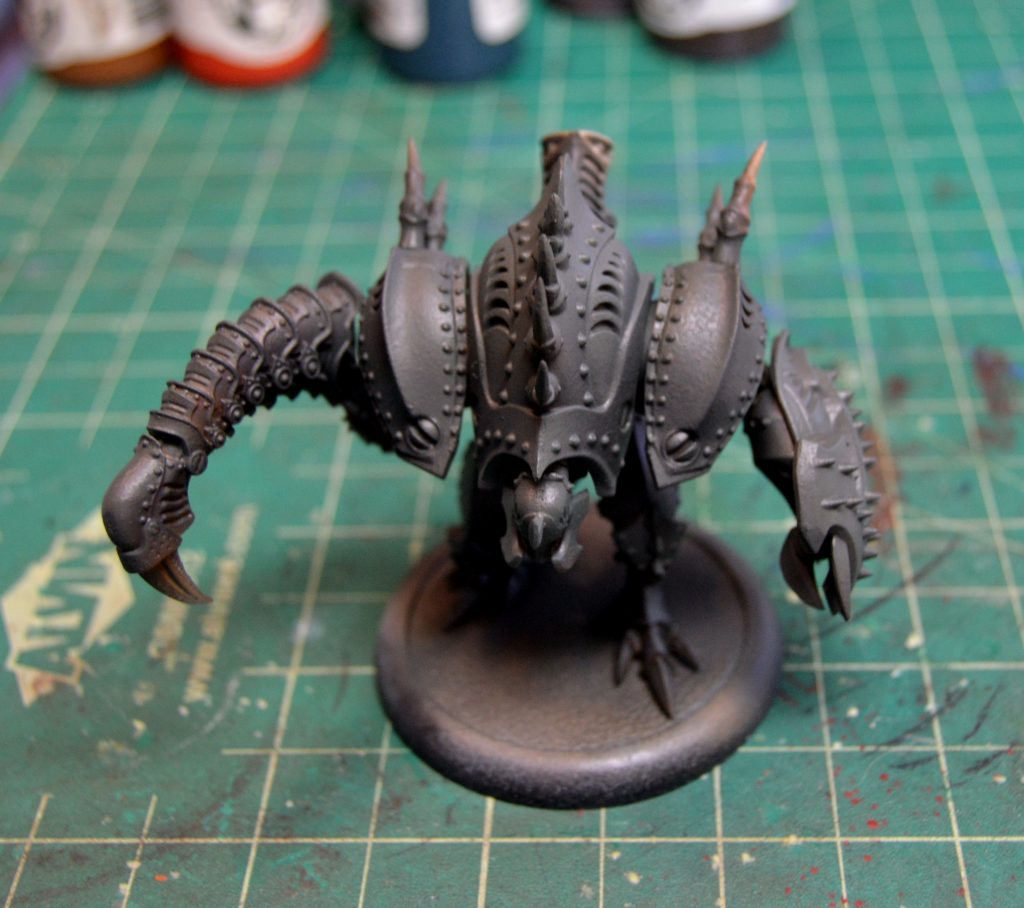
Step 3: Airbrush the Main Color
My Cryx are the standard gray scheme, so I used Cryx Bane Base, Cryx Bane Highlight, and Thamar Black. Using the airbrush is crucial to making this weathering technique work since it applies paint in very thin layers, much more so than what can be achieved with a brush. When airbrushing, I prefer to start with the darkest shadow color, and work my way all the way up to the highest highlight. I start with mostly Thamar Black, mixed with a little Cryx Bane Base, then add more Cryx Bane Base for the next layer. Straight Cryx Bane Base is the third layer and serves as the midtone. First highlight is Cryx Bane Base mixed half and half with Cryx Bane Highlight, and finally the last highlight is straight Cryx Bane Highlight.
 Shadows and Midtone
 Full Highlights
Step 4: Exposing the Rust
For this part you need a clean cup of water, a bristled dental pick, and a cheap, soft paint brush.
With the wet dental pick gently scrub away at the gray until the rust color underneath is sufficiently exposed. The water dissolves the hairspray, and weakens the paint on top of it so that it can be removed. Use the clean paint brush for cleanup of any paint flakes that may not be removed with the dental pick. Focus rust spots on areas that would be prone to them, anywhere water might pool and sit, around rivets or other weak spots, or anywhere the ‘jack might be prone to being scratched or damaged.
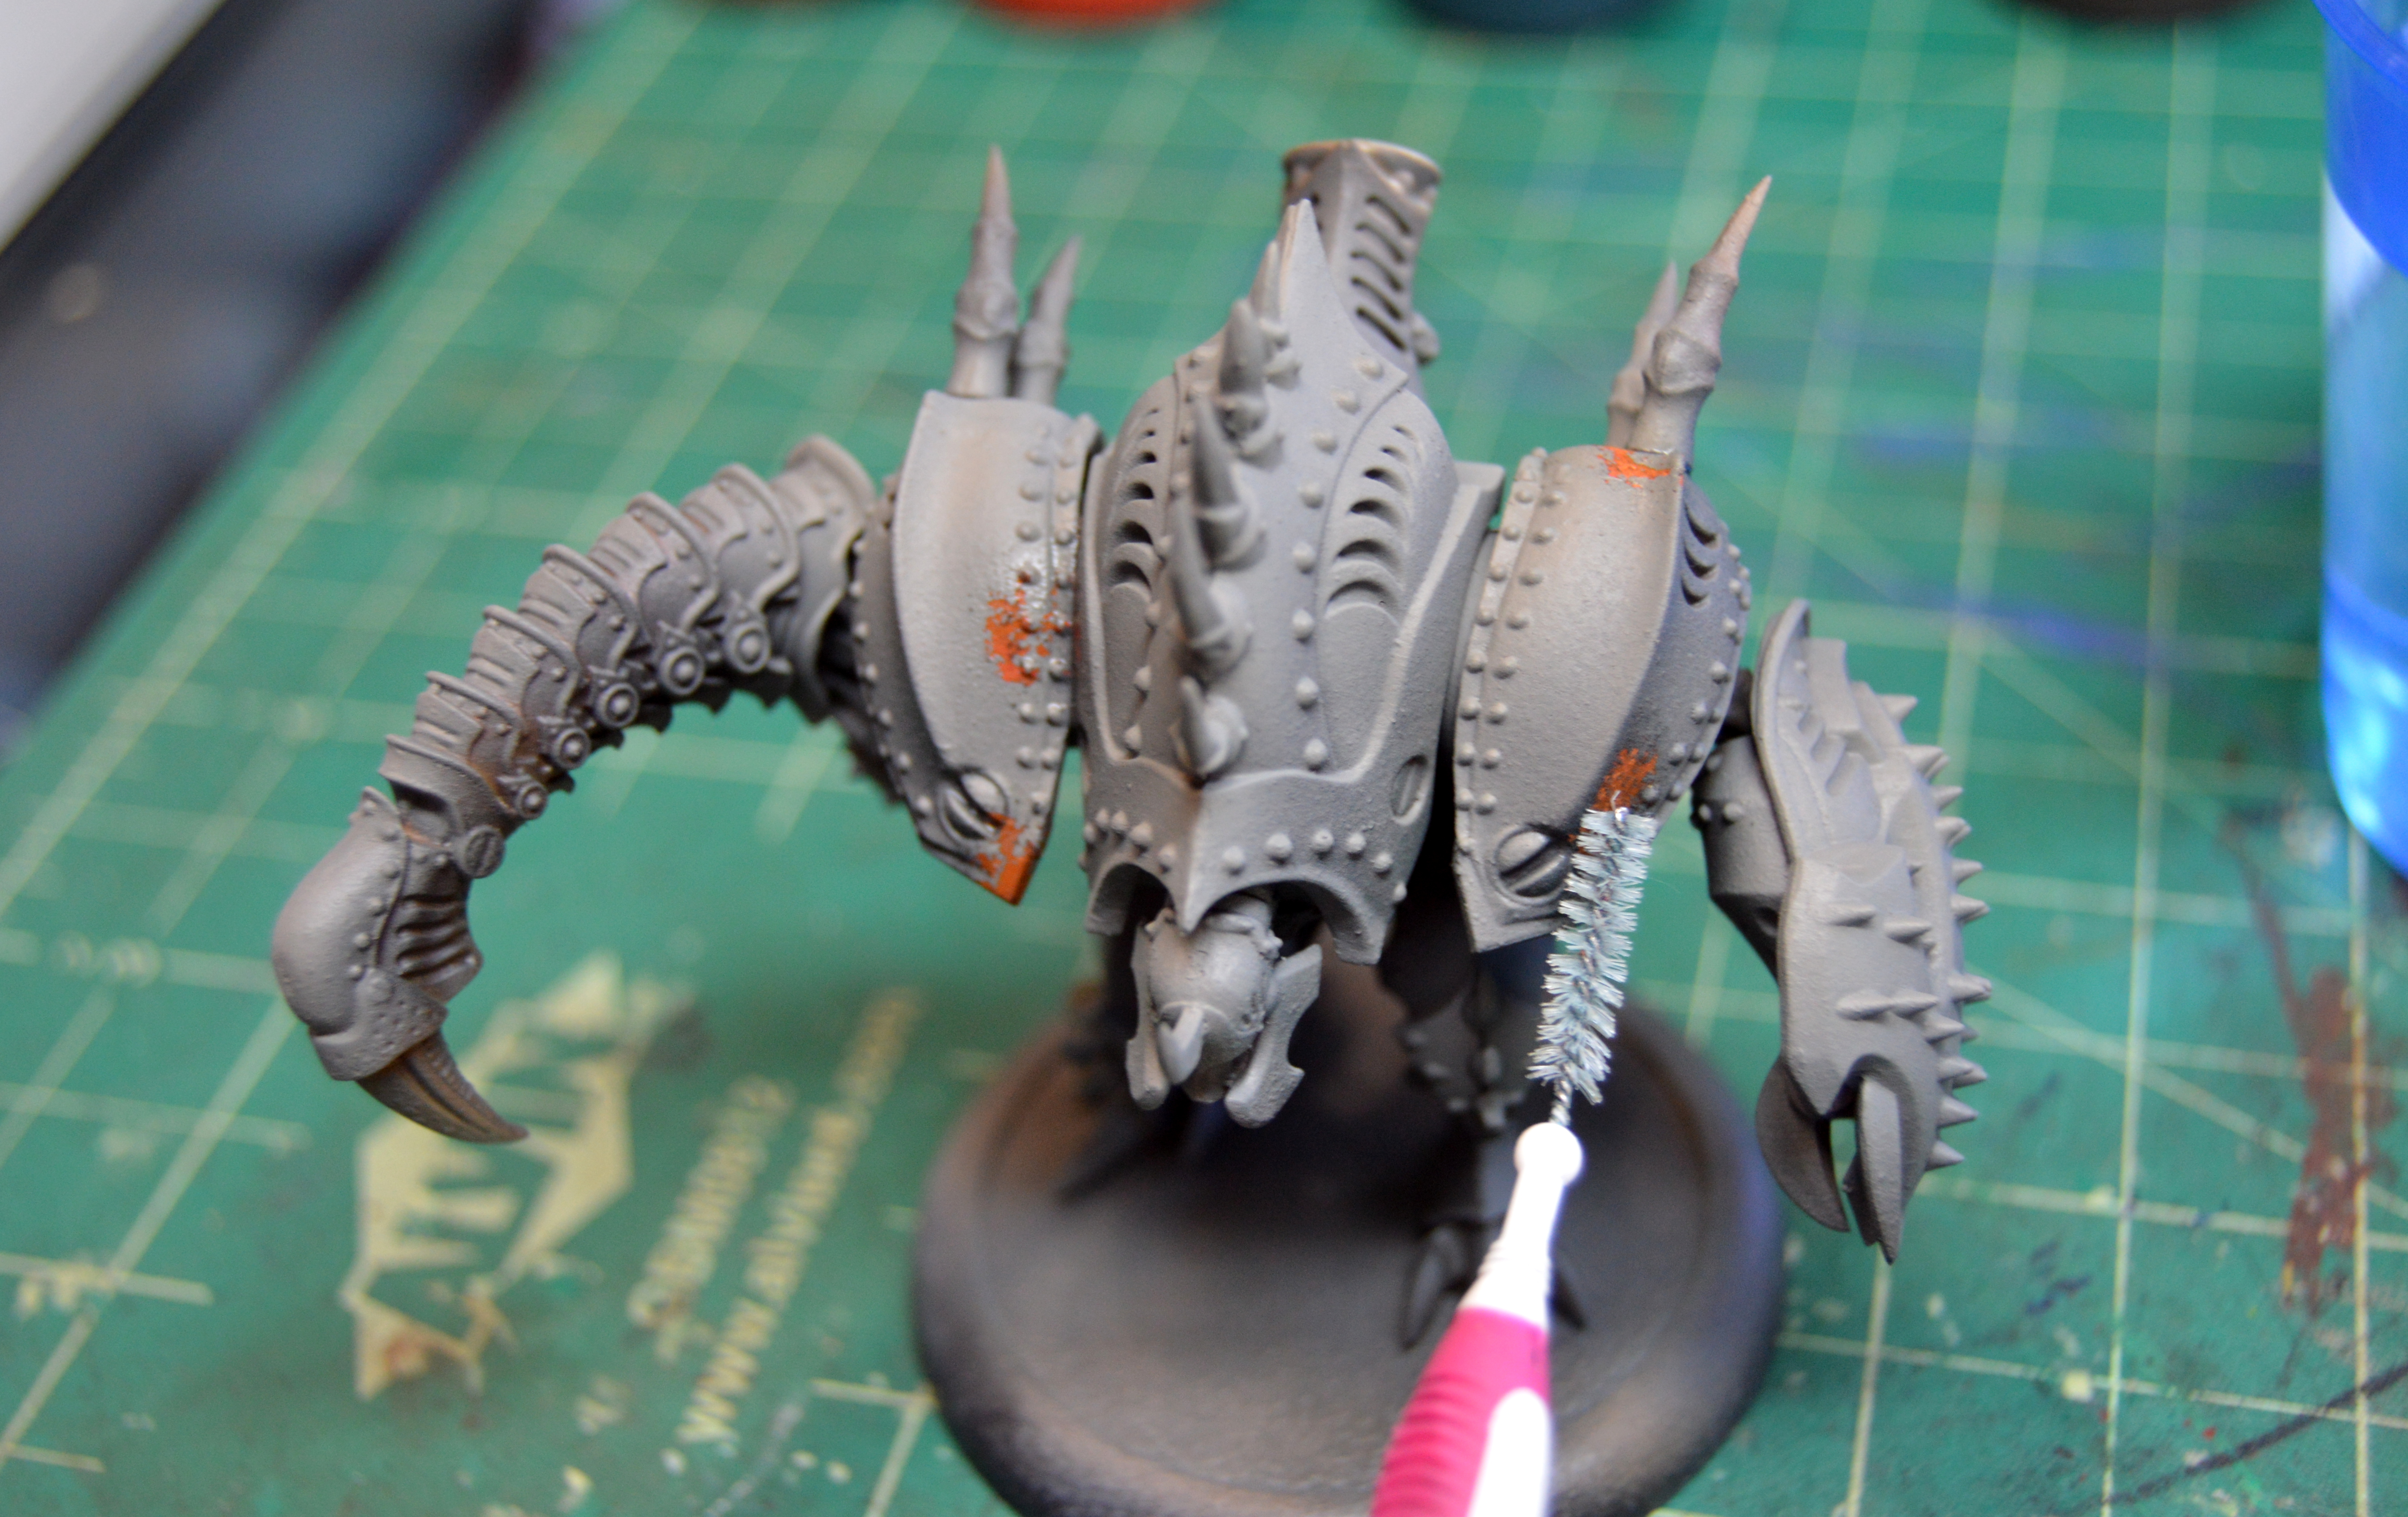
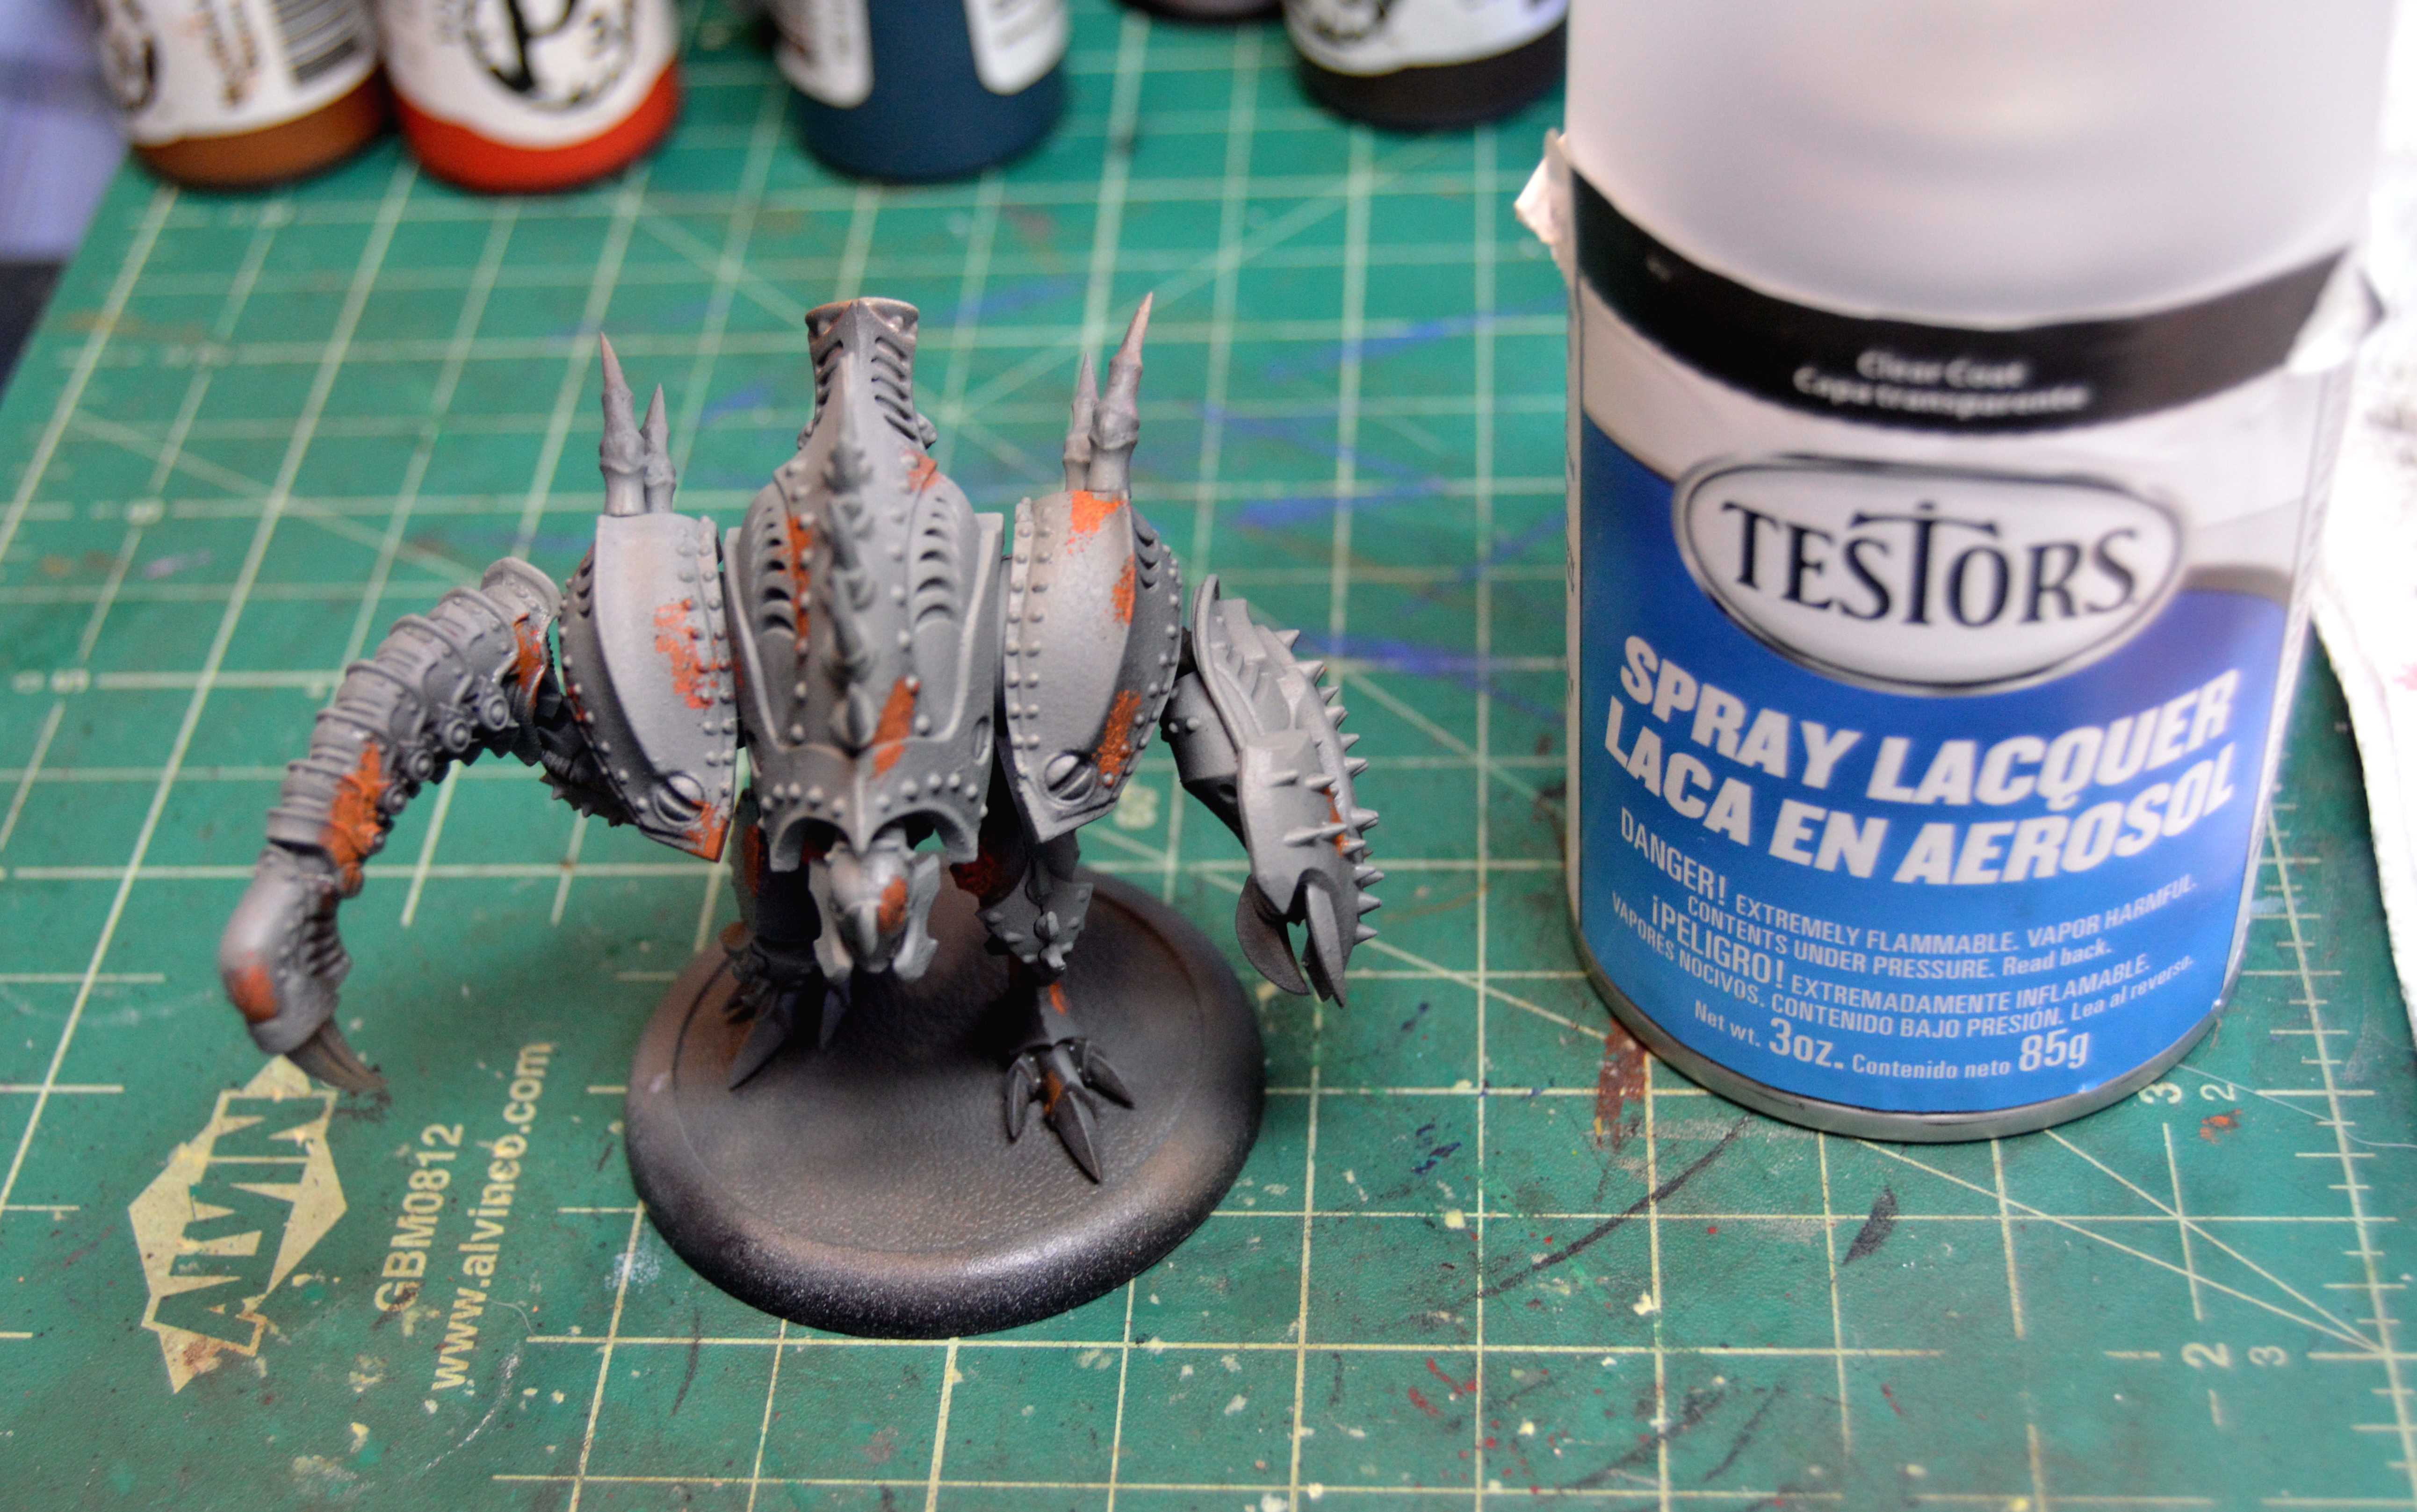
It’s impossible to fully control this process, you get to choose where and approximately how much paint comes off, but not the exact shape or outline of the rust spots. Embrace the chaos, it makes the rust patches look more natural! When the ‘jack is as corroded as desired, make sure it’s fully dry, and then seal the model again with Dullcote. This will protect the work thus far, and prevent the grays from chipping down to the rust any more.
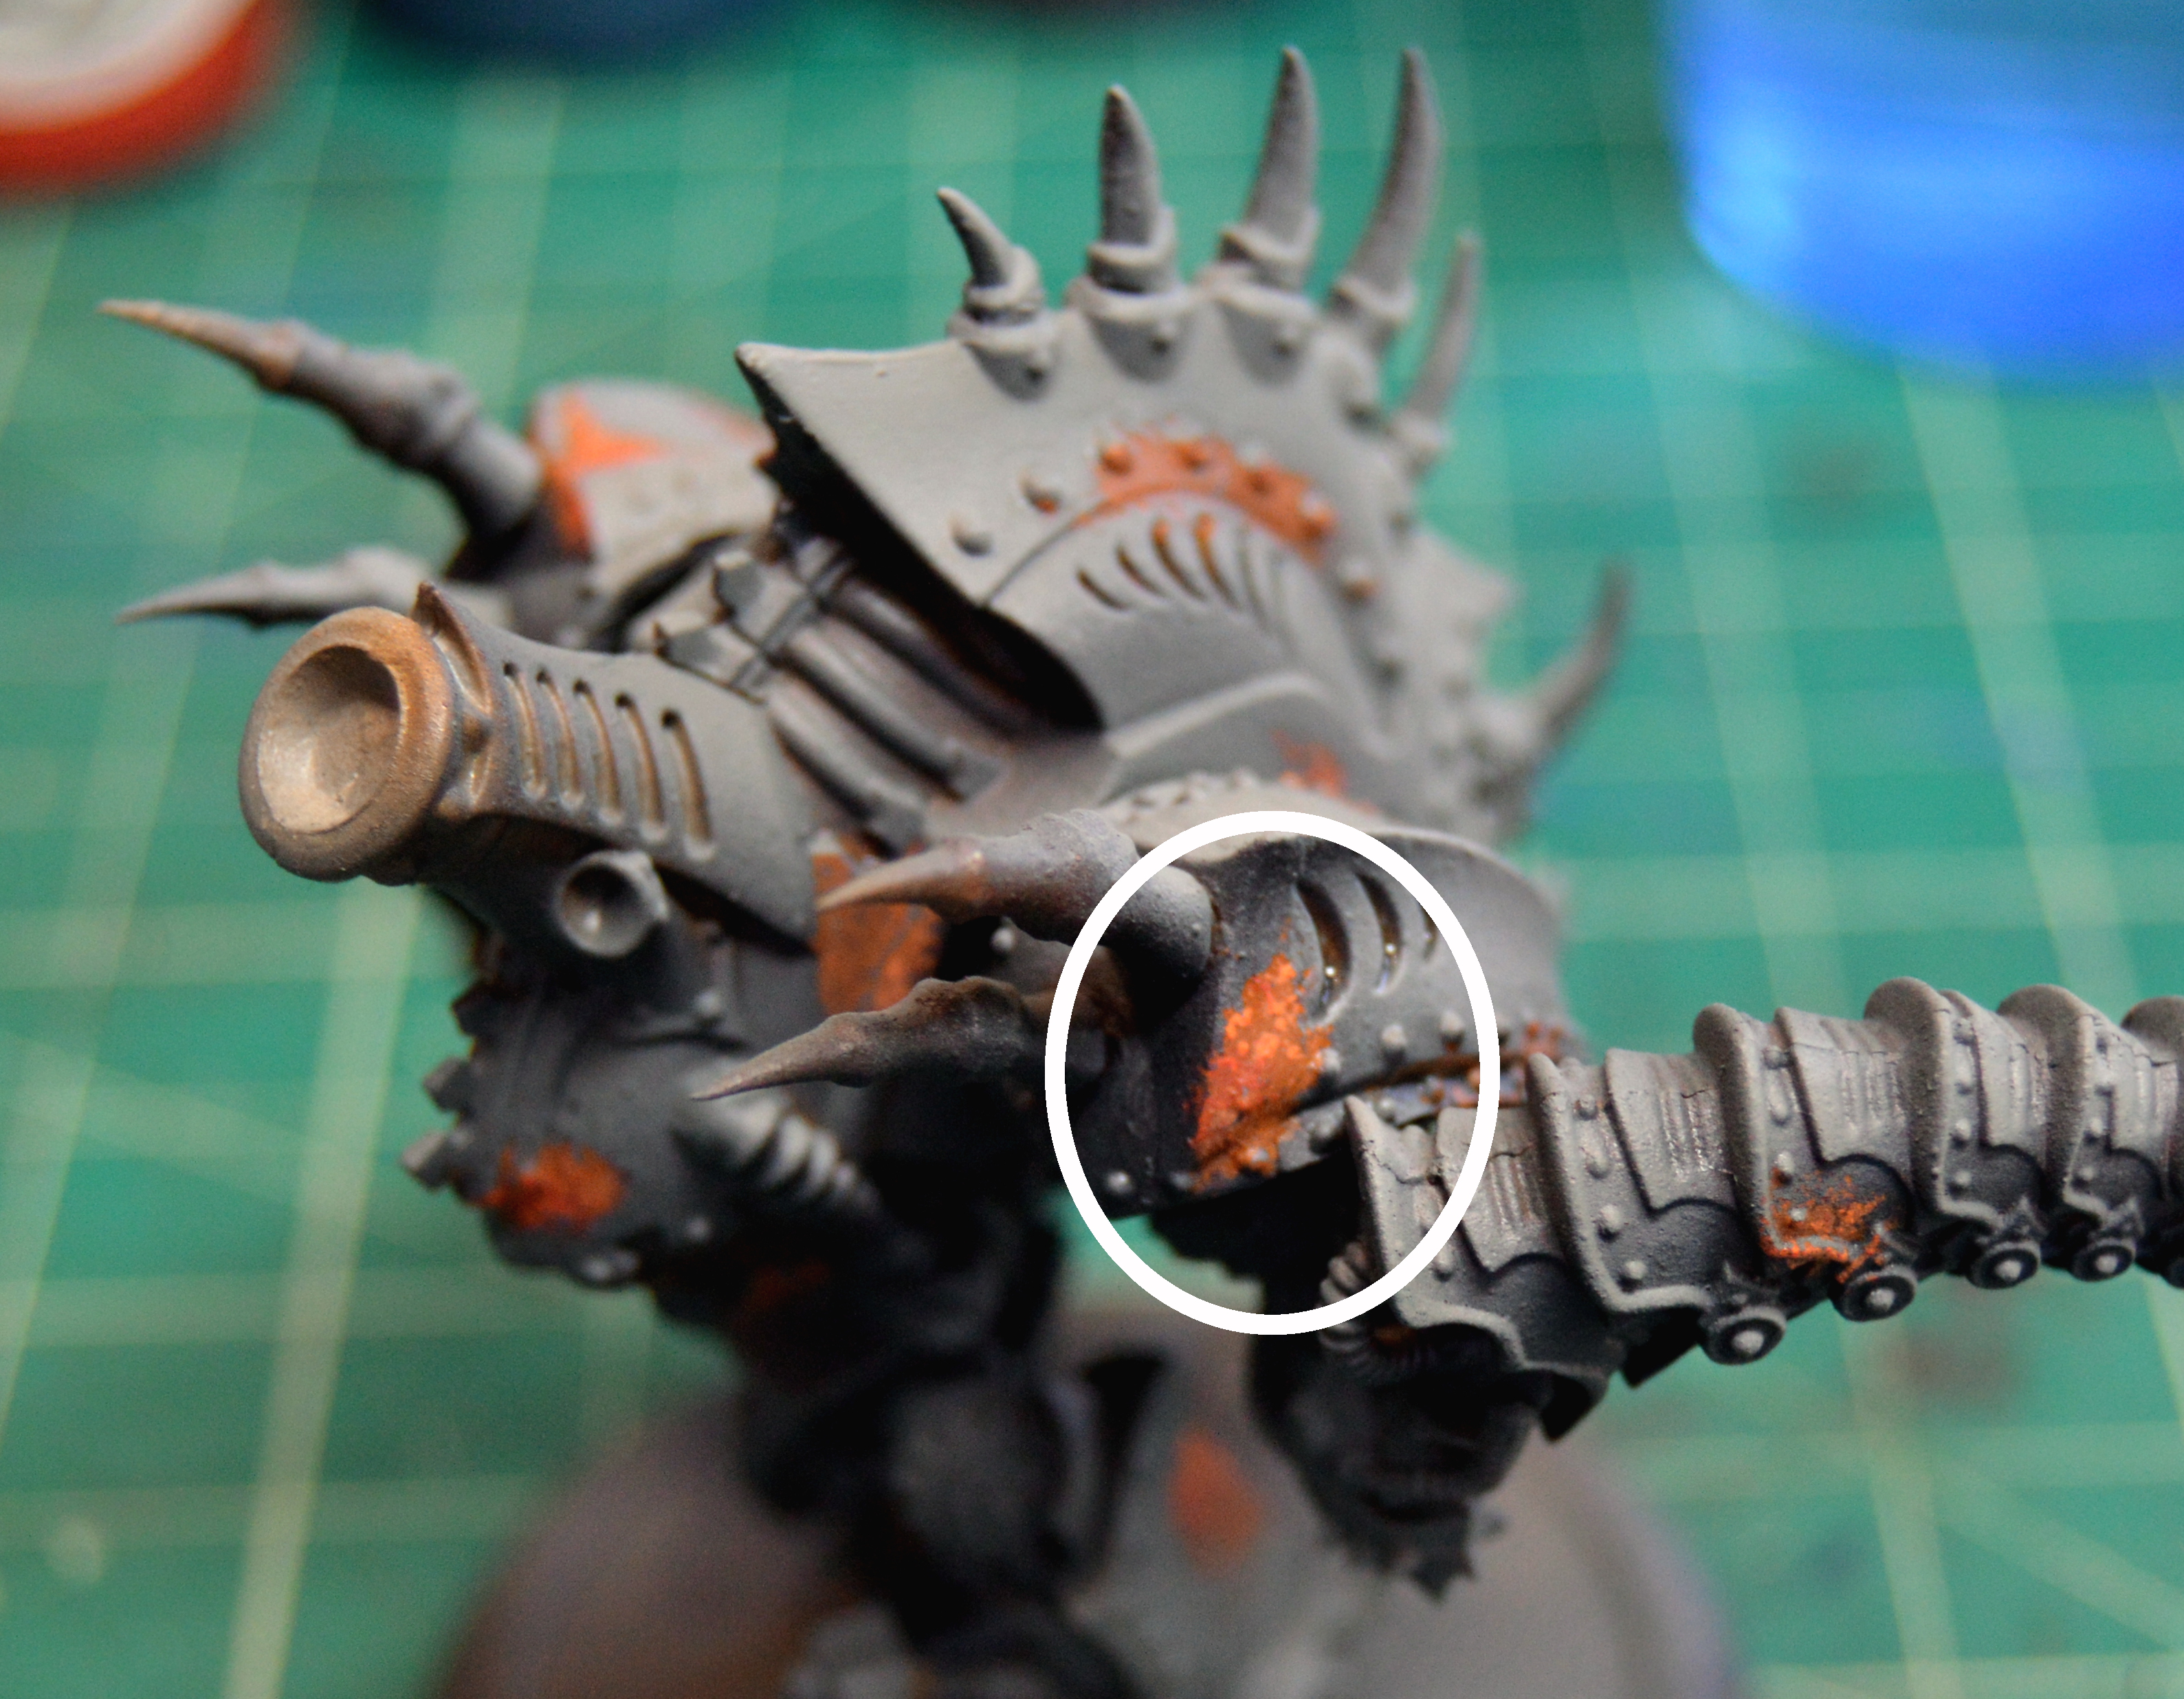
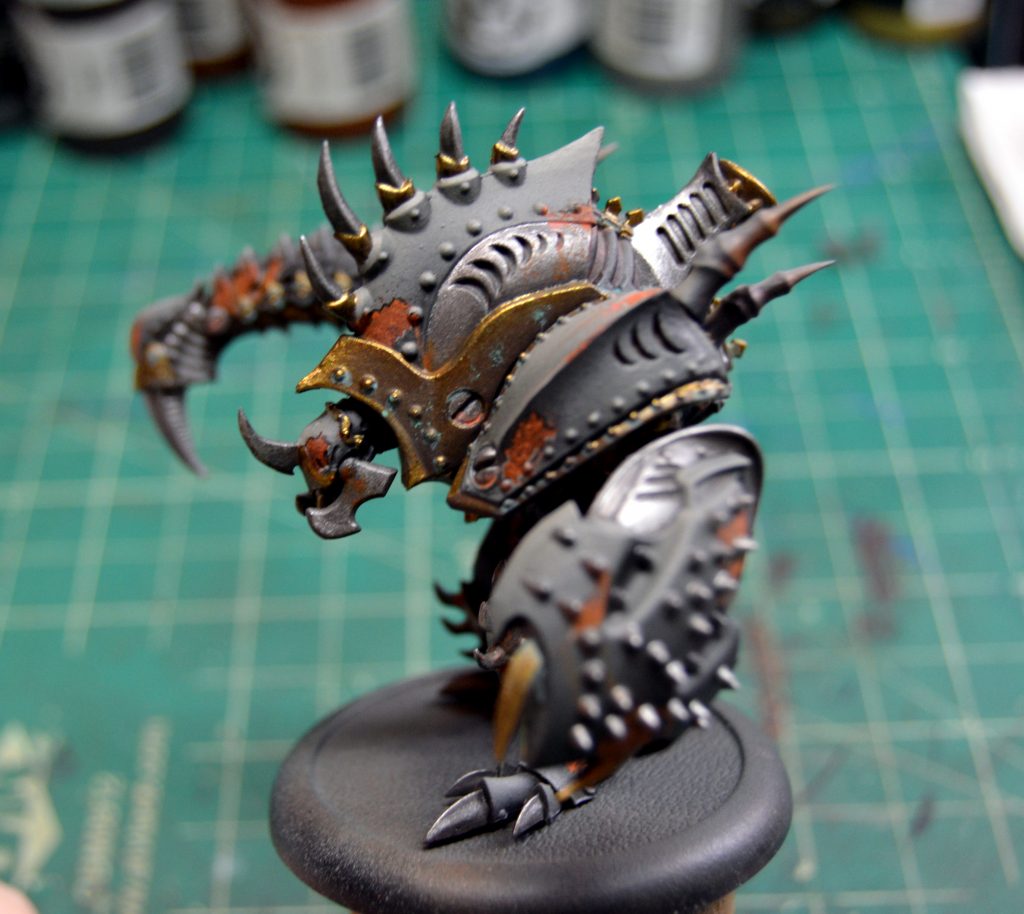
Now this ‘jack is good and rusty!
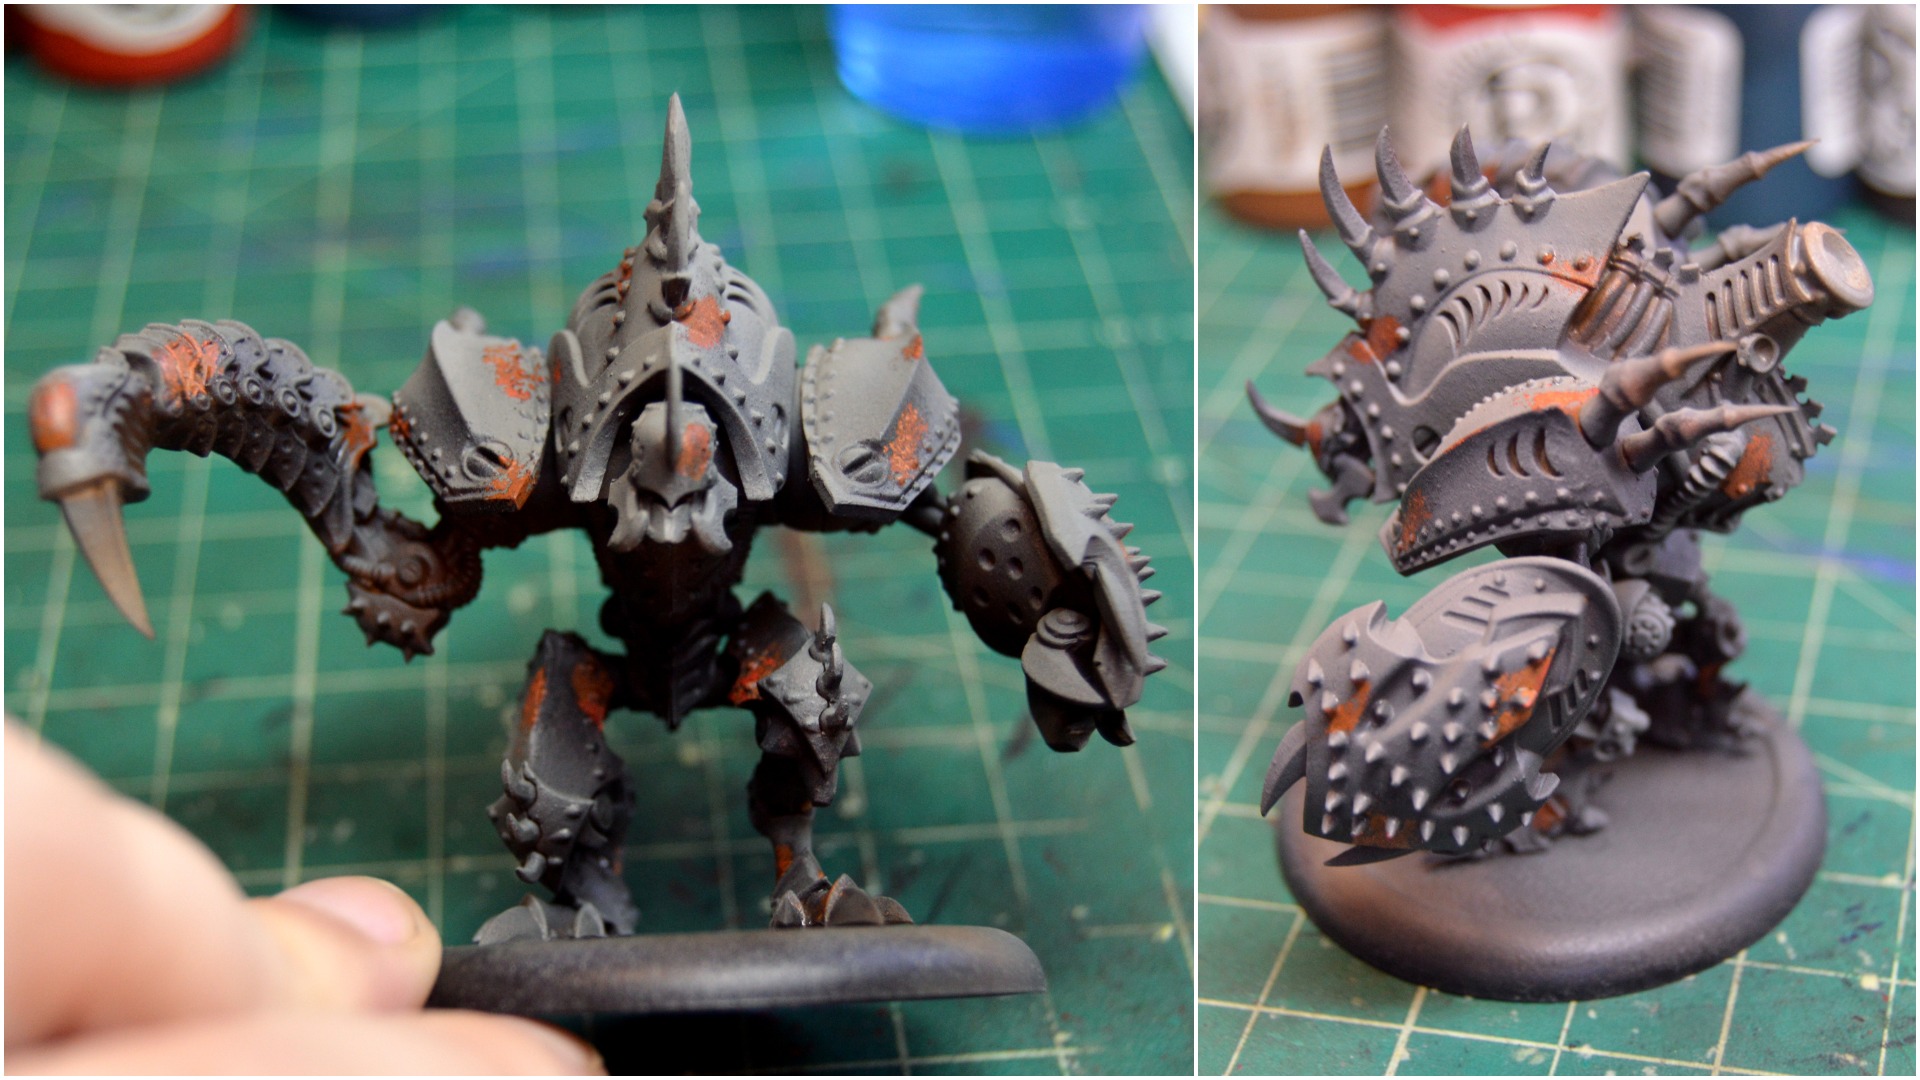
Making the rust varied in the step with the sponge really gives it an extra boost of realism. Check out the circled area to see the detail inside the rust spots.
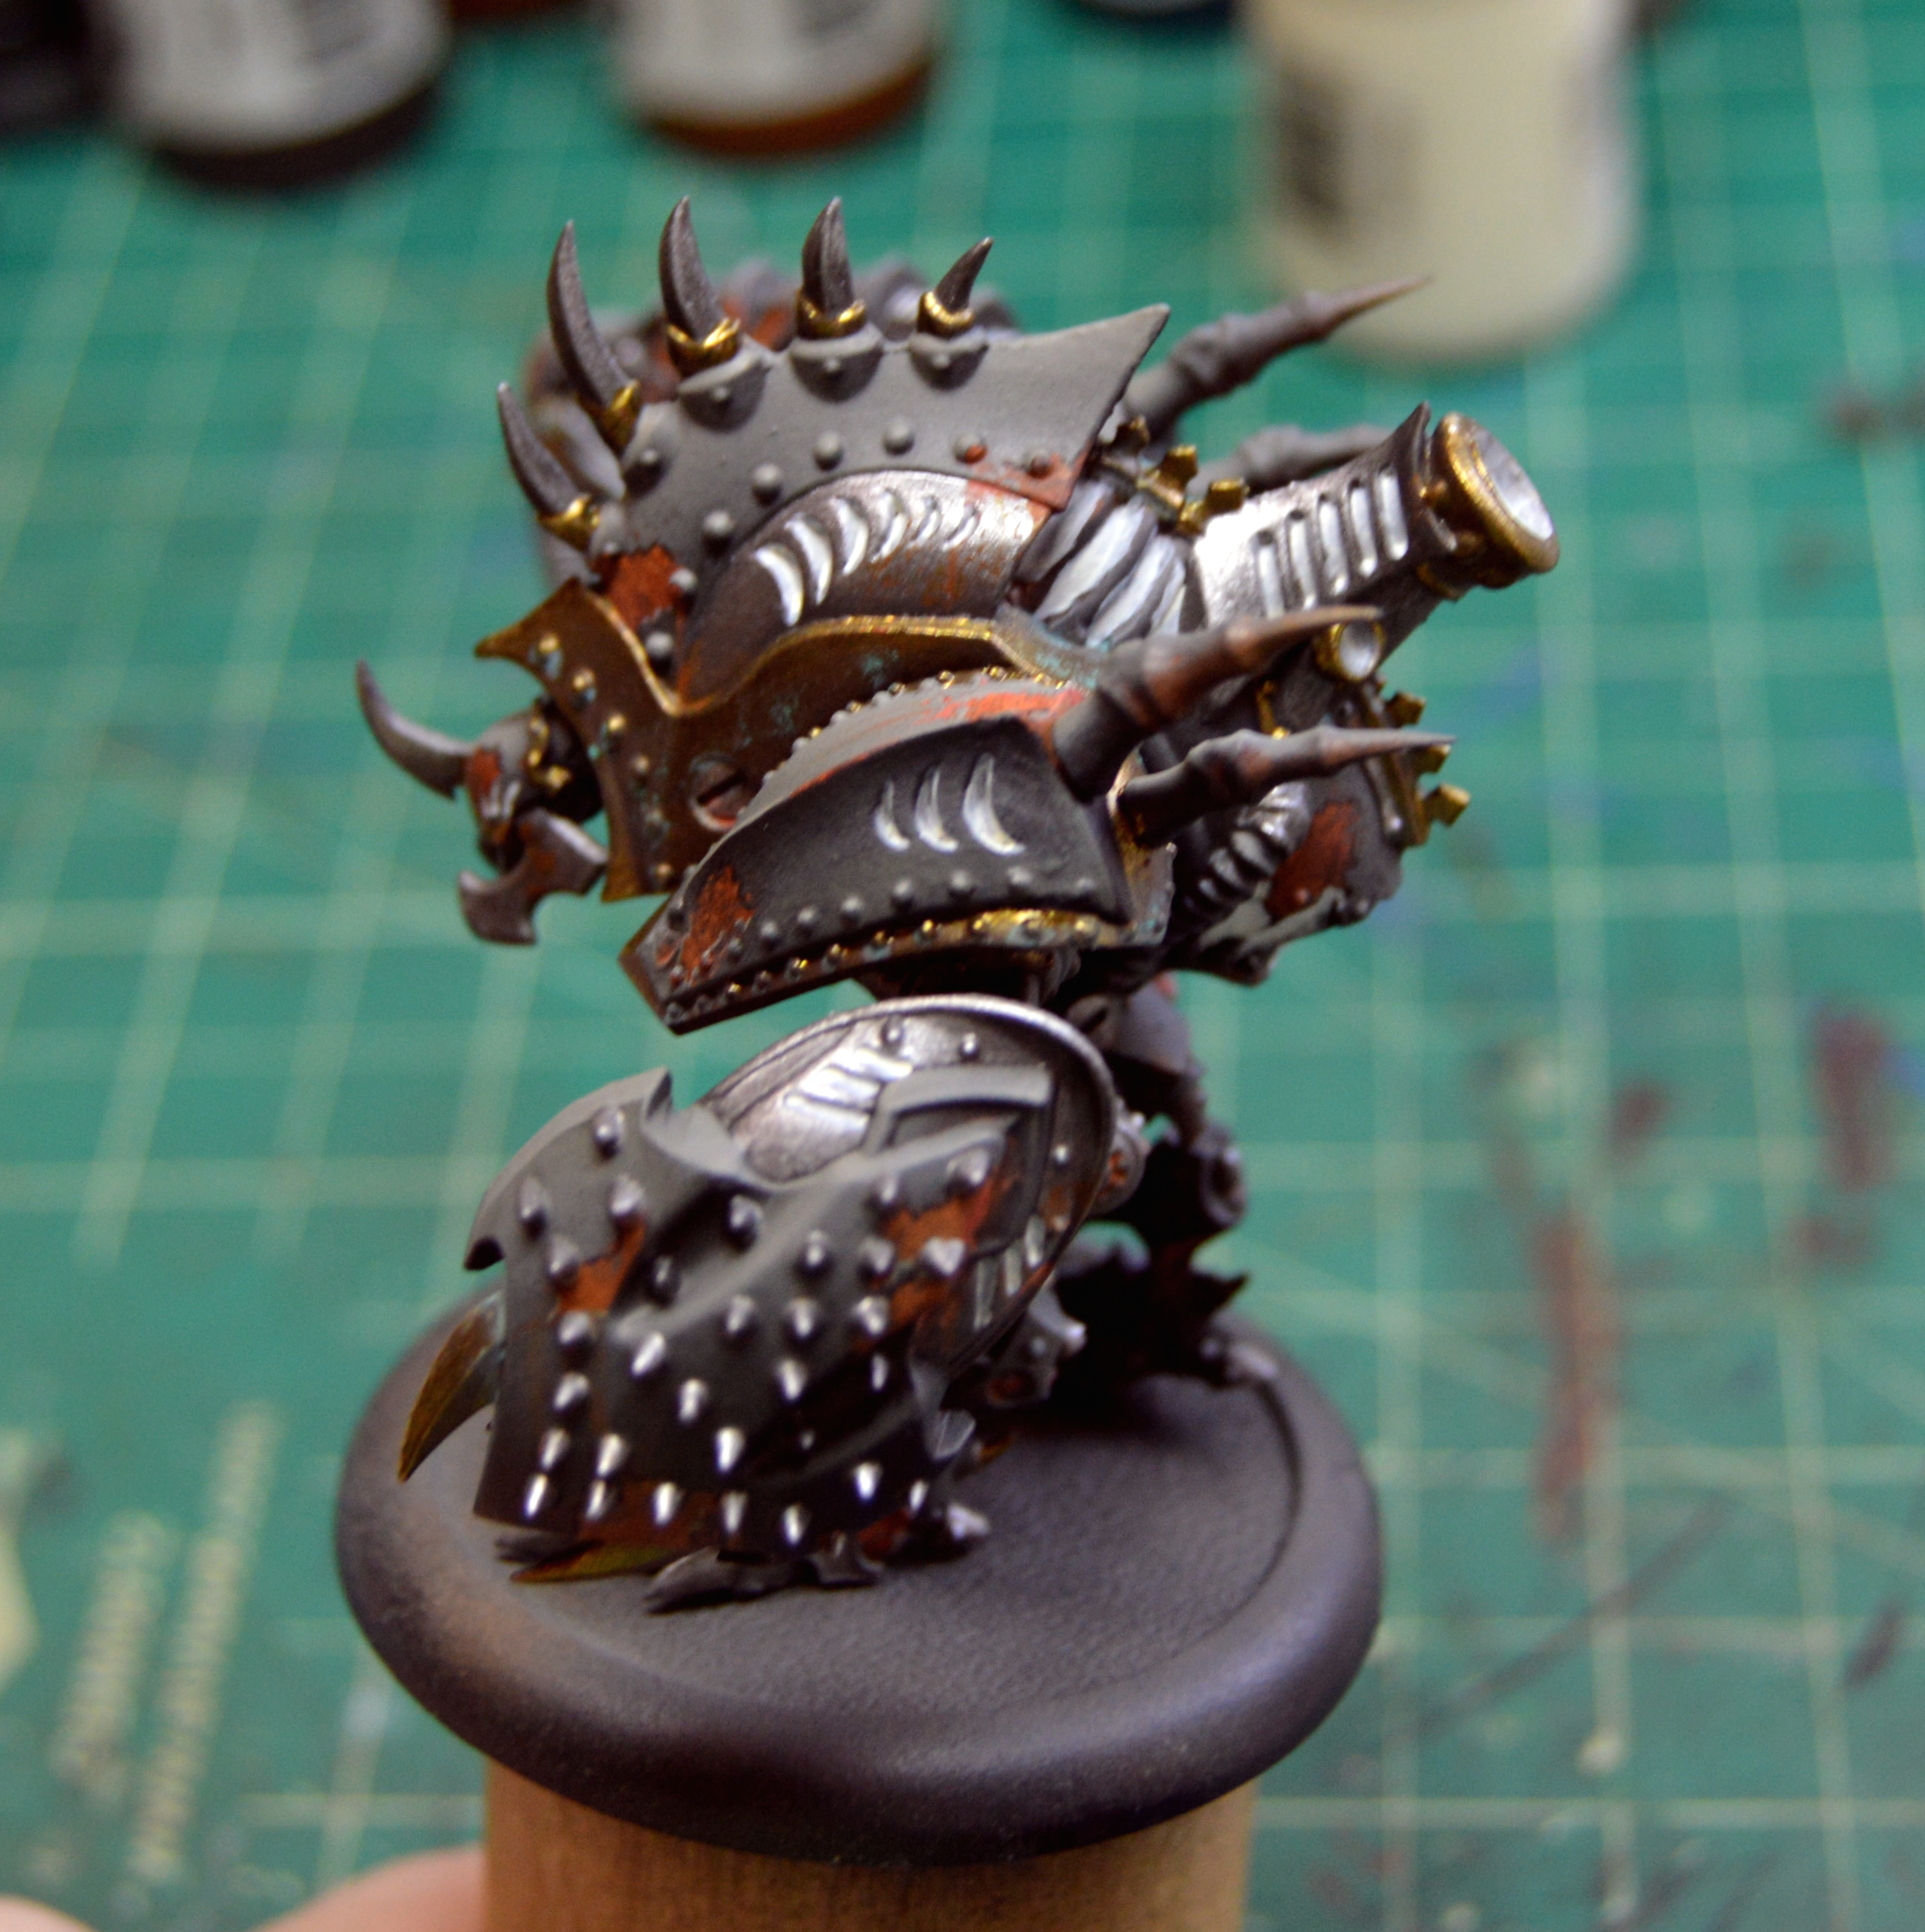
Step 5: Define the Rust
To really make the rust stand out it needs to be edged. To simulate the effect of paint lifting from the rust, paint a fine Thamar Black line around the top edge of the spot, so it looks like it’s casting a shadow. Use Cryx Bane Highlight to paint a thin, light line around the bottom edge of the rust spot, as if the peeling paint edge is catching the sunlight.
 Edging the Rust Spots
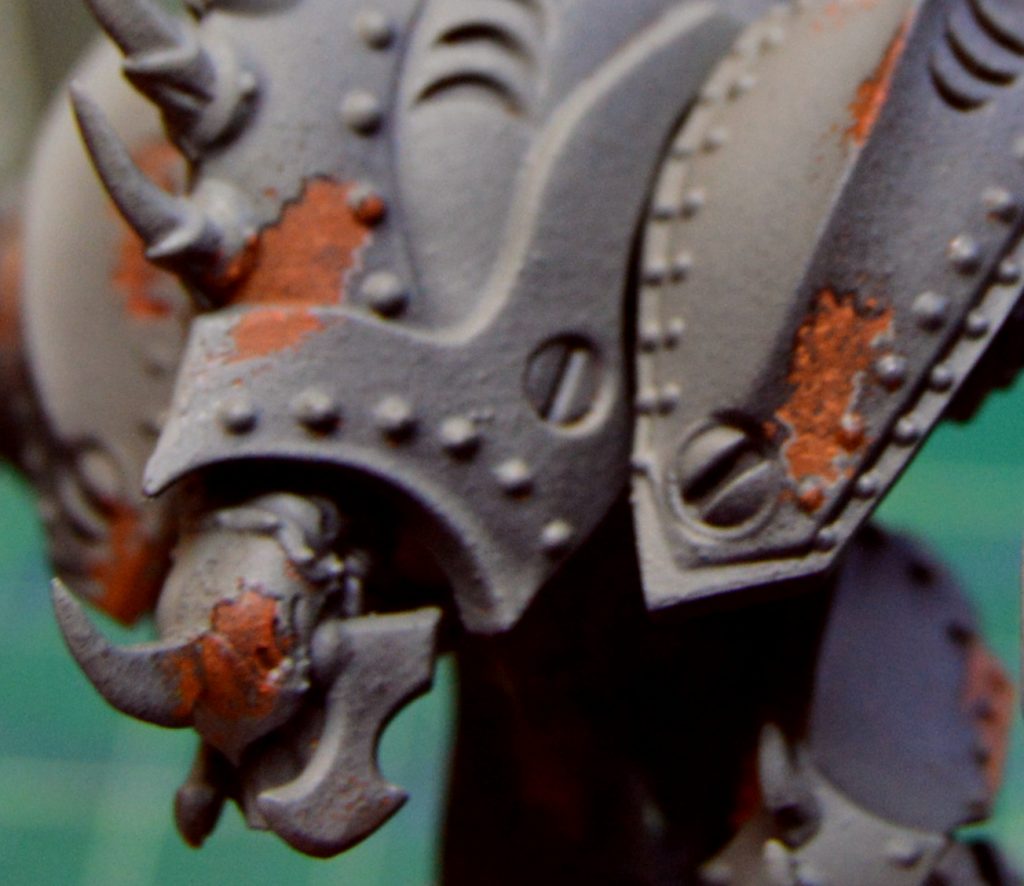 Rust Edging Detail
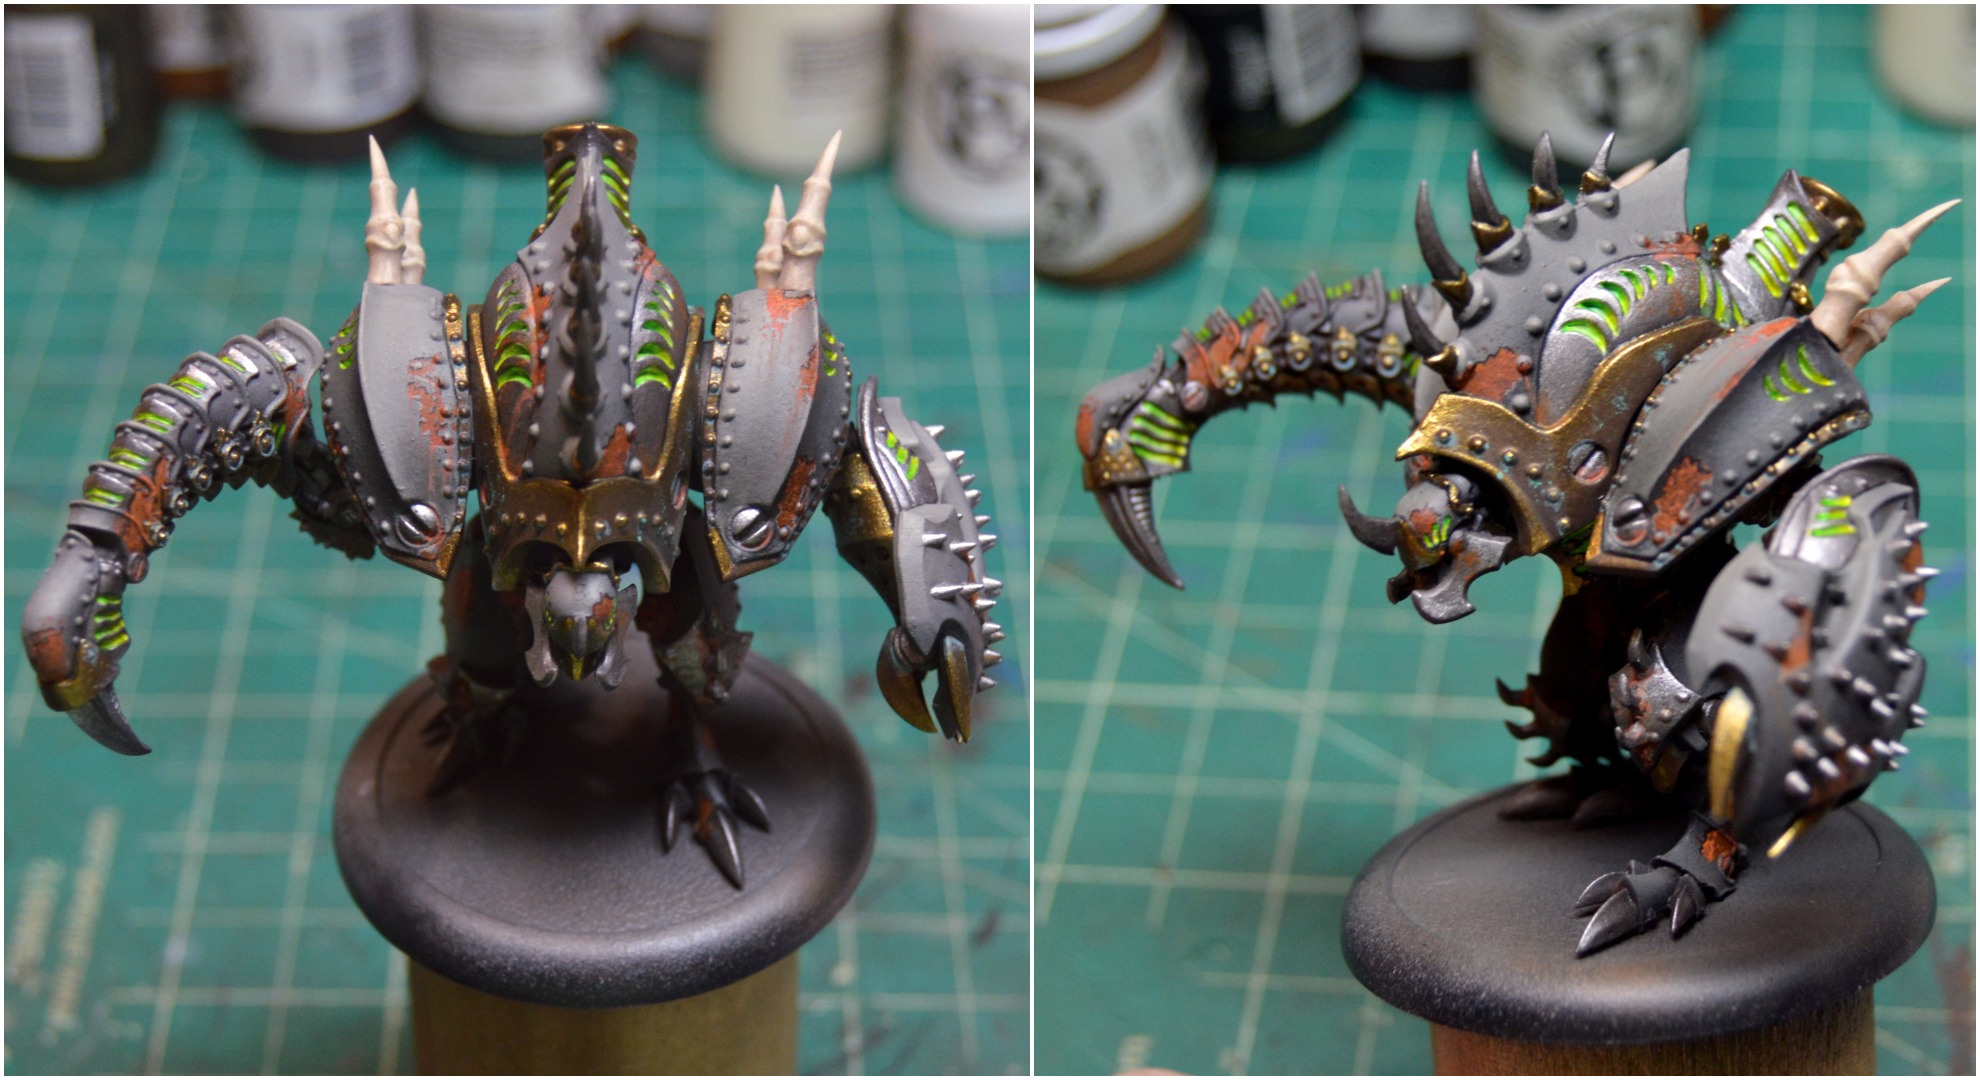
Step 6: Paint the Metals
Paint the steel starting with a Pig Iron base coat, then shade with a 50/50 mix Coal Black and Umbral Umber. Highlight with Cold Steel. For the brass areas, base coat with Blighted Gold, then shade with a mix of Umbral Umber, Cryx Bane Base, and a small bit of Gnarls Green. Highlight with Brass Balls.
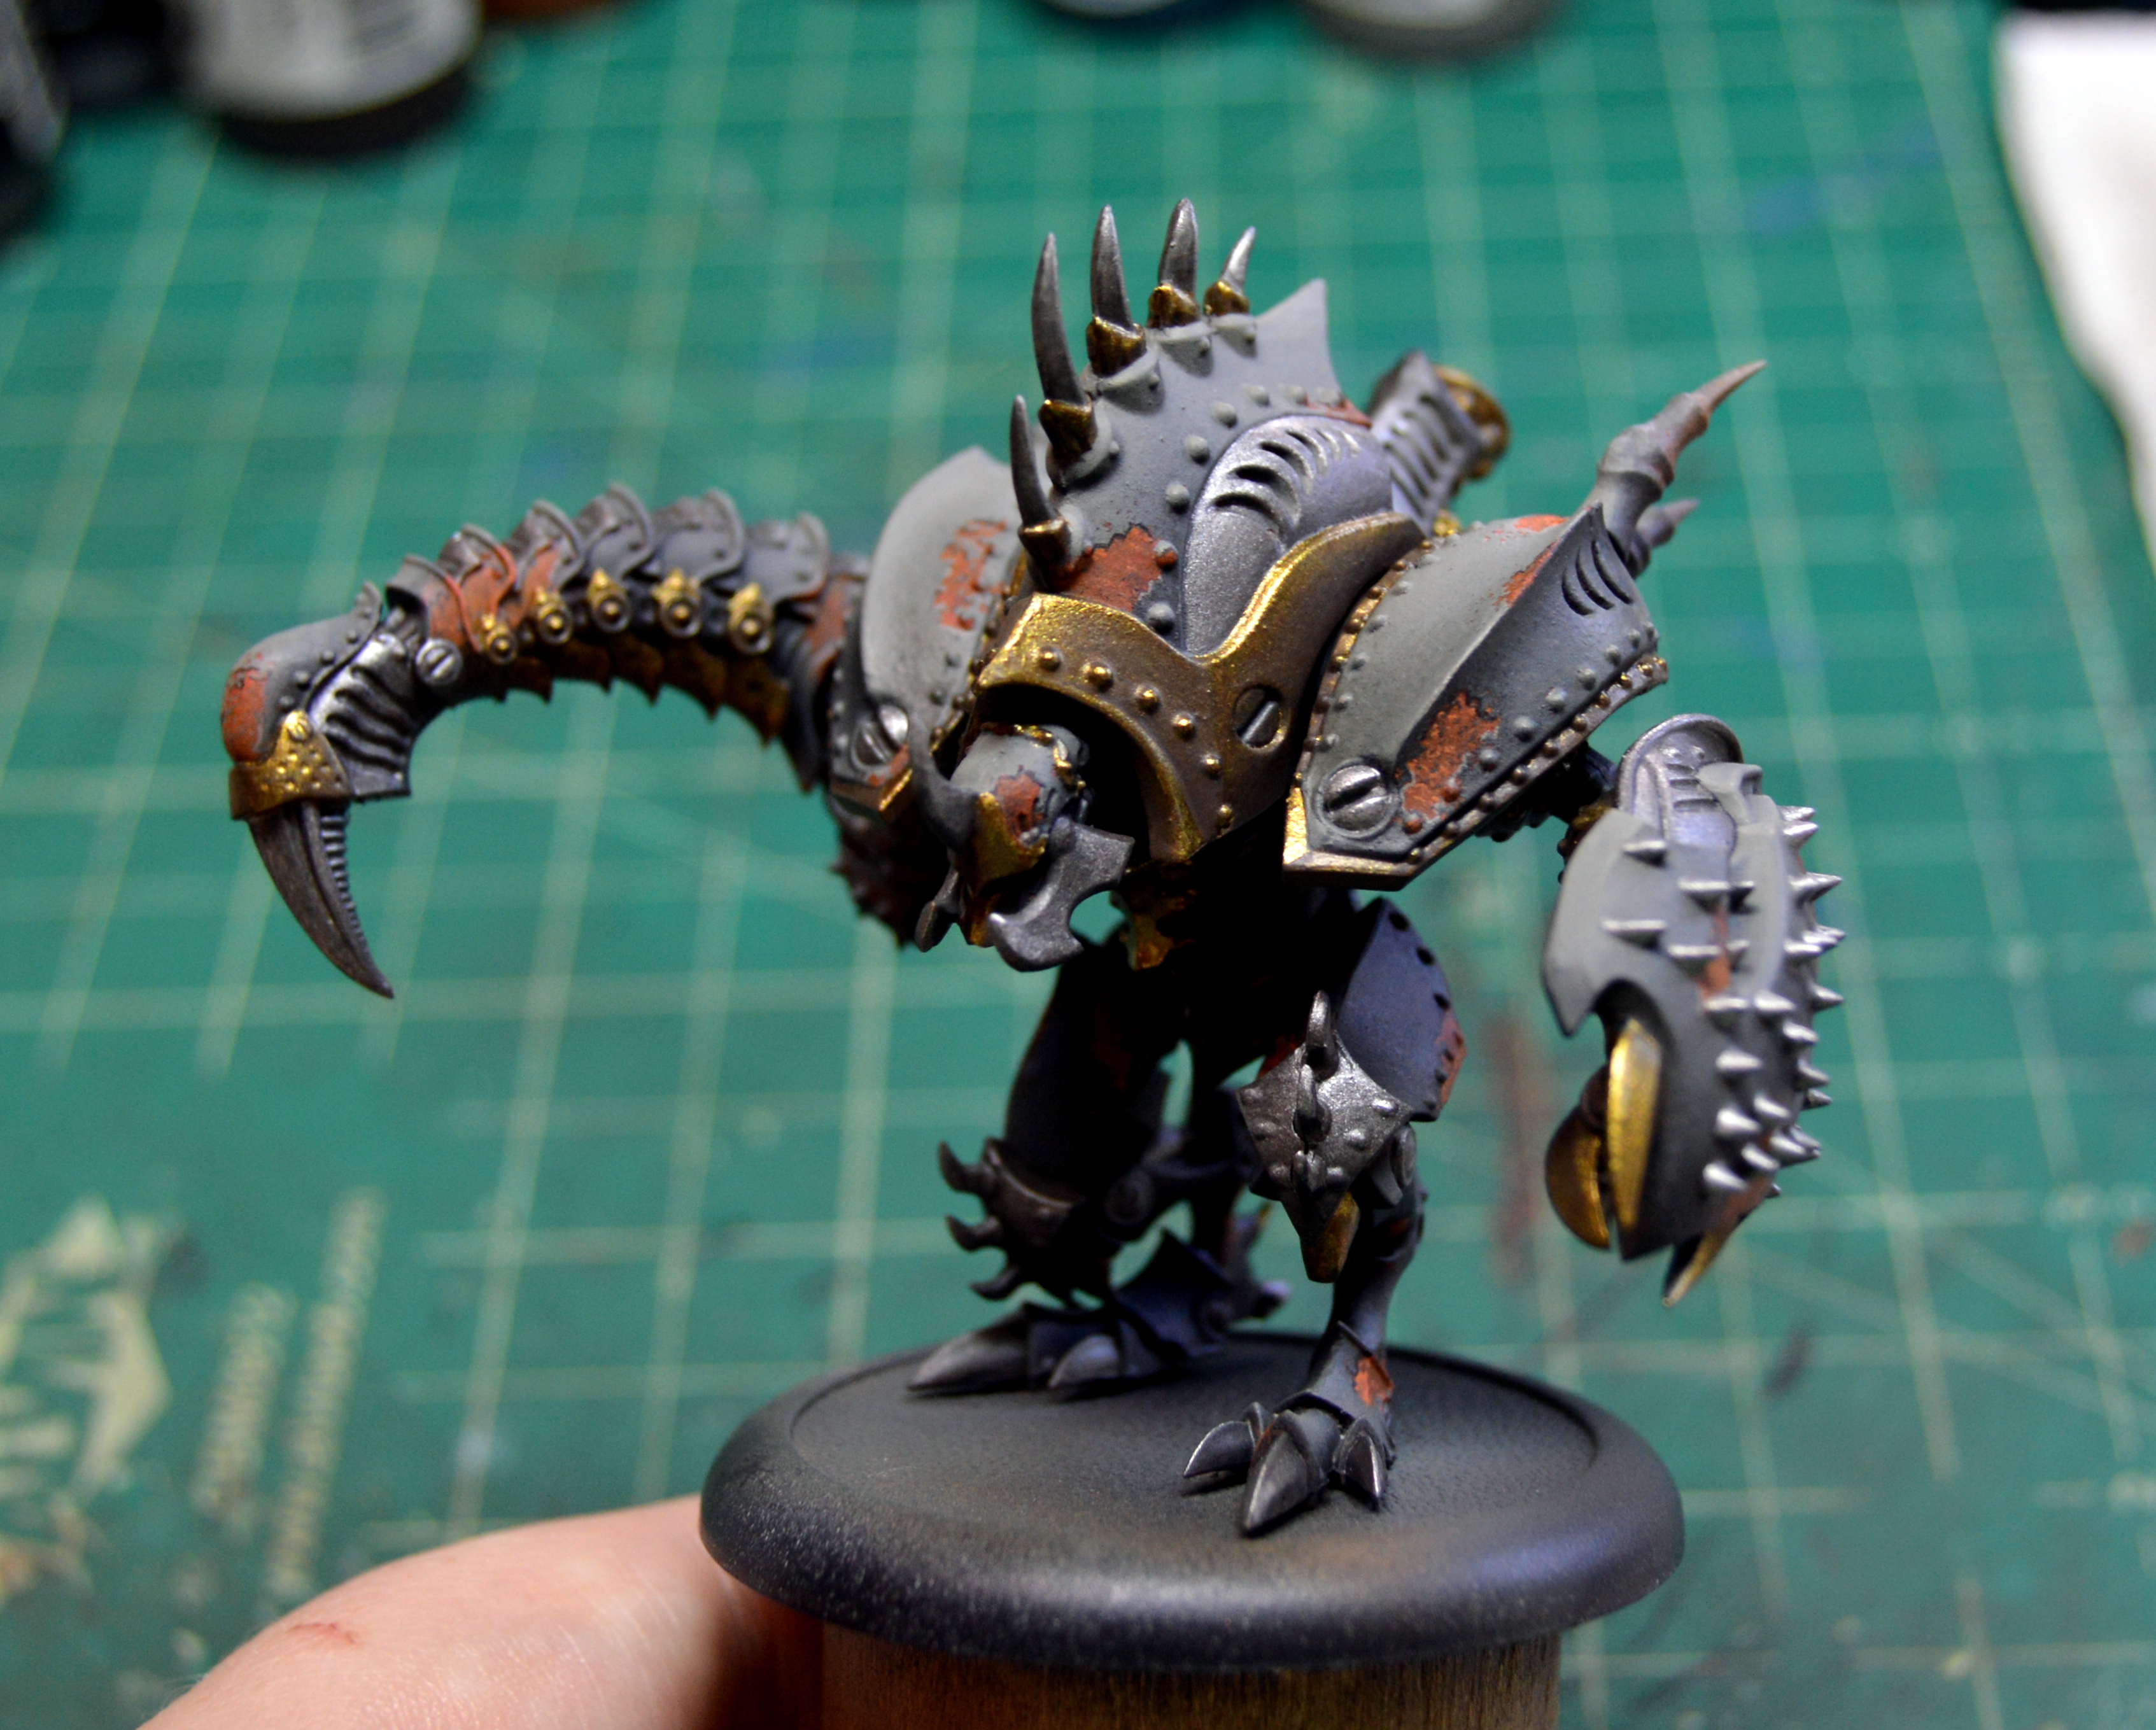
Now, it makes no sense that these metals look clean and shiny and new while the paint is old and rusted. To age the metals, dab some Bloodstone on the steel using a sponge to give it a light rusted appearance. Make a wash of the same color and apply it judiciously where rusty water might pool, or coming in streaks from the rust spots in the gray areas. Brass corrodes differently than steel and oxidizes into a blue-green color. Make a mix with Arcane Blue and Iosan Green, and sponge that on the brass areas. Using these colors, make a wash and apply it carefully around the bottoms of the rivets, or around any of the brass crevices where water might get stuck.
 Aged Metals
Step 7: Cryxian Glow
Hands down the most eye-catching thing about Cryx is their eerie green glow. It lets you know that that’s no normal fire powering these machines, it’s something Evil. To start, paint all the areas that are going to be glowing with Menoth White Highlight. This will insure that it is the brightest part of the model.
Now make three separate mixtures of ink. One of straight yellow ink, one that is two drops yellow and one drop green, and the last mixture is one drop yellow and two drops green ink. Starting with the middle mixture of two yellow, one green, glaze the ink over the areas painted white. Take care not to have too much ink in the brush, and don’t let it pool around the edges or in the cracks. Next, use the straight yellow ink and blend it closer in to the core of the ‘jack. Then use the darker green mix and blend it towards the outer edges, as if the fire is getting colder farther away from the middle.

Step 8: Finishing Touches
Almost there! All that’s left at this point is a few hoses and the boney shoulder spikes. Paint the hoses black and highlight the ridges with Coal Black mixed with a bit of Menoth White Highlight. The bone spikes are a ‘Jack Bone base, shaded with a 50/50 mix of Gun Corps Brown and Cryx Bane Highlight, then highlighted with a mix of ‘Jack Bone and Menoth White Highlight.
Get the ‘jack based with your favorite creepy materials, take some final photos, and voila!
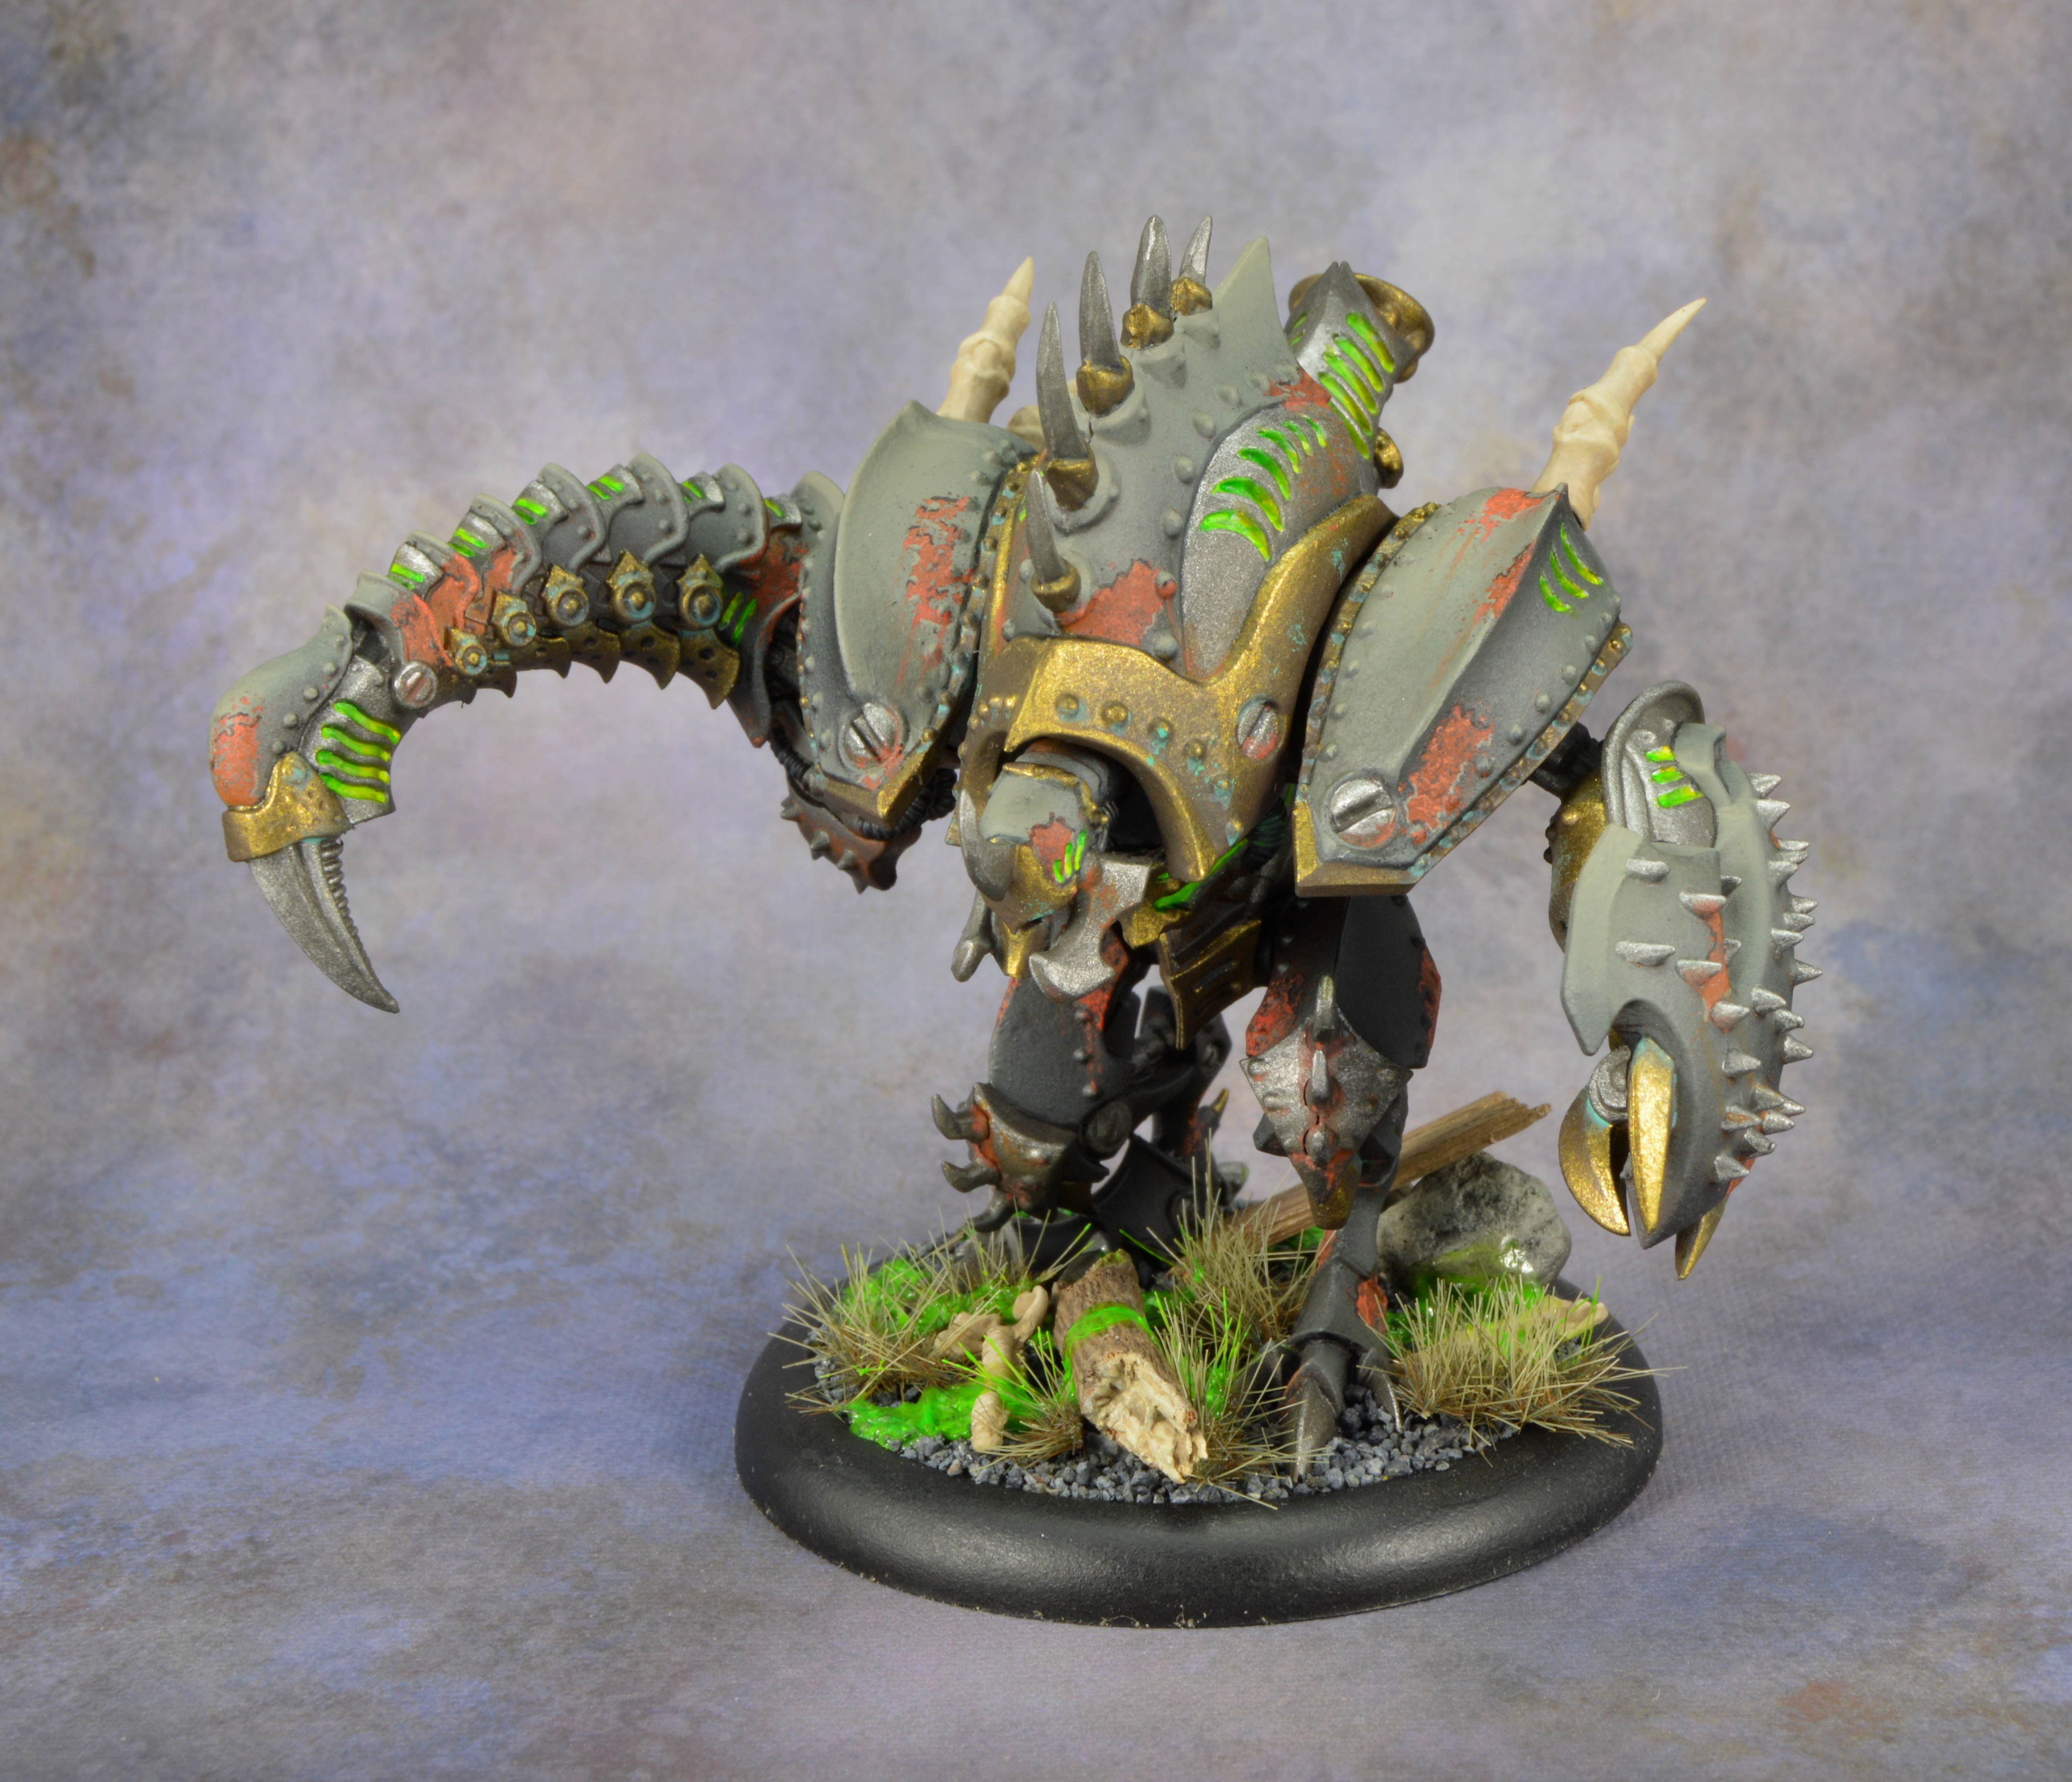
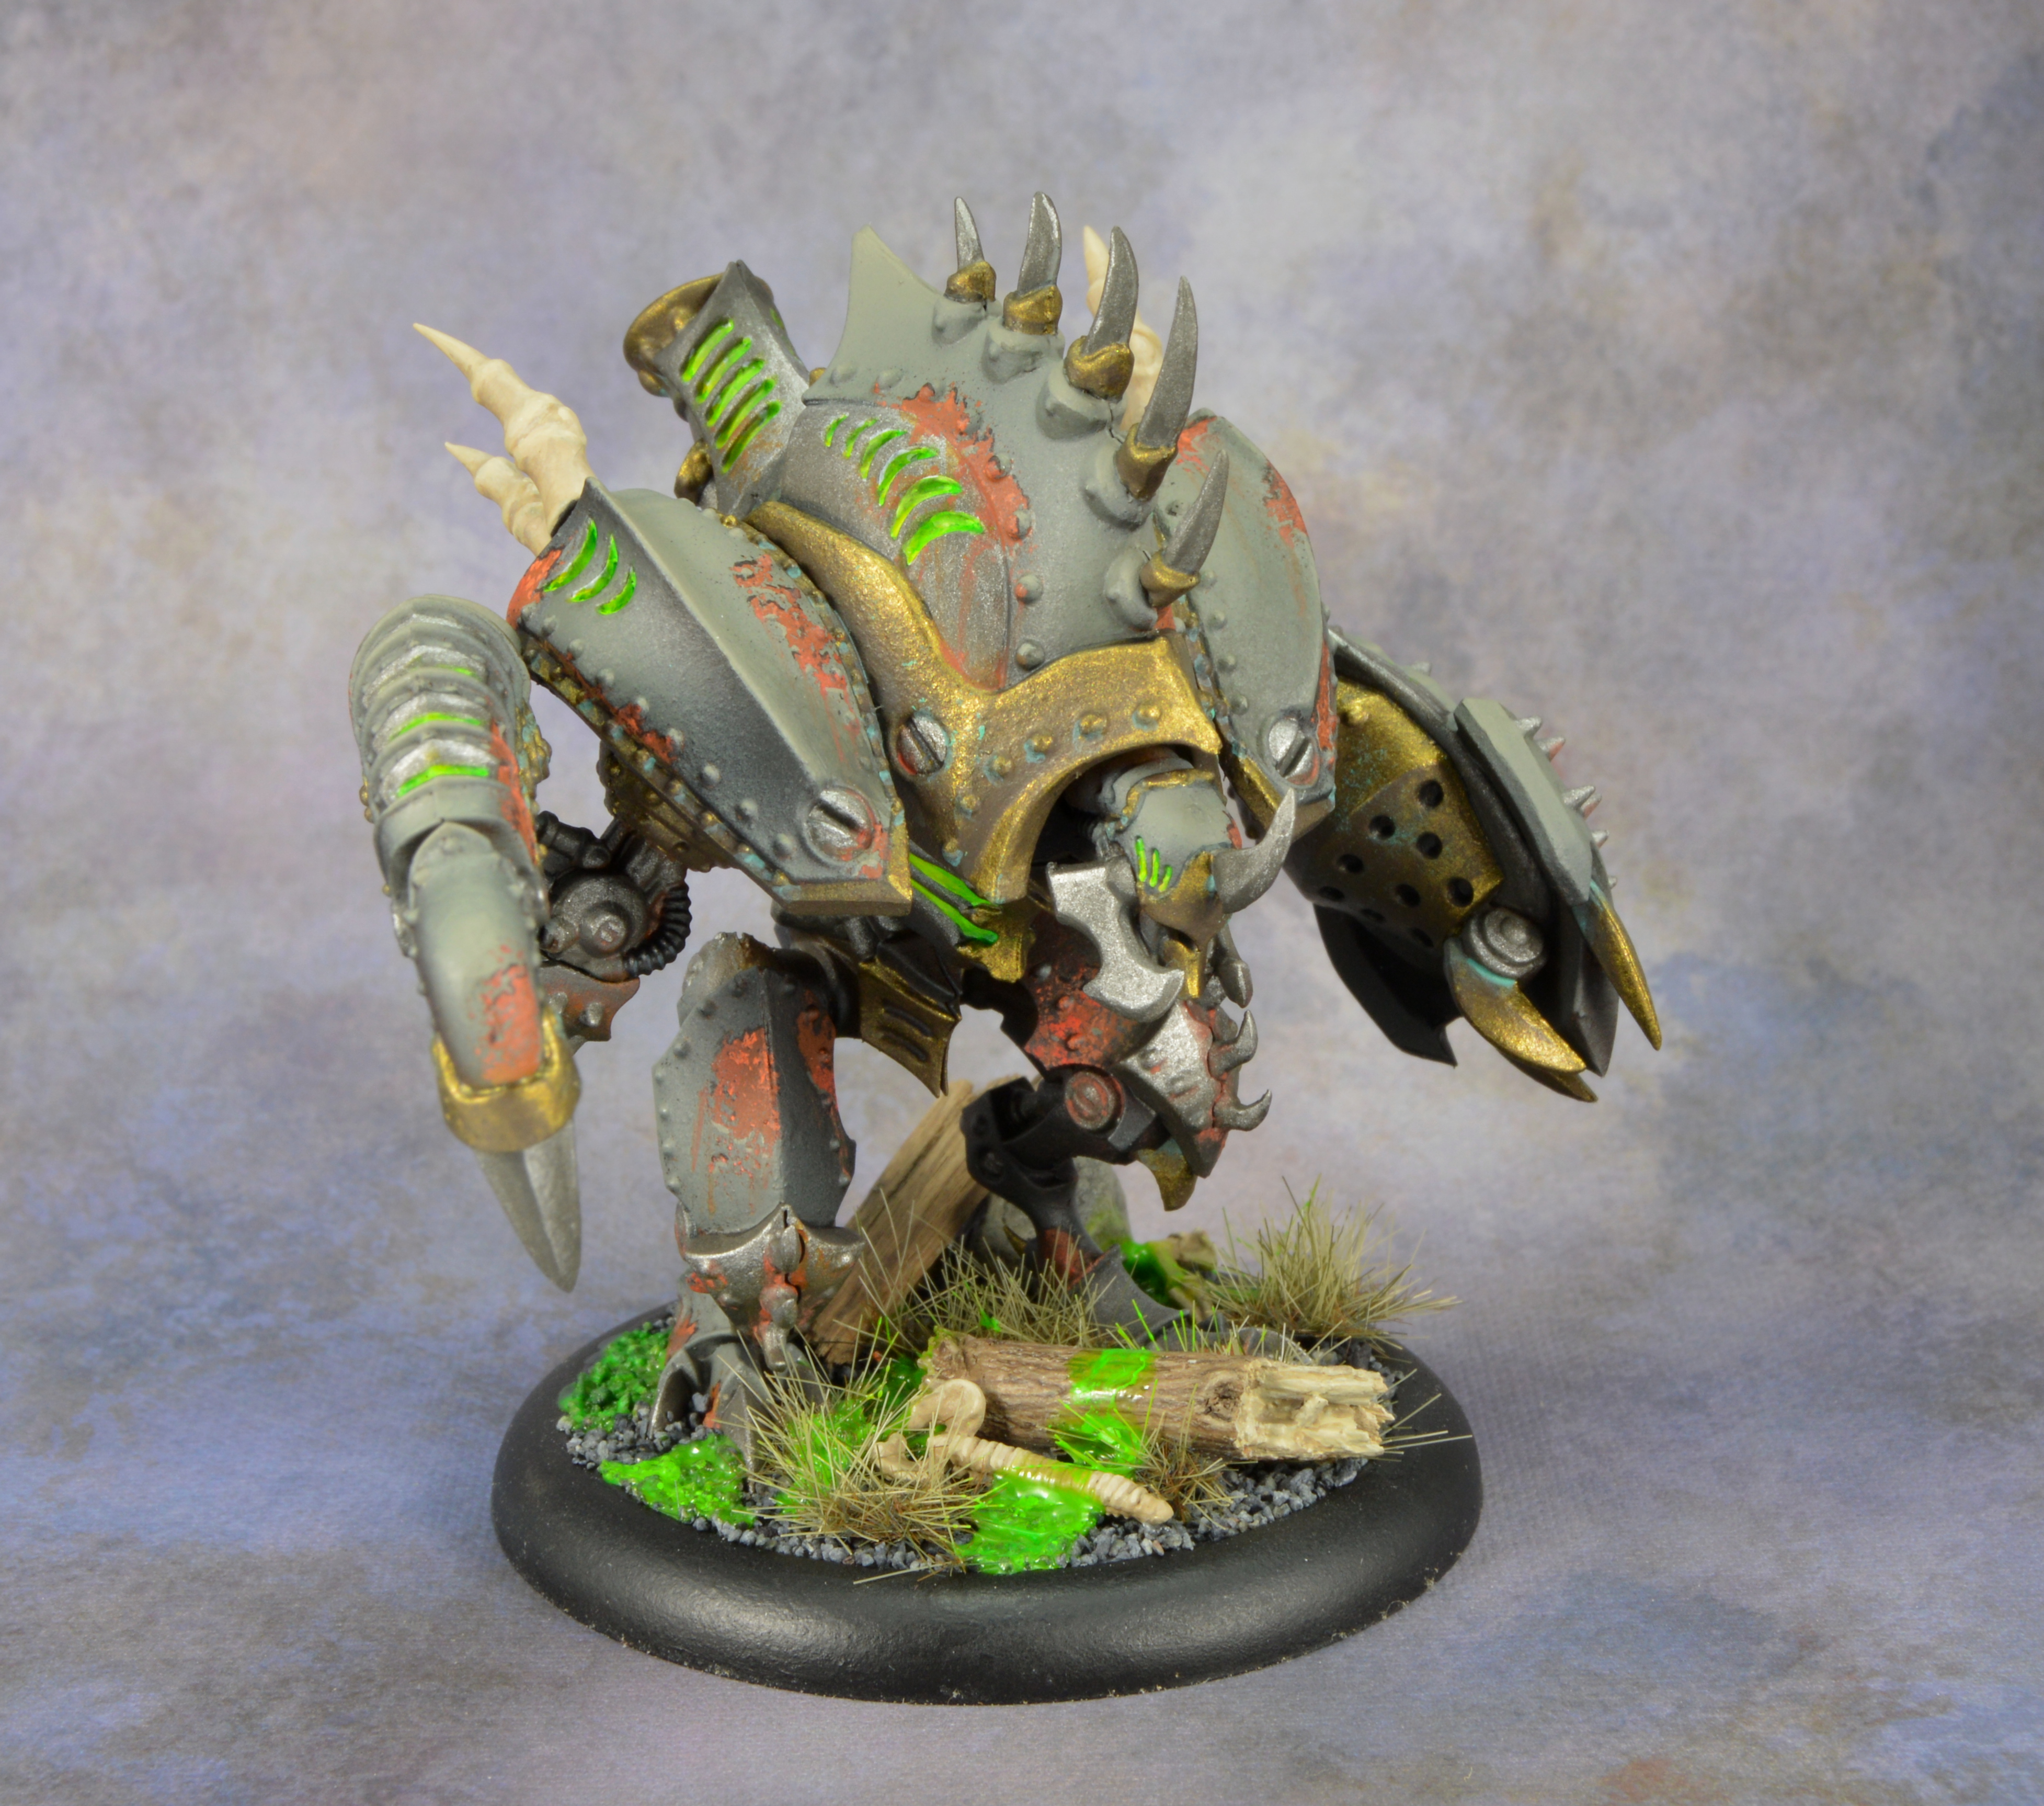
The Inflictor is ready to go onto the battlefield to further the plans of Lord Toruk, drain enemies of their souls, and perhaps give them tetanus, too!
Be sure to check out Griffon’s Roost Painting for Lauren’s other WARMACHINE and HORDES projects over here. Also look forward to more guest hobby features in the future!